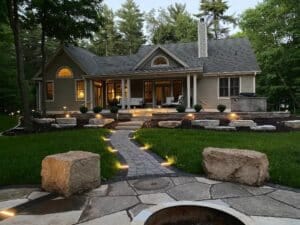
Have you ever driven through a neighborhood at night and had your head turned by a home that just glows? Chances are, that stunning effect wasn’t an accident. It was the result of a carefully planned lighting technique called uplighting. This is simple yet powerful method can transform your property after dark, turning your beautiful trees and architectural features into breathtaking focal points.
If you’ve ever wondered how to achieve that high-end, professionally lit look, you’re in the right place. This guide is your introduction to the art and science of uplighting. We’ll walk you through everything you need to know, from choosing the right fixtures to mastering the techniques that will make your home the star of the block. Get ready to see your home in a whole new light.
What Exactly Is Uplighting?
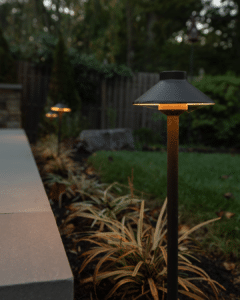
At its core, uplighting is a landscape lighting technique where you place a light fixture at or near the base of an object and aim it upward. This illuminates the object from below, creating dramatic shadows and highlighting textures that go unnoticed in daylight. Unlike functional lighting meant purely for safety, like path lights, uplighting is all about creating mood, drama, and curb appeal by following the principles of layered lighting.
It’s the secret behind making a stately oak tree look even more majestic or drawing attention to the beautiful stonework on your home’s facade. By casting light from an unconventional angle, you create a sense of depth and visual interest that simply can’t be achieved with standard overhead lighting.
Why Your Home Deserves Professional-Grade Uplighting
Investing in quality uplighting does more than just make your home look good; it adds tangible value and enhances your lifestyle. It’s an investment in your home’s beauty, security, and overall ambiance.
Top Benefits of a Professionally Installed Uplighting System:
- Boosts Curb Appeal Instantly: A well-lit home stands out. The right illumination dramatically improves your home’s appearance after sunset, creating a luxurious and welcoming aesthetic.
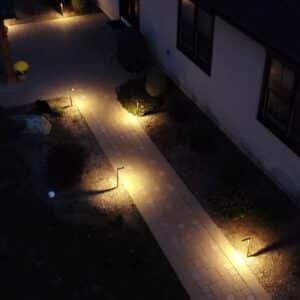
- Enhances Security and Safety: Brightly lit properties are a powerful deterrent to potential intruders. Illuminating dark corners around your home and landscape not only discourages unwanted visitors but also helps prevent trips and falls for your family and guests.
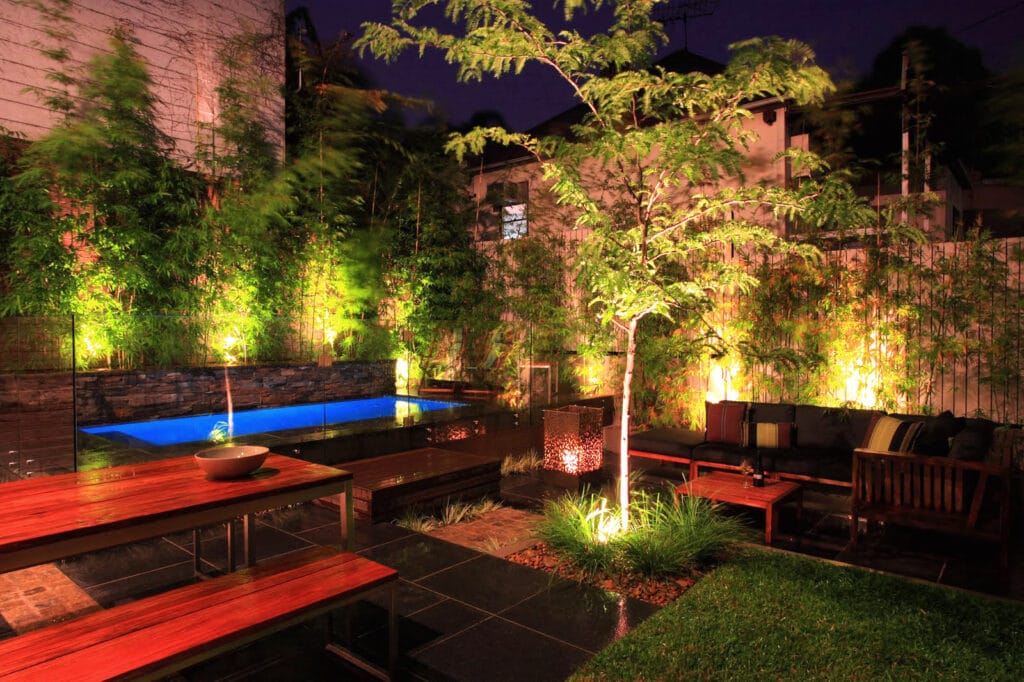
- Extends Your Living Space: Your patio, deck, and garden don’t have to disappear when the sun goes down. Proper lighting transforms these areas into usable and enchanting outdoor rooms for evening relaxation or entertaining.
- Highlights Your Best Assets: You’ve invested in beautiful landscaping and unique architectural details. Uplighting ensures these features are appreciated 24/7, showcasing their texture, form, and color in a stunning new way.
Getting Started: The Tools for the Job
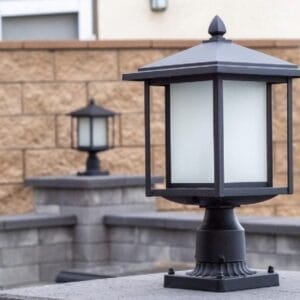
Achieving a professional look starts with professional-grade equipment. While you might see various options at big-box stores, the fixtures used by experts are designed for durability, performance, and precision. At Tru-Scapes, we rely exclusively on high-quality, low-voltage brass fixtures.
Here’s why the materials matter:
| Fixture Material | Pros | Cons |
| Brass | Extremely durable, weathers beautifully to a natural patina, corrosion-resistant, feels premium. | Higher initial investment. |
| Aluminum | Lightweight, lower cost. | Prone to corrosion, powder coating can chip and fade, less durable in harsh weather. |
| Plastic | Cheapest option. | Becomes brittle and cracks, fades quickly in sunlight, looks and feels inexpensive. |
For a system that lasts, brass is the undisputed champion. It’s the choice for homeowners who want a “do it once, do it right” solution.
The key components of a typical uplighting setup include:
- Fixtures: The lights themselves. We recommend directional spotlights for most uplighting applications.
- Low-Voltage Transformer: This essential device converts your home’s standard 120-volt electricity to a safe, efficient 12-volt current.
- Low-Voltage Wire: This specially insulated cable runs from the transformer to power your fixtures. It can be safely buried just beneath the surface of your lawn or mulch.
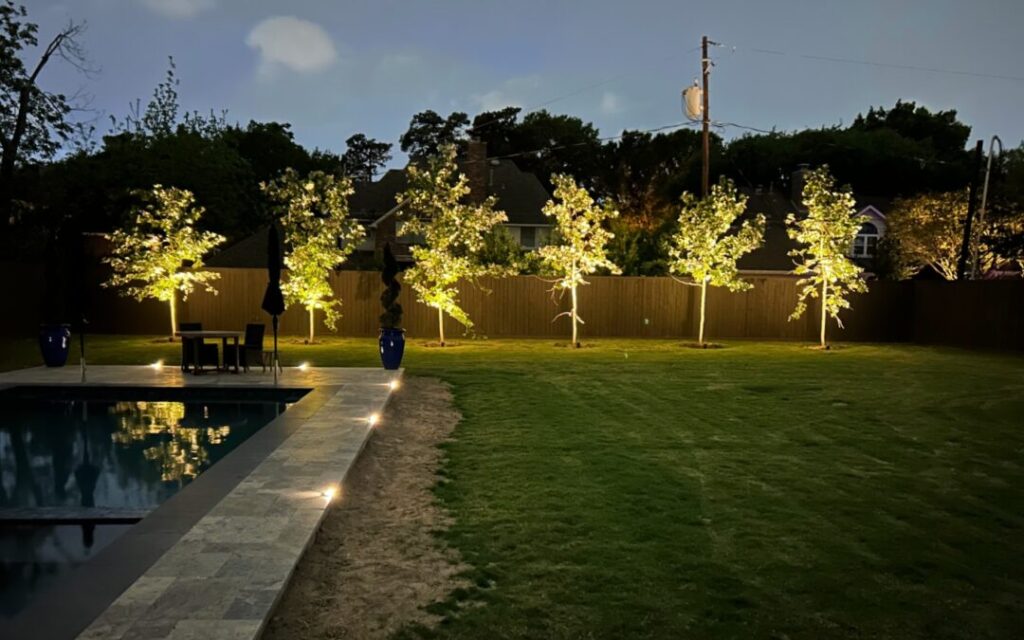
How to Perfectly Highlight Trees with Uplighting
Trees are one of the most popular and impactful features to uplight. The right technique depends on the tree’s size, shape, and canopy density.
For Tall, Narrow Trees (like Italian Cypress or Juniper):
- The Goal: Emphasize the height and slender form.
- Technique: Place one or two spotlights very close to the base of the trunk. Use a fixture with a narrow beam spread (around 15-30 degrees) to send a tight column of light straight up the trunk. This creates a dramatic, soaring effect.
- Pro Tip: Positioning the light slightly to one side can help highlight the texture of the bark.
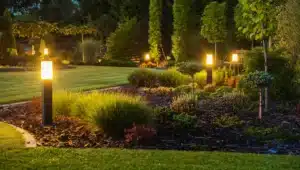
For Broad, Spreading Trees (like Oaks or Maples):
- The Goal: Showcase the majestic canopy and intricate branch structure.
- Technique: This is where you can create real magic. Place two or more uplights further away from the trunk, aiming them up into the underside of the canopy. Using a wider beam spread (45-60 degrees) will cast a broad wash of light, creating a soft, ambient glow and beautiful shadowing.
- Pro Tip: For very large trees, positioning a light on the viewer’s side of the trunk and another behind it can create a stunning sense of depth and dimension.
For Small or Ornamental Trees (like Japanese Maples or Dogwoods):
- The Goal: Gently accentuate their delicate shape and color without overwhelming them.
- Technique: Use a single, lower-wattage uplight placed a few feet from the base. A wider beam spread often works best to softly illuminate the entire form. The key here is subtlety; you want to create a gentle glow, not a harsh spotlight.
Illuminating Architecture: Making Your Home Shine
Architectural uplighting turns flat, uninteresting surfaces into dynamic features. It’s about playing with light and shadow to draw the eye to your home’s best qualities.
Columns and Pillars:
- Technique: Place a narrow-beam spotlight at the base of each column. Aiming the light straight up will accentuate its height and roundness, adding a touch of grandeur to your entryway or porch.
Textured Surfaces (Stone, Brick, Stucco):
- The Goal: Bring out the rich texture of the material.
- Technique: This technique is called “grazing.” Place the fixtures very close to the wall, pointing almost straight up. The light will “graze” the surface at a sharp angle, creating dramatic shadows that reveal the intricate details of the stonework or brick. This is a perfect use for hardscape lighting.
Flat Facades and Gables:
- The Goal: Create a soft, elegant wash of light.
- Technique: Instead of grazing, use the “wall wash” technique. Place fixtures a few feet back from the wall and aim them at a wider angle. Use a wide beam spread to cast an even layer of light across the surface, minimizing shadows and creating a soft, inviting glow. This is perfect for applying strategic lighting for architectural features.
Frequently Asked Uplighting Questions
Q: How bright should the lights be?
A: It depends on the object. A massive oak tree needs more light (higher lumens) than a small ornamental shrub. The beauty of a professional system is that you can use different brightness levels for different applications. The goal is to create a balanced scene, not an airport runway.
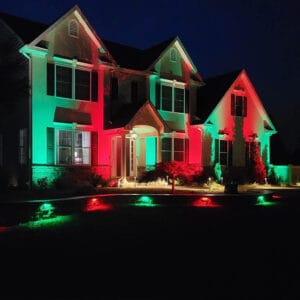
Q: What color light is best?
A: We almost always recommend a warm white light (around 2700K). According to the U.S. Department of Energy’s guides on understanding LED lighting, this temperature creates a welcoming and sophisticated ambiance that complements both natural landscapes and architectural materials. It mimics the warm glow of classic incandescent bulbs, not the harsh, blueish light of cheap LEDs. You can learn more about finding the ideal color temperature for your project in our detailed guide.
Q: Can I install uplighting myself?
A: While DIY kits exist, a professional installation ensures the best results, safety, and longevity. An expert designer from Tru-Scapes understands the nuances of beam spread, placement, and wattage to create a cohesive and stunning design. We use our expertise to hide wires, properly secure fixtures, and balance the overall lighting scene for maximum impact. A correct installation is critical for a lasting system.
Your Home’s After-Dark Transformation Awaits
Uplighting is more than just sticking a few lights in the ground. It’s a design practice that uses light as a brush to paint a new, captivating picture of your home at night. By highlighting your favorite trees and showcasing your home’s architectural character, you can create a scene that is both beautiful and secure.
Ready to unlock the full potential of your property? Browse our high-quality brass fixtures or Contact the experts at Tru-Scapes today. Let’s work together to design a lighting system that will make you fall in love with your home all over again, every single evening.
What will you highlight first? Share your ideas in the comments below!