Walk through almost any neighborhood after dark and you’ll spot them: flickering pathway lights, trees blasted with too much glare, garden fixtures that cast zero useful light. Outdoor landscape lighting has become one of the most popular home improvement projects in the U.S., yet a surprising number of installations fall short — not because the products are bad, but because a handful of avoidable mistakes keep getting repeated.
This guide breaks down the 10 common landscape lighting mistakes that plague DIY and even some professional installations. Whether you’re planning a new low voltage landscape lighting kit or troubleshooting an existing setup, these fixes will save you time, money, and frustration.
Key Takeaways
- The 10 common landscape lighting mistakes are mostly avoidable with basic planning.
- Oversized or undersized transformers are a leading cause of system failures.
- LED landscape lights use up to 75% less energy than halogen alternatives.
- Pathway landscape lights should be staggered, not lined up in a straight row.
- Uplighting for trees requires careful beam angle selection to avoid wasted light.
- A quality landscape lighting transformer with timer controls simplifies maintenance significantly.
The 10 Most Common Landscape Lighting Mistakes
Mistake 1: Skipping a Lighting Plan Before You Buy
The single biggest error is purchasing fixtures before sketching a design. Without a landscape lighting design on paper, you’ll overspend on the wrong fixtures, leave key areas dark, and create a mismatched look.
How to avoid it: Walk your yard at night with a flashlight. Identify focal points — large trees, architectural features, garden beds — and note areas that need safety lighting, like steps and driveways. Sketch a rough layout before spending a dollar. For more inspiration on identifying these focal points, check out our guide on highlighting architectural features with strategic lighting.
Mistake 2: Using the Wrong Transformer Size
Your landscape lighting transformer is the backbone of the entire system. Too small, and your fixtures will dim or flicker. Too large, and you’re paying for power you don’t use. Knowing exactly how to size your landscape lighting transformer is the first step to a reliable system.
Step-by-step guide to sizing your transformer correctly:
- List every fixture you plan to install and note its wattage.
- Add up the total wattage of all fixtures.
- Multiply that total by 1.25 to build in a safety buffer.
- Choose a transformer rated at or above that final number.
- If you plan to expand the system later, add 20–30% more capacity now.
If you’re running mostly LED landscape lights, wattage totals will be much lower than older halogen systems — a 150-watt transformer may be more than enough for a medium-sized yard.
Mistake 3: Ignoring Voltage Drop on Long Runs
Low voltage landscape lighting kits operate at 12 volts. When wire runs exceed 100 feet, resistance in the wire reduces voltage at the far end. Fixtures at the end of a long run glow dimmer than those near the transformer.
How to avoid it: Use a loop (daisy chain) wiring method for short runs and a hub-and-spoke or T-method for longer runs. Upgrade to 12-gauge wire for runs over 100 feet. If you are dealing with dim lights at the end of a line, learn how to fix voltage drop issues to restore full brightness. According to industry standards from the American Lighting Association, proper wire sizing is one of the most overlooked aspects of low voltage installations.
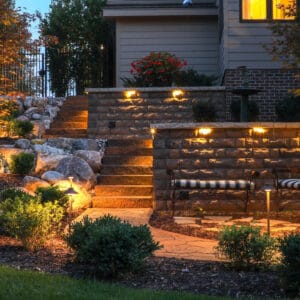
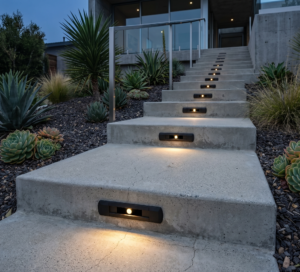
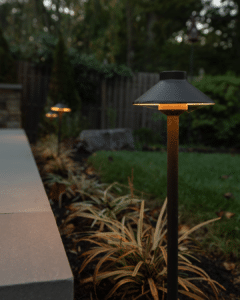
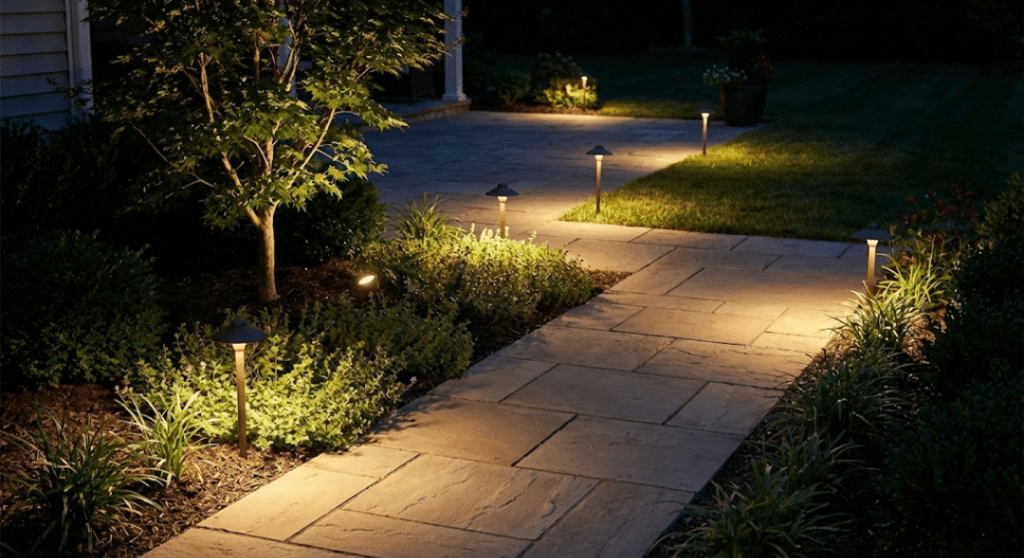
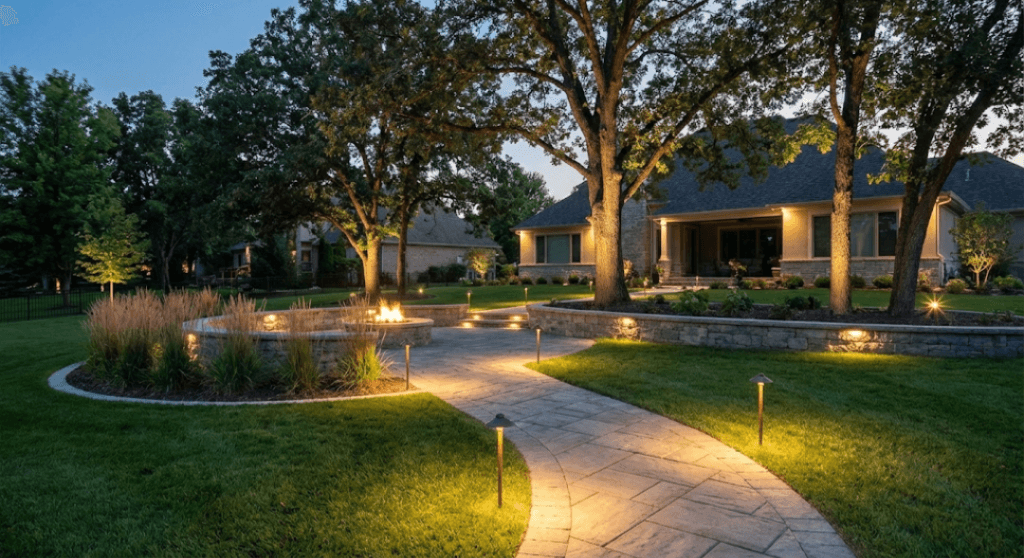
Mistake 4: Placing Pathway Lights in a Straight Line
Pathway landscape lights placed in a perfectly straight row look institutional — like a runway, not a garden. It’s one of the most visually jarring mistakes in residential landscape lighting design.
How to avoid it: Stagger lights on alternating sides of the path. Space them 8–10 feet apart. This creates a natural, flowing guide that leads the eye without overpowering the landscape.
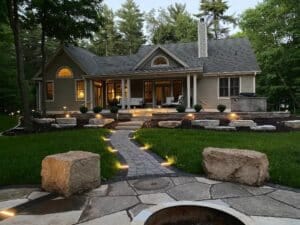
Mistake 5: Pointing Uplights at the Wrong Angle for Trees
Uplighting for trees is one of the most dramatic effects in outdoor lighting — and one of the easiest to ruin. Aiming a fixture too steeply or from too far away wastes light and creates an unnatural “hot spot” at the trunk base. To truly master tree uplighting techniques, precision is key.
Do / Don’t for Tree Uplighting:
| Do | Don’t |
|---|---|
| Position the fixture 1–2 feet from the base | Place the fixture more than 3 feet away |
| Use a narrow beam (15°–30°) for tall trees | Use a flood beam on narrow canopy trees |
| Aim slightly off-center toward the canopy | Aim straight up the trunk only |
| Use warm white (2700K–3000K) LEDs | Use cool white (5000K+) which looks unnatural |
| Adjust angle seasonally as foliage changes | Set and forget permanently |
Mistake 6: Choosing the Wrong Color Temperature
Color temperature (measured in Kelvins) dramatically affects how a yard looks at night. Many homeowners choose fixtures without checking this spec and end up with a cold, clinical look when they wanted warmth. To help you choose the right color temperature for your landscape, consider the mood you want to create.
- 2700K–3000K: Warm white — ideal for most residential landscapes, gardens, and wood features
- 3500K–4000K: Neutral white — works well for modern architecture and hardscaping
- 5000K+: Daylight — typically too harsh for residential use; better suited for commercial security lighting
If you need a cohesive, welcoming look, choose 2700K–3000K throughout. If you need to highlight a contemporary concrete wall, 4000K may be the right call. For those interested in the science behind these choices, federal research on outdoor LED performance from the U.S. Department of Energy confirms that warmer temperatures are generally less disruptive to local ecosystems and human circadian rhythms.
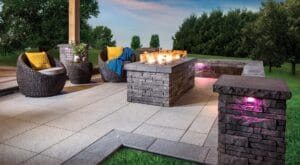
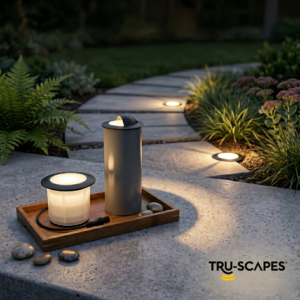
Mistake 7: Overlooking Fixture Quality and IP Ratings
Not all garden lighting fixtures are built the same. Inexpensive fixtures from big-box stores often use low-grade plastics that crack, fade, and corrode within a season or two — especially in humid or coastal climates.
Pros vs. Cons of Budget vs. Premium Fixtures:
| Factor | Budget Fixtures | Premium Fixtures |
|---|---|---|
| Upfront cost | Low ($5–$15 each) | Higher ($25–$80+ each) |
| Lifespan | 1–3 years typical | 10–15 years common |
| IP Rating | Often IP44 or lower | IP65 or higher recommended |
| Finish quality | Plastic, fades quickly | Brass, copper, or cast aluminum |
| Bulb replacement | Limited or none | Usually replaceable |
| Warranty | 90 days–1 year | 3–5 years or lifetime |
IP65 is the minimum recommended rating for any landscape fixture exposed to rain or irrigation spray. Professional landscape lighting contractors typically use fixtures rated IP65 or IP67.
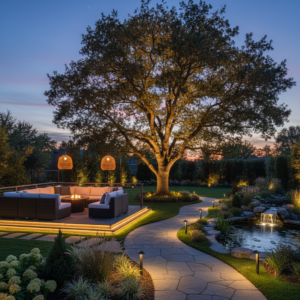
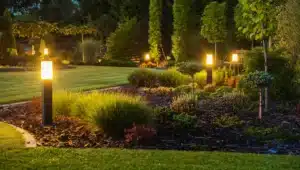
Mistake 8: Using Too Much Light (Light Pollution and Glare)
More light is not always better. Overlighting a landscape overwhelms the eye, creates glare, and eliminates the shadow contrast that makes nighttime landscapes beautiful. It also contributes to light pollution, which research on residential light pollution by the International Dark-Sky Association identifies as a growing environmental concern.
How to avoid it: Use the “less is more” rule. Accent 3–5 key focal points rather than lighting everything. Downlighting and path lighting should supplement, not flood, the space. Shielded fixtures that direct light downward reduce glare and keep light where it belongs.
Mistake 9: Neglecting Maintenance and Seasonal Adjustments
Even a perfectly installed system needs attention. Plants grow, fixtures shift, and timer settings that worked in summer are off by an hour or two in winter. Many homeowners set up their system once and never revisit it.
Hypothetical Case Study: A homeowner in suburban Atlanta installed 18 LED landscape lights in spring. By fall, overgrown shrubs were blocking three pathway lights entirely, and the transformer timer hadn’t been adjusted for the earlier sunsets. Two fixtures near the irrigation zone had accumulated water damage from a cracked seal. A one-hour seasonal checkup would have caught all three issues.
Seasonal maintenance checklist:
- Adjust timer settings at daylight saving time changes.
- Trim plants that have grown over or around fixtures.
- Check wire connections and junction caps for corrosion.
- Clean lenses on uplights and path lights.
- Inspect transformer connections and verify voltage output.
Mistake 10: DIYing a System That Needs Professional Landscape Lighting Expertise
Low voltage landscape lighting kits are genuinely DIY-friendly for simple setups. But larger properties, complex terrain, multiple zones, and custom architectural lighting benefit significantly from professional landscape lighting design and installation. Before starting a massive project, take a moment to weigh the pros and cons of DIY vs. professional installation.
If you need a basic path lighting kit for a small front yard, a DIY low voltage kit is a cost-effective solution. If you need integrated uplighting, smart controls, multiple transformer zones, and commercial-grade fixtures across a half-acre lot, a licensed outdoor lighting professional will save you money in the long run.
Professional installers understand local soil conditions, irrigation interference, and wire routing that DIY guides can’t fully account for. If your project feels too complex, you can easily find a licensed lighting professional near you to ensure the job is done right.
Quick Answers – FAQ
What is the most common landscape lighting mistake? The most common mistake is failing to plan the layout before purchasing fixtures, which leads to uneven coverage, wrong fixture types, and wasted spending.
How far apart should pathway landscape lights be placed? Pathway lights should be spaced 8–10 feet apart and staggered on alternating sides of the path for the most natural, effective illumination.
What size transformer do I need for low voltage landscape lighting? Add up the total wattage of all fixtures, multiply by 1.25 for a safety margin, and choose a transformer rated at or above that number. Most residential systems need between 150 and 300 watts.
Are LED landscape lights worth the extra cost? Yes. LED landscape lights use significantly less energy than halogen, last far longer, and produce better color consistency. The higher upfront cost typically pays back within two to three seasons.
What does IP65 mean on garden lighting fixtures? IP65 means the fixture is fully dust-tight and protected against water jets from any direction — the recommended minimum for any outdoor landscape fixture exposed to weather or irrigation.
Can I mix warm and cool white landscape lights in the same yard? It’s generally not recommended. Mixing color temperatures creates a visually inconsistent look. Choose one color temperature range (ideally 2700K–3000K) and stick with it throughout the design.
What is voltage drop in low voltage landscape lighting? Voltage drop is the reduction in electrical voltage that occurs over long wire runs. It causes fixtures at the far end of a run to appear dimmer than those near the transformer. Proper wire gauge and wiring method selection prevents it.
How often should I maintain my landscape lighting system? At a minimum, perform a full inspection twice a year — at daylight saving time changes is a convenient reminder — and do a quick visual check monthly during the growing season.
What is the best beam angle for uplighting trees? A narrow beam angle of 15° to 30° works best for tall, columnar trees. Wider angles (40°–60°) suit trees with a broad, spreading canopy. The fixture should be positioned 1–2 feet from the base of the trunk.
Is professional landscape lighting installation worth the cost? For large properties, complex designs, or custom architectural features, professional installation pays for itself through proper system design, high-quality materials, and avoided mistakes that would require costly rework.
Glossary of Terms
Landscape Lighting Transformer: An electrical device that reduces standard 120-volt household current to 12 volts for safe use with low voltage landscape lighting systems. Most include timers, photocells, or smart controls.
Color Temperature (Kelvin): A measurement of the color appearance of light output. Lower Kelvin values (2700K–3000K) produce warm, amber-toned light, while higher values (5000K+) produce cool, blue-toned daylight.
IP Rating (Ingress Protection): An international standard that rates how well a fixture is sealed against dust and water. For outdoor landscape use, IP65 is the recommended minimum.
Voltage Drop: The loss of electrical voltage that occurs as current travels through a wire over a long distance. In low voltage landscape lighting, it causes distant fixtures to appear dimmer than those closer to the transformer.
Conclusion
Avoiding the 10 common landscape lighting mistakes doesn’t require a design degree or a big budget — it requires planning, the right equipment, and a little ongoing attention. Start with a sketch, size your transformer properly, choose LED landscape lights with the right color temperature, and resist the urge to over-light your space.
The difference between a landscape that looks professionally lit and one that looks like an afterthought almost always comes down to these fundamentals. Whether you’re working from a low voltage landscape lighting kit or investing in professional landscape lighting for a larger property, the principles are the same: thoughtful placement, proper power, and quality fixtures.
Ready to transform your outdoor space? Start with a lighting plan tonight — your landscape will thank you.