The short answer is yes — for most homeowners, DIY landscape lighting installation is entirely achievable. But “achievable” and “advisable” are not always the same thing, and that distinction matters when you’re dealing with electricity outdoors.
This guide gives you an honest, experience-based breakdown of what it actually takes to install landscape lighting on your own. You’ll learn which systems are beginner-friendly, where DIYers most commonly go wrong, what tools and knowledge you need, and exactly when it makes more financial and practical sense to hire a professional. No sugarcoating, no upselling — just a clear picture so you can make the right call for your yard and your budget.
Key Takeaways
- Installing landscape lighting yourself can save hundreds of dollars in labor costs.
- Low voltage landscape lighting kits are the safest and most beginner-friendly option.
- A landscape lighting transformer is required for all low voltage systems and must be correctly sized.
- LED landscape lights consume far less energy than halogen and last significantly longer.
- Complex uplighting for trees, multi-zone systems, and 120V wiring typically warrant professional help.
- If you need a polished, symmetrical design with multiple fixture types, a professional landscape lighting designer delivers better results.
Understanding Your Options: Low Voltage vs. Line Voltage
Before picking up a shovel, you need to understand the fundamental difference between the two types of outdoor landscape lighting systems.
Low voltage landscape lighting runs on 12V power, stepped down from standard 120V household current by a landscape lighting transformer. This is the system used in virtually all residential DIY kits. It’s safe to handle, easy to splice, and forgiving of mistakes. For those interested in learning more about these specific setups, our guide to low voltage landscape lighting systems offers a deeper dive into the benefits and components.
Line voltage (120V) systems run at the same power as your home’s outlets and require conduit, weatherproof junction boxes, GFCI protection, and in most jurisdictions, a licensed electrician. These are typically used for commercial installations or high-output security lighting.
For nearly all homeowners considering a DIY approach, low voltage is the right starting point.
What a Low Voltage Landscape Lighting System Looks Like
A standard low voltage setup has four main components:
1. The Transformer This device plugs into a GFCI outdoor outlet and converts 120V household power to 12V. Transformers are rated in watts — a 150W transformer can power roughly 10–15 LED landscape lights. Most quality units include a built-in timer and photocell sensor. When selecting your unit, it is crucial to properly size your landscape lighting transformer to ensure it can handle your planned load with room to grow.
2. The Cable Direct-burial 12-gauge or 16-gauge wire runs from the transformer to your fixture locations. The wire is laid just below the surface or buried 3–6 inches deep.
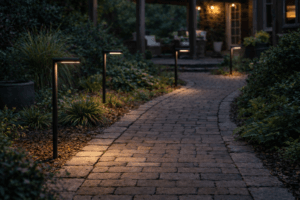
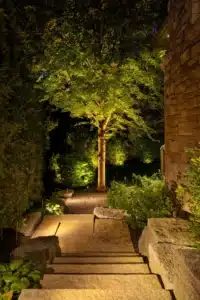
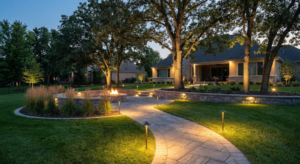
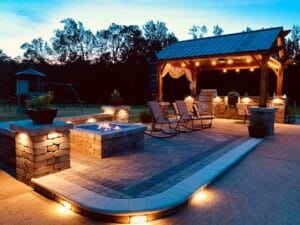
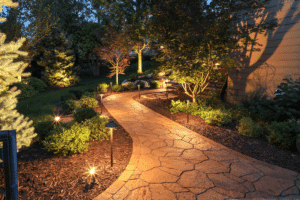
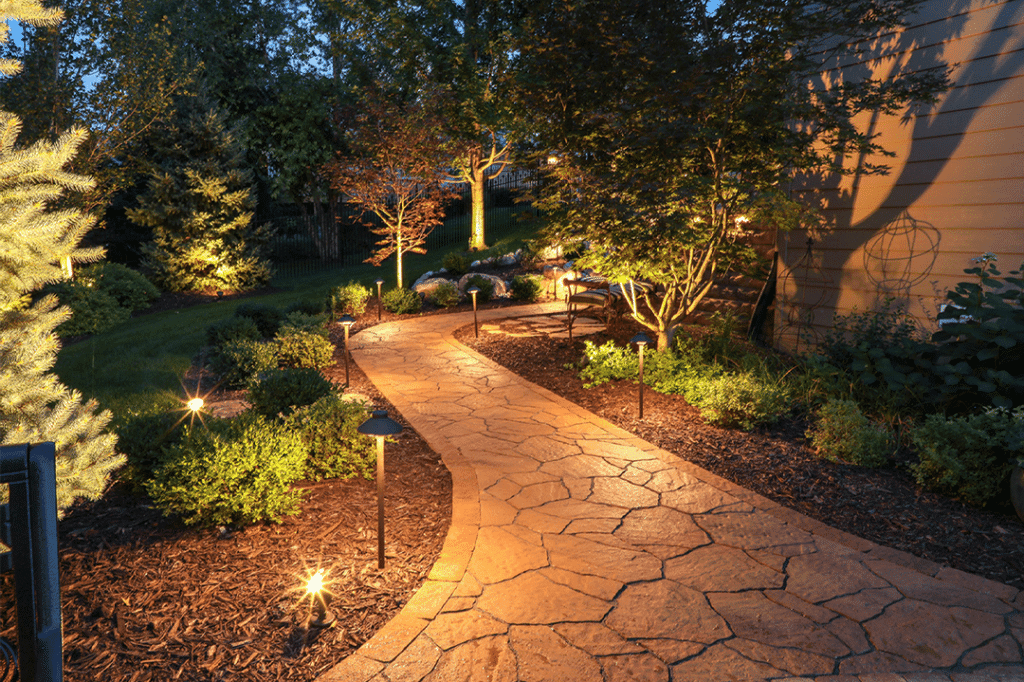
3. The Fixtures These include pathway landscape lights (stake-mounted), uplights for trees and shrubs, well lights, spotlights, and deck or step lights. Most connect to the main cable using quick-connect snap connectors — no wire stripping required.
4. The Bulbs Modern systems use LED landscape lights almost exclusively. LEDs use roughly 75% less energy than comparable halogens and last many times longer, according to data from the U.S. Department of Energy.
Step-by-Step: How to Install Low Voltage Landscape Lighting
Step 1: Plan Your Layout
Sketch your yard and mark where you want fixtures. Note the location of your outdoor GFCI outlet — your transformer must be within reach of it. Group fixtures by run so that no single cable run exceeds the transformer’s wattage capacity.
Step 2: Choose and Size Your Transformer
Add up the wattage of all fixtures you plan to install, then choose a transformer rated at least 10–20% above that total. This headroom prevents overloading and allows you to add fixtures later. Position the transformer on an exterior wall, at least one foot above ground level.
Step 3: Lay Out Your Cable
Roll out the cable from the transformer toward your fixture locations. Don’t bury it yet — test everything first. Use a single cable run in a loop or line pattern depending on your layout.
Step 4: Connect Your Fixtures
Most low voltage fixtures use one of two connection methods: push-in snap connectors that pierce the cable insulation, or separate wire leads that you splice to the main cable. Follow the manufacturer’s instructions carefully. Polarity matters on some LED fixtures.
Step 5: Connect the Cable to the Transformer
Strip approximately ¾ inch of insulation from both cable leads and secure them under the transformer’s terminal screws. Tighten firmly — a loose connection causes flickering and heat buildup.
Step 6: Test the System
Plug in the transformer and manually trigger the lights. Walk the circuit to confirm every fixture works. Adjust aim on spotlights and uplights as needed.
Step 7: Bury the Cable
Once satisfied with placement, use a flat spade or a rented cable puller to bury the wire 3–6 inches deep. This protects it from foot traffic and lawn equipment.
Step 8: Set the Timer and Photocell
Program your transformer’s timer for your preferred on/off schedule. If the unit has a photocell, position it where it won’t be blocked by vegetation.
DIY vs. Professional Installation: Comparison Table
| Factor | DIY Low Voltage | Professional Installation |
|---|---|---|
| Upfront Cost | $150–$600 for materials | $800–$3,000+ depending on scope |
| Labor Cost | Your time (4–12 hours) | $50–$100/hour labor |
| System Complexity | Simple to moderate | Any complexity |
| Design Quality | Functional, self-guided | Engineered, layered, polished |
| Permits Required | Rarely for low voltage | Sometimes for line voltage |
| Warranty/Liability | None | Often included |
| Best For | Pathway lights, basic uplighting | Large properties, complex designs |
Pros and Cons of DIY Landscape Lighting Installation
Pros:
- Significant cost savings on labor
- Flexibility to expand or change the system over time
- Satisfaction of completing the project yourself
- Low voltage systems are genuinely safe for non-electricians
- Wide availability of low voltage landscape lighting kits at home improvement stores
Cons:
- Time-consuming, particularly for large properties
- Mistakes in wiring can damage fixtures or trip breakers
- Aesthetic results may be less refined than professional landscape lighting design
- Transformer sizing errors are common and can reduce system lifespan
- DIY installs may not account for voltage drop over long cable runs
Do’s and Don’ts for DIY Landscape Lighting
Do:
- Use LED landscape lights to minimize energy draw and heat
- Test your full system before burying any cable
- Keep individual cable runs under 100 feet to prevent voltage drop issues
- Use direct-burial rated cable, not standard extension cord wire
- Install your transformer on a GFCI-protected outlet
- Contact 811 before digging to check for underground utilities
Don’t:
- Overload your transformer — leave headroom capacity
- Bury cable under concrete or pavement without conduit
- Mix 12V and 120V systems without professional guidance
- Ignore local codes — some jurisdictions require permits even for low voltage work
- Use incandescent bulbs in fixtures rated for LED only
- Run cable across high-traffic areas without adequate burial depth
When to Call a Professional
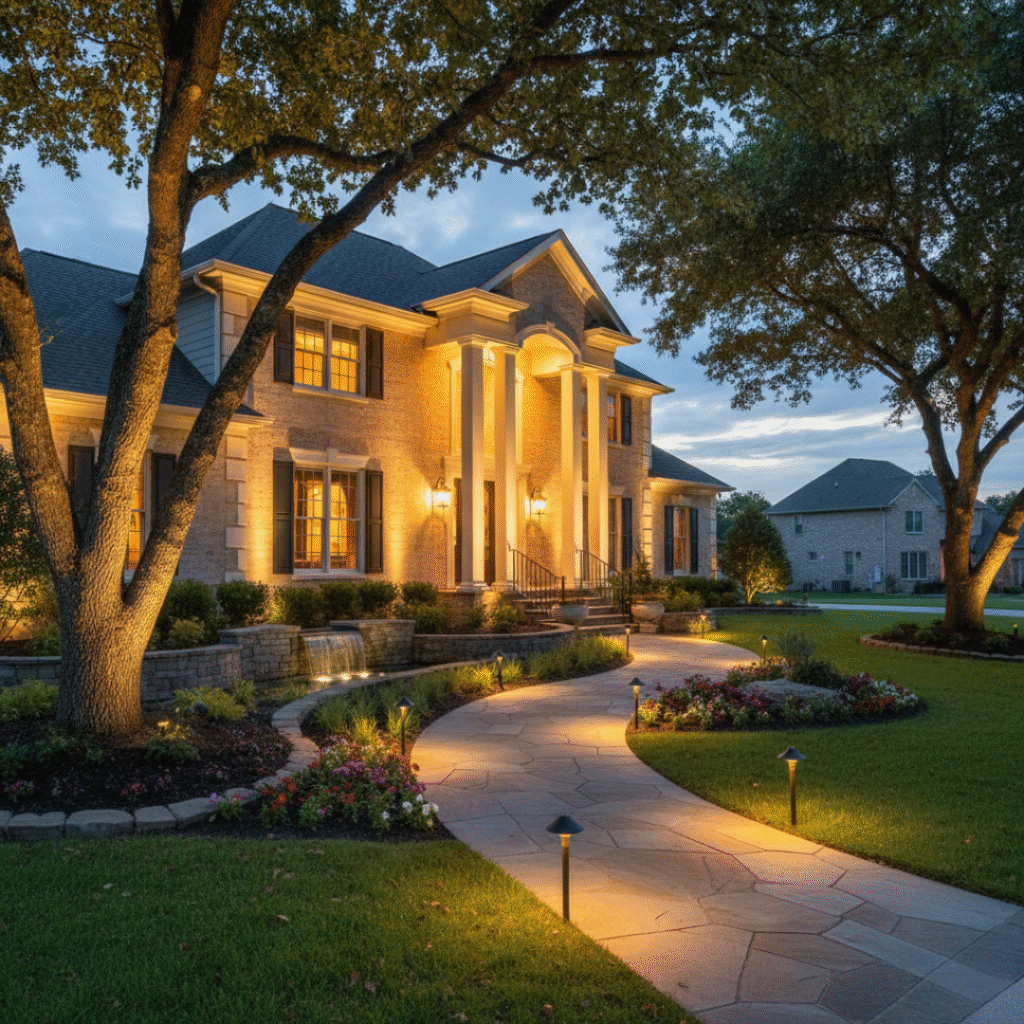
If you need extensive uplighting for trees across a large property with multiple fixture types and zones, a professional landscape lighting designer will produce significantly better results than a DIY kit. The difference isn’t just aesthetic — it’s about voltage calculation, transformer zoning, and long-term reliability. If you are considering this route, reviewing professional tree uplighting techniques can help you understand the complexity involved.
Specifically, hire a professional if:
- Your project involves 120V line voltage wiring
- You want a multi-zone system with separate timers and circuits
- Your property has complex hardscaping, water features, or mature tree canopies
- Local codes require a licensed electrician for any outdoor electrical work
- You want a warranty on labor and materials
(illustrative): A homeowner in the suburbs installs a 150W transformer and 12 pathway lights along a front walkway in a single Saturday afternoon using a kit purchased at a home improvement store. Total cost: approximately $220. A neighbor on the same street hires a professional to design and install a full front and backyard lighting scheme with uplighting for trees, recessed step lights, and three lighting zones. Cost: $2,400, but the result is architectural and dramatically increases curb appeal. Both decisions were correct — for their respective situations.
Common Mistakes That DIYers Make
Voltage Drop: On cable runs longer than 100 feet, the voltage reaching fixtures at the far end can fall below 10.8V — the minimum most LED landscape lights need to operate correctly. The fix is using heavier gauge wire (12-gauge instead of 16-gauge) or splitting long runs into two shorter ones.
Improper Transformer Sizing: Many first-timers buy a 150W transformer, add fixtures over time, and eventually overload it. Industry guidance from the Outdoor Lighting Association recommends sizing transformers to no more than 80% of rated capacity.
Poor Fixture Placement: Pathway lights placed too close together create a “runway” effect. Following expert spacing guidelines for pathway lights suggests spacing them 8–10 feet apart for a natural appearance, rather than clustering them.
Ignoring Maintenance: Outdoor fixtures need periodic adjustment, lens cleaning, and bulb replacement. Many homeowners install and forget, then wonder why the system looks dim or uneven after a few seasons. Refer to our seasonal maintenance tips for outdoor fixtures to keep your system performing optimally.
Quick Answers – FAQ
Q: Is it safe to install low voltage landscape lighting yourself? Yes. Low voltage systems operate at 12V, which poses no meaningful electrical shock risk for adults. The transformer handles the conversion from 120V, and the low voltage side is safe to handle.
Q: Do I need a permit to install landscape lighting? For low voltage systems, permits are rarely required in most U.S. jurisdictions. However, any work involving 120V line voltage outdoors typically requires a permit and may require a licensed electrician. Always check with your local building department.
Q: How long does it take to install landscape lighting yourself? A basic pathway and uplight setup for an average front yard takes most homeowners 4–8 hours, including planning, layout, and burial. Larger or more complex installs can take a full weekend.
Q: What is the best transformer for DIY landscape lighting? Choose a transformer from a recognized brand with built-in timer and photocell functions, rated at least 150W to 300W depending on your fixture count. Look for units with multiple circuits if you want zone control.
Q: Can I add more lights to an existing low voltage system? Yes, as long as your transformer has remaining wattage capacity. Add the wattage of new fixtures and ensure the total does not exceed 80% of the transformer’s rated output.
Q: How deep should landscape lighting wire be buried? The National Electrical Code (NEC) safety standards recommend burying direct-burial low voltage cable at least 6 inches deep. Many installers bury it 3–4 inches in low-traffic areas, but deeper is always safer.
Q: Do LED landscape lights make a meaningful difference over halogen? Significantly. LED landscape lights use roughly 75–80% less energy, produce less heat, and last tens of thousands of hours longer than halogen equivalents, according to the U.S. Department of Energy.
Q: What is voltage drop and should I worry about it? Voltage drop is the reduction in electrical power that occurs over long cable runs. On runs exceeding 100 feet, fixtures at the far end may receive insufficient voltage, causing dim or inconsistent lighting. Use 12-gauge wire and keep individual runs under 100 feet to minimize this.
Q: Can I install landscape lighting near a pond or water feature? Yes, but use fixtures rated for wet or submersible environments and ensure all connections are watertight. Learn how to safely illuminate ponds and water features while adhering to code requirements. Any fixtures within 10 feet of a water feature must be on a GFCI-protected circuit per the NEC.
Q: Are low voltage landscape lighting kits worth buying? For beginners, kit purchases make sense because they include a matched transformer, cable, and fixtures sized to work together. Kits reduce guesswork on compatibility and sizing.
Glossary of Terms
Landscape Lighting Transformer: A device that converts standard 120V household current to 12V for use in low voltage outdoor lighting systems. It typically includes a timer and photocell and is mounted near an outdoor GFCI outlet.
Voltage Drop: The loss of electrical voltage that occurs over the length of a wire run. In landscape lighting, excessive voltage drop causes dim fixtures, particularly at the far end of long cable runs.
GFCI (Ground Fault Circuit Interrupter): A safety device built into outlets or breakers that detects ground faults and shuts off power within milliseconds to prevent electric shock. Required for all outdoor electrical outlets in the U.S. under the NEC.
Uplighting: A landscape lighting technique in which fixtures are placed at ground level and aimed upward to illuminate trees, architectural features, or garden focal points. It creates dramatic visual depth and is a staple of professional landscape lighting design.
Conclusion
Installing landscape lighting yourself is a realistic, cost-effective project for the majority of homeowners — provided you choose a low voltage system, plan the layout carefully, and respect the basic rules of transformer sizing and voltage drop. The savings are real, the learning curve is manageable, and the results can be genuinely attractive.
That said, honesty matters here. If your vision involves architectural-grade uplighting for large trees, a multi-zone design, or any 120V wiring, the investment in professional landscape lighting design pays for itself in quality and long-term reliability.
Start small. A single transformer and a handful of pathway lights and LED uplights will teach you more than any guide can. Once you understand how the system behaves, expanding it becomes straightforward.
Ready to start planning your install? Review our expert guide to selecting the right transformer, or explore our full selection of LED landscape lights and outdoor landscape lighting fixtures to find the right fit for your yard.