Ever notice how a thoughtfully lit home seems to have a special glow, a certain charm that sets it apart from the rest of the block? It’s not just about visibility; it’s about creating an ambiance that extends your living space into the outdoors. You might think achieving that polished, high-end look requires a team of expensive professionals, but what if you could create it yourself? This guide is designed to walk you through every step of a DIY landscape lighting project, ensuring your home shines in its best light.
You’ll learn how to plan, select, and install a low-voltage lighting system that looks like it was done by a seasoned pro. By the end, you’ll have the confidence and know-how to transform your property’s nighttime appeal, turning your yard into a stunning after-dark oasis.
Getting Started: Planning Your Landscape Lighting Design
The secret to a professional-looking landscape lighting installation is planning a well-thought-out design. It’s about more than just placing lights randomly; it’s about telling a story and highlighting your home’s best features.
Start by grabbing a notepad and pen. Stroll around your property during the day and explore strategies for accentuating key features. Consider elements like:
- Architectural Details: Pillars, archways, and interesting textures on your home’s facade.
- Landscaping Focal Points: Specimen trees, flowering shrubs, a stone retaining wall, or a garden statue.
- Functional Areas: Walkways, steps, patios, and driveways where safety and visibility are important.
As you walk, think about the view from different angles—from the street, from your windows, and from your outdoor living areas. A rough sketch of your property with these key features marked will become your lighting blueprint.
Choosing Your Tools: The Anatomy of a Low-Voltage System
For a DIY project, learning about the benefits of a low-voltage system is key, as it’s the safest and most user-friendly option, provided you always follow outdoor electrical safety tips. Unlike high-voltage systems that require a licensed electrician, low-voltage lighting is something any homeowner can confidently install.
Here’s a quick breakdown of the essential components you’ll need:
| Component | Purpose | Key Consideration |
| Transformer | Converts your home’s 120-volt current to a safe, usable 12 volts. | Choose one with enough wattage to power all your planned lights. It’s wise to select a transformer with a wattage capacity that is about 20-30% higher than your total fixture wattage to allow for future expansion. |
| Low-Voltage Cable | Carries the electrical current from the transformer to your lights. | The gauge (thickness) of the wire matters. A 12-gauge or 10-gauge wire is typically recommended for longer runs to prevent voltage drop. |
| Fixtures | The lights themselves! This is the fun part where you pick the styles. | Select fixtures made from durable materials like brass or aluminum that can withstand the elements. |
| Bulbs | The source of the light. | LED bulbs are the industry standard, a fact confirmed by the U.S. Department of Energy. They use a fraction of the energy, and you can learn more about the difference between LED and older halogen bulbs to see why they are a superior choice. |
| Stakes & Mounts | Secure your fixtures in the ground or onto surfaces. | Ensure they are sturdy and appropriate for the type of fixture and installation location. |
| Wire Connectors | Used to safely connect each fixture to the main cable line. | Use waterproof connectors to protect your system from moisture and ensure a long, reliable life. |
Selecting Your Fixtures: The Key to a Layered Look
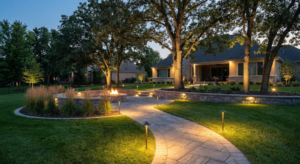
The magic of professional landscape lighting lies in using a variety of fixtures to create layers of light. Relying on just one type of light can make your design look flat and uninspired.
Core Fixture Types:
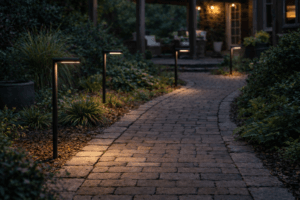
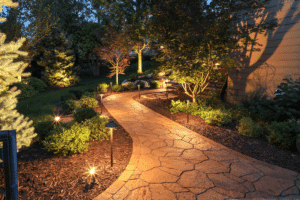
- Path Lights: These are your go-to for illuminating walkways, garden beds, and driveways. They cast pools of light downward to guide the way safely while adding a warm, welcoming feel. Place them staggered on either side of a path rather than in a straight “runway” line for a more natural look.
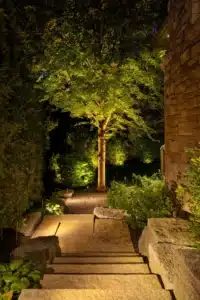
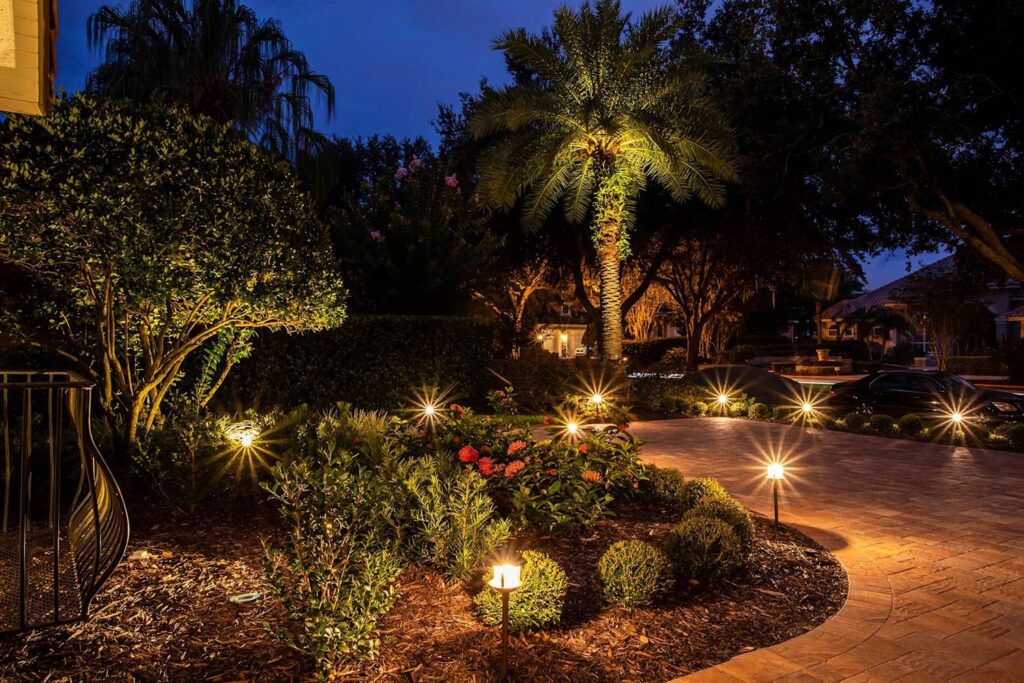
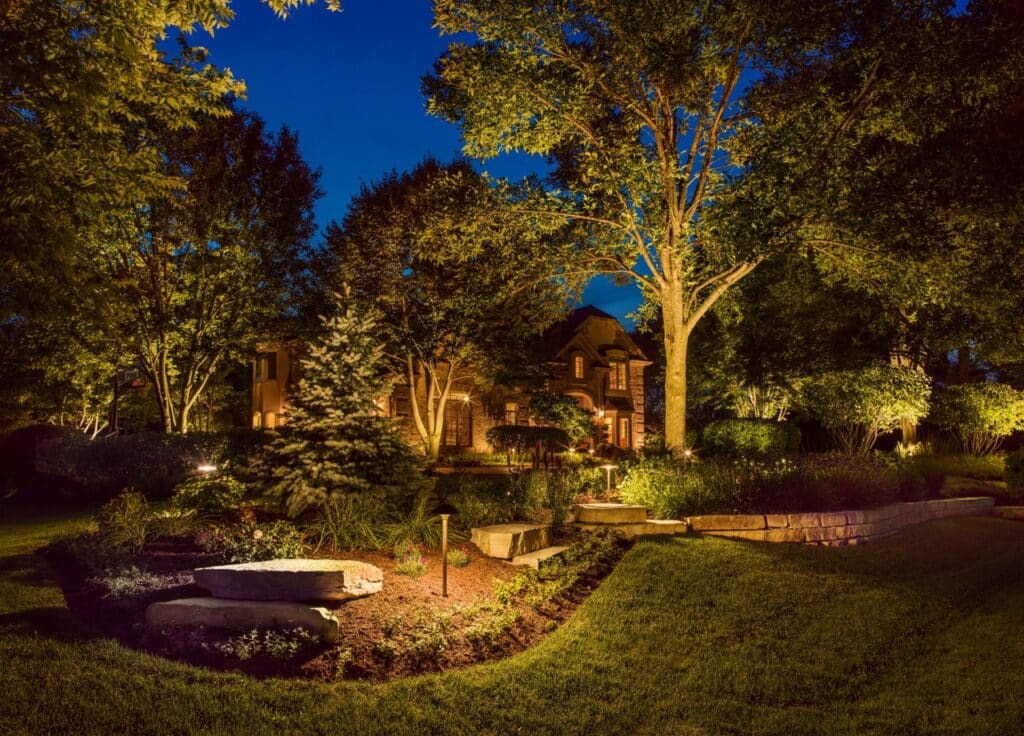
- Spotlights & Floodlights: These are the workhorses for highlighting focal points. Spotlights produce a narrower beam (typically 10 to 45 degrees) perfect for pinpointing a specific architectural detail or a tall, narrow tree. Floodlights offer a wider beam (60 to 120 degrees) ideal for illuminating a broad privacy hedge, a stone wall, or the side of your house.
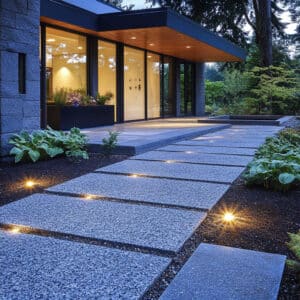
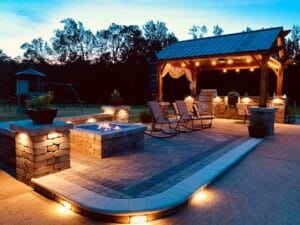
- Hardscape Lights: Designed for versatility, these compact hardscape fixtures can be mounted directly into or under solid surfaces. They are perfect for tucking under stair treads, along the top of a retaining wall, or beneath the capstones of a seating wall to cast a soft, indirect glow.
Pro Tip: Think in layers. Use spotlights for height and drama on trees and your home, path lights for the mid-level ground plane, and hardscape lights for built-in features. This creates depth and visual interest.
The Installation Process: A Step-by-Step Guide
With your plan made and your gear collected, it’s time to bring your vision to life. For a great visual reference, you can review this detailed guide from This Old House before you begin. Our complete guide to installation below also walks you through how to tackle every step.
Step 1: Lay Out Your Fixtures and Cable
Before you bury anything, place your fixtures on the ground according to your sketch. Run the low-voltage cable from the planned transformer location, past each fixture. This allows you to visualize the final layout and make any necessary adjustments. Leave a little extra slack in the cable to make connecting easier.
Step 2: Mount the Transformer
Mount your transformer on an exterior wall or a sturdy post near a GFCI-protected outlet. Most transformers are weatherproof, but it’s best to choose a location that offers some protection from the harshest elements. Mount it at least 12 inches above the ground. Do not plug it in yet!
Step 3: Connect the Fixtures
This is where your design comes together. Starting with the light furthest from the transformer, attach each fixture to the main cable using the provided connectors. Most modern connectors are simple to use—they pierce the cable insulation to make contact with the copper wire inside. Give a gentle tug on the fixture wire to ensure the connection is secure.
What is a “Daisy Chain” vs. a “T-Method” for wiring?
The most common wiring method is the “daisy chain,” where you run a single cable and attach lights one after another. However, for longer runs with many lights, you can experience “voltage drop,” causing lights at the end of the line to appear dimmer.
To prevent this, you can use a “T-Method.” This involves running the main cable to a central point in a group of lights and then branching off in two directions. This helps distribute the electrical load more evenly, ensuring all your lights shine at a consistent brightness.
Step 4: Bury the Cable
Once all fixtures are connected, it’s time to hide the cable. The beauty of low-voltage wire is that it only needs to be buried a few inches deep. Use a flat-edged spade or an edger to create a shallow trench (about 3-6 inches). Tuck the wire in and press the soil or sod back into place. Be careful when digging in garden beds to avoid damaging plant roots.
Step 5: Plug In and Test
Now for the moment of truth! With all fixtures connected and the wire safely buried, you can connect the main cable to the transformer and plug the transformer into the outlet. Your lights should turn on. Wait until dusk to see the full effect.
Fine-Tuning Your Design After Dark
The job isn’t quite done yet. The final, crucial step is to adjust your lights after the sun goes down. What looks right in the daytime might need tweaking at night.
- Adjust Angles: Tilt and rotate your spotlights to eliminate harsh hot spots or dark voids. The goal is to graze a surface with light rather than hitting it head-on.
- Check for Glare: Walk your property and view the lights from every angle, including from inside your home. If a bare bulb is visible and creating glare, adjust the fixture’s angle or use a shroud to shield it.
- Perfect the Placement: You may find that moving a path light a foot to the left or right makes a huge difference in how it illuminates the walkway. Don’t be afraid to make small adjustments for the perfect effect.
Your Questions Answered: Landscape Lighting FAQs
How far apart should I space my path lights?
A general rule of thumb is to space them 8 to 10 feet apart. The goal is to create overlapping pools of light that guide the eye and the feet, not to create a solid line of light. For a more detailed breakdown, check out our expert tips on spacing your path lights.
Can I mix different brands of low-voltage lights?
Yes, as long as they are all 12-volt fixtures, you can mix and match brands within the same system. The key is to ensure your transformer can handle the total combined wattage.
How do I calculate the right size transformer?
It’s simple math. Add up the wattage of every bulb in your plan. For example, if you have ten 5-watt fixtures, your total is 50 watts. Choose a transformer that exceeds this total. A 75-watt or 100-watt transformer would give you room to add more lights later.
A Brighter Home is Just a Weekend Away
Creating a beautifully lit landscape is one of the most rewarding DIY projects you can undertake. It provides stunning ideas to boost your home’s curb appeal, enhances its security, and extends your enjoyment of your outdoor spaces long after sunset. By following these steps, you can install a durable, professional-quality landscape lighting system that you’ll be proud of for years to come.
Ready to transform your home’s nighttime identity? Take these tips and start planning your project. Share your before-and-after photos in the comments below—we’d love to see how you bring your landscape to life!