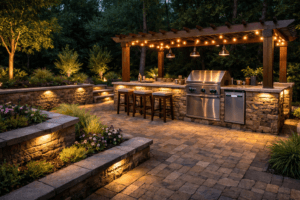
Ever feel like your home’s exterior is missing that certain something after the sun goes down? You’ve invested in beautiful landscaping and architecture, but at night, it all just fades to black. What if you could not only illuminate your property but also transform it into a breathtaking work of art?
This is where the magic of flood lights comes in. Forget those harsh, glaring security lights of the past. Modern landscape lighting is all about artistry, and with the right techniques, you can achieve a truly dramatic effect that will make your home the star of the neighborhood.
In this guide, we’ll explore how to use flood lights to create a stunning, professional-looking lighting design. You’ll learn simple yet powerful techniques to add depth, texture, and intrigue to your outdoor spaces.
What Exactly Are Flood Lights, and Why Do They Matter?
Before we dive into techniques, let’s clarify what we’re talking about. In landscape lighting, “flood light” refers to a fixture that casts a wide beam of light, typically 40 degrees or more. Think of it as a paintbrush that allows you to “wash” a large area with light, as opposed to a spotlight, which is more like a fine-tipped pen.
So, why are they the key to a dramatic effect? It’s all about control. By strategically placing flood lights, you can manipulate light and shadow to:
- Highlight Key Features: Draw attention to the most beautiful parts of your home and garden.
- Create Depth: Make your property feel larger and more dimensional.
- Enhance Texture: Bring out the rich textures of stone, brick, and tree bark.
- Set a Mood: Craft an ambiance that’s anything from serene and inviting to grand and mysterious.
Techniques for a Dramatic Effect Using Flood Lights
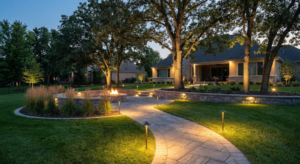
Creating a show-stopping design is easier than you think. It’s not about adding more lights; it’s about placing them with purpose. Here are some foundational techniques to get you started.
Uplighting: The Foundation of Drama
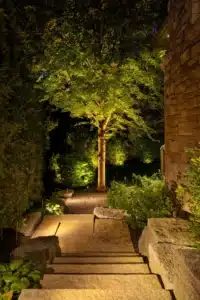
Uplighting is the cornerstone of dramatic landscape lighting. It involves placing a light fixture at the base of an object and aiming it upward. This reverses the natural order of daylight, instantly creating an eye-catching and sophisticated look.
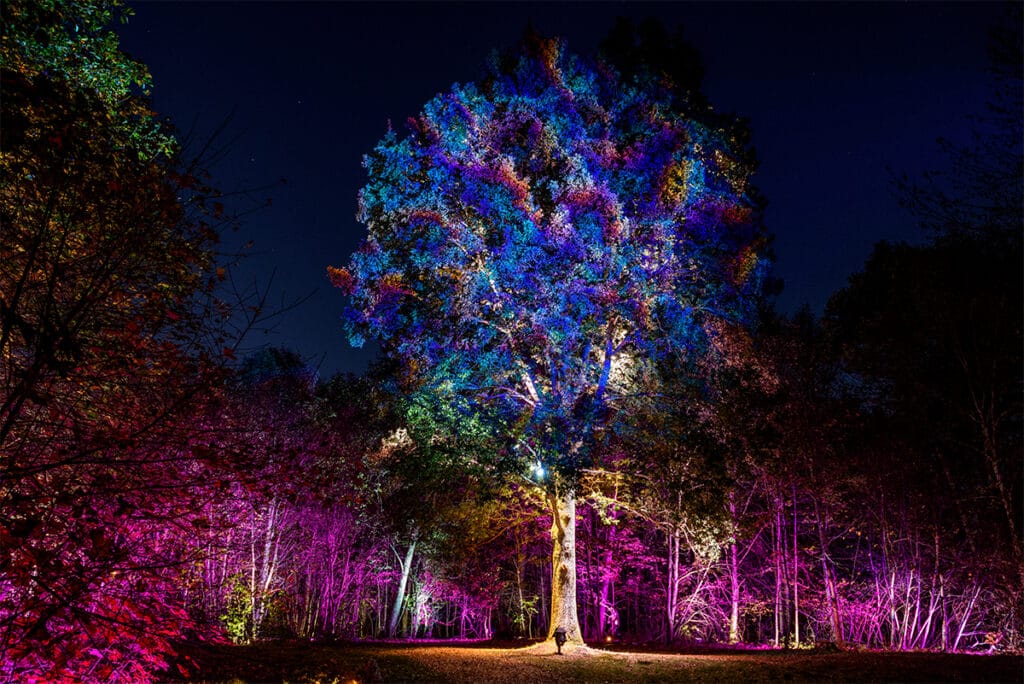
- How to Do It: Place a flood light at the base of a tall tree, a stately column, or a garden statue.
- Why It Works: This technique accentuates height and form. For trees, it illuminates the trunk and sends a beautiful glow up into the canopy, creating a living sculpture. On architectural elements, it adds a sense of grandeur.
Wall Grazing vs. Wall Washing
While they sound similar, these two techniques produce very different results. Knowing how to best go about highlighting your home’s architectural features will help you determine whether grazing or washing is the right choice.
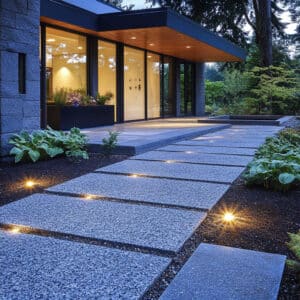
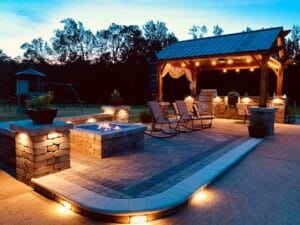
- Wall Grazing: To “graze” a wall, you place the light fixture very close to the surface and aim the beam almost parallel to it. This is perfect for textured surfaces like stacked stone, brick, or rustic wood. The tight angle of the light catches every nook and cranny, casting small, sharp shadows that create a rich, three-dimensional look.
- Wall Washing: To “wash” a wall, you place the fixture further away from the surface and aim it at a wider angle. This smooths out imperfections and bathes the wall in a soft, even layer of light. It’s ideal for smooth stucco or siding when you want a clean, elegant glow.
Silhouetting and Shadowing: Playing with Darkness
Sometimes, the most dramatic part of a lighting design is the darkness itself. Playing with darkness by using silhouettes and shadows creates powerful negative space.
- Silhouetting: To create a silhouette, place a flood light behind an object with an interesting shape (like a Japanese maple or a sculptural fountain) and aim the light at a surface behind it, such as a wall or fence. This technique hides the front of the object in shadow, revealing only its outline for a highly dramatic effect.
- Shadowing: This is the opposite of silhouetting. Here, you place the light in front of the object, casting its shadow onto a blank surface behind it. This is a fantastic way to add interest to a plain wall or fence, using the shadow of a leafy tree or intricate gate to create moving art.
Here’s a quick comparison of these powerful techniques:
| Technique | Best For | Desired Effect |
| Uplighting | Tall Trees, Columns, Statues | Grandeur, Highlighting Form |
| Wall Grazing | Stone, Brick, Textured Surfaces | Highlighting Texture, Rich Shadows |
| Wall Washing | Smooth Walls, Siding, Fences | Soft, Even Glow, Elegance |
| Silhouetting | Sculptural Plants, Fountains | Dramatic Outline, Mystery |
| Shadowing | Leafy Trees, Intricate Gates | Casting Interesting Shadows on a Wall |
Choosing the Right Tools for the Job
Your artistic vision needs the right equipment to become a reality. When selecting the right flood lights, consider these two factors:
- Beam Spread: This is the angle of the light beam, measured in degrees. A wider beam spread (40-120 degrees) is great for wall washing or lighting up a broad group of shrubs. A narrower beam is better for focusing on a specific architectural detail or a slender tree.
- Brightness (Lumens): It’s a common mistake to think brighter is always better. The goal is to create gentle pools of light, not a runway landing strip. Start with lower-lumen bulbs and see how they look. A great lighting design has layers and variation in brightness.
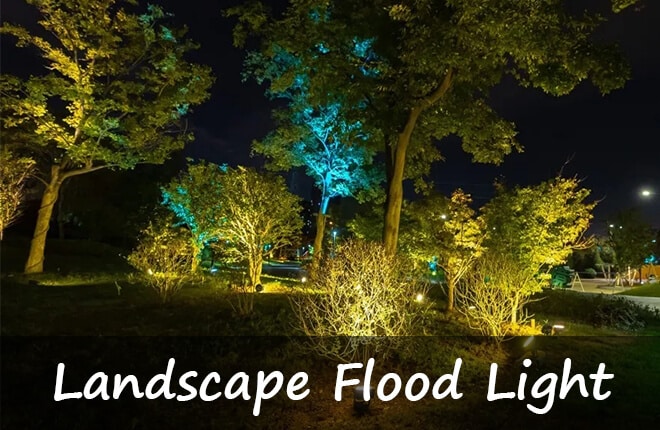
Modern LED flood lights, like those offered by Tru-Scapes, are the gold standard. They are incredibly energy-efficient and long-lasting. For ultimate control and to create a truly custom dramatic effect, consider RGBCW color-changing fixtures. Imagine being able to bathe your home in a warm, classic glow for most of the year, then switching to festive colors for holidays or parties with a simple tap on your phone.
Common Mistakes to Avoid
- The “More is More” Fallacy: Too many lights create a flat, over-lit scene. Focus on creating pockets of light and shadow.
- Ignoring the Viewer’s Perspective: Always check your design from key viewpoints, like the street, your patio, and inside your windows. Make sure no bulbs are glaring directly into anyone’s eyes.
- Forgetting About Your Neighbors: Be a good neighbor. Ensure your lights aren’t shining into their windows or creating unwanted light pollution.
Ready to Go from Drab to Dramatic?
Your home’s exterior holds incredible potential to be a source of beauty and pride, long after sunset. By using flood lights to uplight, graze, wash, and silhouette, you can sculpt with light and shadow to create a truly captivating and dramatic effect. You have the power to turn the ordinary into something extraordinary.
Start by identifying one or two key features of your property you’d love to highlight. Is it that magnificent oak tree in the front yard? The beautiful stone facade of your entryway? Begin there. Experiment with these techniques and see how a few well-placed lights can completely transform your space.
Feeling inspired? Don’t stop here. Explore our full range of professional-grade landscape lighting solutions or connect with a Tru-Scapes certified professional to help bring your vision to life. Share your flood light projects with us in the comments below—we’d love to see what you create!