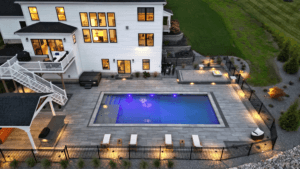
Standing in your yard at dusk, you notice how flat and uninviting your carefully maintained garden becomes once natural light fades. Install landscape lighting correctly, and you’ll transform that same space into an enchanting evening retreat that enhances curb appeal, improves safety, and extends your outdoor living hours year-round.
This guide provides everything you need to successfully install outdoor landscape lighting as a beginner, from selecting the right components to positioning fixtures like a professional. Whether you’re illuminating pathways, highlighting architectural features, or creating ambient garden lighting, you’ll learn the techniques that deliver stunning results without the premium cost of hiring a contractor.
Key Takeaways
Essential Points for Installing Landscape Lighting Successfully
• Low-voltage landscape lighting systems offer safety and easier installation for DIY beginners
• Proper planning of your landscape lighting design prevents costly mistakes and ensures optimal illumination
• Energy-efficient LED landscape lighting provides energy efficiency and lasts up to 25 times longer than traditional bulbs
• Properly sizing and installing your landscape lighting transformer ensures safe, reliable power distribution throughout your system
• Pathway landscape lights and tree uplighting create depth and visual interest in your outdoor space
• Professional landscape lighting techniques can be replicated with careful attention to spacing and placement guidelines
Understanding Landscape Lighting Basics
Before purchasing materials or breaking ground, you need to understand the fundamental differences between lighting systems and how they impact your installation approach.
Low Voltage vs. Line Voltage Systems
Most residential landscape lighting projects use low voltage systems that operate at 12 volts rather than standard 120-volt household current. This voltage reduction happens through a landscape lighting transformer installed near your home’s exterior outlet.
Low voltage advantages: safer to install and maintain, no electrical permit typically required, reduced energy costs, easier to modify or expand, and less dangerous if accidentally damaged during yard work.
Line voltage systems deliver brighter output and work better for commercial properties or very large residential estates, but they require licensed electrician installation, electrical permits, and conduit burial in most jurisdictions.
For more on this foundational topic, see our detailed guide on low-voltage landscape lighting.
LED vs. Traditional Bulb Technology
LED landscape lights have become the industry standard for good reason. They consume approximately 75% less energy than incandescent alternatives, produce minimal heat, and maintain consistent color temperature throughout their operational life. While initial costs run higher, the National Electrical Manufacturers Association notes that LED fixtures often provide 50,000 hours of illumination compared to just 2,000 hours for halogen bulbs.
Learn more about the difference in our comparison of LED versus halogen or incandescent bulbs.
Planning Your Landscape Lighting Design
Strategic planning separates professional-looking installations from haphazard attempts that waste money and deliver disappointing results.
Assess Your Yard’s Needs
Walk your property at dusk and identify:
• Safety priorities: Steps, uneven pathways, potential trip hazards, and dark entry areas
• Focal points: Mature trees, architectural details, water features, or garden beds
• Functional requirements: Outdoor seating areas, grilling stations, or entertainment spaces
• Security concerns: Dark corners, side yards, or areas near entry points
Calculate Your Power Requirements
Each LED landscape light draws between 3 and 12 watts depending on size and brightness. Add the wattage of all planned fixtures and verify your transformer capacity exceeds this total by at least 20% to prevent overloading and allow for future expansion.
If you plan to install 20 fixtures at 5 watts each, you need a transformer rated for at least 120 watts (100 watts × 1.2 = 120 watts minimum capacity).
If your design includes various fixture types, calculate separately: pathway lights, spotlights, and accent fixtures may draw different amounts of power.
For help with load calculations, refer to our Power Reference Guide.
Essential Tools and Materials
Required Equipment
| Category | Items | Approximate Cost |
|---|---|---|
| Core System | Low voltage transformer (100-300W), 12-gauge wire, timer or smart controller | $150-$400 |
| Fixtures | LED path lights, spotlights, well lights (varies by quantity/quality) | $20-$80 per fixture |
| Installation Tools | Wire strippers, voltage meter, shovel or trenching tool, wire connectors | $50-$100 |
| Safety Equipment | GFCI outlet, weatherproof wire nuts, mounting stakes | $30-$60 |
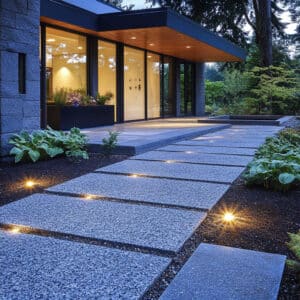
Selecting Quality Garden Lighting Fixtures
Look for fixtures with:
• Corrosion-resistant construction (brass, copper, or heavy-duty aluminum rather than thin steel)
• Sealed lens compartments to prevent moisture infiltration
• Adjustable mounting systems for precise aiming
• Replaceable LED modules rather than integrated designs
The Illuminating Engineering Society recommends brass or copper fixtures in coastal areas where salt air accelerates corrosion.
Step-by-Step Installation Process
Step 1: Install the Landscape Lighting Transformer
Mount your transformer on an exterior wall near a GFCI-protected outlet, ideally within 10 feet of your starting point. Most transformers include mounting brackets and require these clearances:
• Minimum 12 inches above ground level
• At least 6 inches from building corners
• Protected from direct rain exposure (under eaves when possible)
Connect the transformer to the outlet but keep it switched off during installation.
For a complete walkthrough on choosing the right unit, see our guide on how to size your landscape lighting transformer.
Step 2: Layout Your Cable Runs
Unroll your main cable along the planned lighting route without cutting. This “dry run” helps you:
• Verify you have sufficient wire length
• Identify obstacles requiring route adjustments
• Determine optimal fixture spacing
• Confirm voltage drop won’t affect distant fixtures
Mark fixture locations with flags or spray paint.
To avoid dimming at the end of long runs, learn how to prevent voltage drop in long wire runs.
Step 3: Bury Cable Properly
Most local codes require landscape lighting wire burial between 6 and 12 inches deep. Use a flat shovel to create a narrow trench along your marked route. The International Association of Certified Home Inspectors suggests running cable alongside existing hardscape edges when possible to minimize future accidental damage from digging.
Do: Run cable in straight lines between fixtures with gentle curves around obstacles
Don’t: Create sharp bends that stress wire insulation or make future service difficult
Step 4: Connect Fixtures to Main Cable
Low voltage systems typically use one of three connection methods:
Quick-connect clips pierce wire insulation and contact the copper conductor when squeezed shut. While convenient, these connections can corrode over time in wet conditions.
Wire nuts with silicone filling provide weatherproof connections but require stripping insulation from both the main cable and fixture leads.
Screw-terminal junction boxes offer the most reliable connections and easiest troubleshooting but add cost and installation time.
Strip 1/2 inch of insulation, insert wires into the connector, and seal according to manufacturer specifications.
Step 5: Position and Aim Fixtures
This step separates adequate installations from professional results.
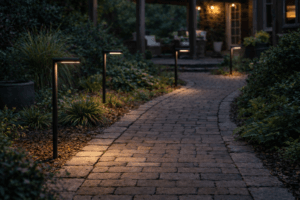
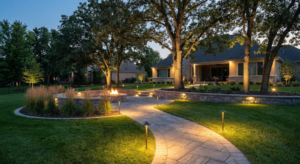
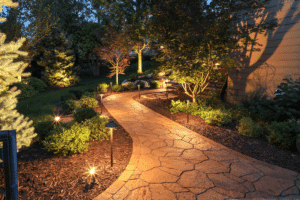
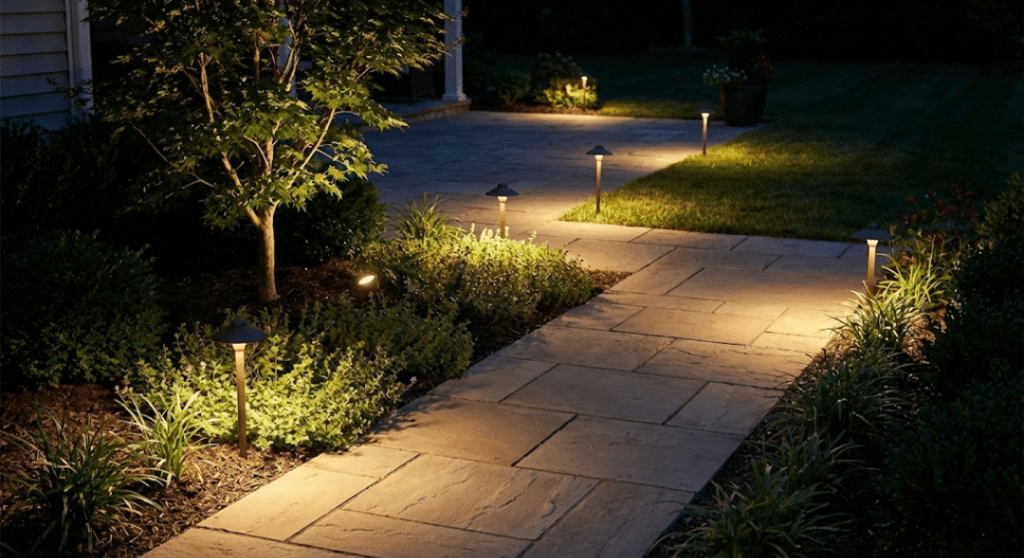
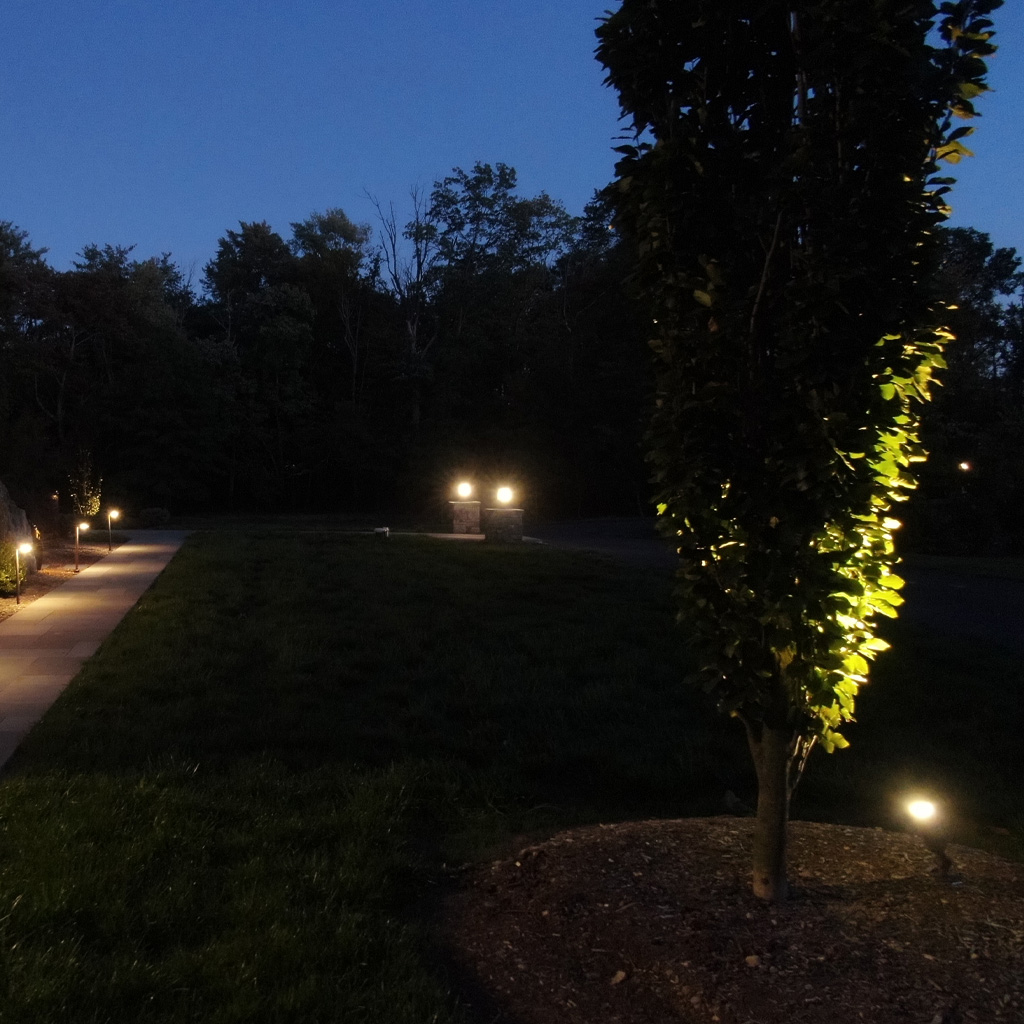
For pathway landscape lights: Space fixtures 8 to 10 feet apart along walkways, alternating sides in a zigzag pattern rather than lining both edges military-style. Install 12 to 18 inches back from the path edge to illuminate the walking surface without creating glare.
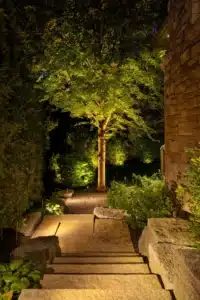
For uplighting trees: Position fixtures 2 to 3 feet from the trunk, aimed upward at a 30 to 45-degree angle. Adjust distance based on tree size—larger specimens need fixtures set farther back to capture the full canopy. For best results, follow our guide on using pathway lights and tree uplighting to add depth.
For wall washing: Place fixtures 12 to 18 inches from vertical surfaces you want to illuminate, aimed straight up to create a smooth gradient of light.
Step 6: Test and Adjust
Before backfilling trenches, power on the transformer and verify:
• All fixtures illuminate properly
• Light distribution creates the intended effect
• No fixtures cause unwanted glare
• Voltage at the last fixture exceeds 10.8 volts (use a multimeter)
If voltage drops below 10.8 volts at distant fixtures, your wire gauge may be insufficient for the run length, or you’ve exceeded transformer capacity. See our detailed fix for voltage drop in low-voltage systems.
Step 7: Backfill and Finish
Once satisfied with fixture operation and positioning, backfill trenches with the excavated soil, tamping lightly every few inches to eliminate air pockets. Mark cable routes on a property diagram for future reference.
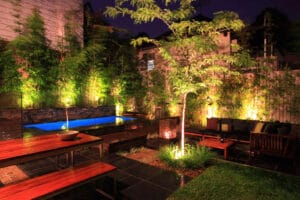
Common Lighting Effects and How to Achieve Them
Moonlighting
This technique mimics natural moonlight by installing fixtures high in trees and aiming them downward. Use well-shielded spotlights mounted 15 to 20 feet up to cast dappled shadows through branches onto the ground below. The American Lighting Association describes this as one of the most natural and subtle outdoor lighting effects.
For a step-by-step method, see how to create a natural moonlighting effect.
Silhouetting
Place spotlights behind objects (statuary, interesting plant forms, or architectural details) and aim toward a nearby wall or fence. The backlit object appears as a dramatic silhouette against the illuminated surface.
Grazing
Install fixtures very close to textured surfaces (stone walls, tree bark, or dimensional siding) and aim horizontally along the surface. This low-angle light accentuates texture and creates depth through shadow play.
These artistic techniques are part of a broader approach covered in our guide to creative garden lighting techniques.
Pros and Cons of DIY Installation vs. Professional Services
DIY Landscape Lighting Installation
Pros:
• Material costs typically range from $300 to $1,200 depending on system size
• Complete creative control over design and fixture placement
• Flexibility to modify or expand whenever desired
• Valuable skills development for future projects
• No scheduling delays or contractor coordination required
Cons:
• Requires research time to understand proper techniques
• Physical labor demands for trenching and cable burial
• Risk of design mistakes that compromise aesthetics
• Potential for troubleshooting frustration if problems arise
• No warranty coverage on labor (only on materials)
For a full comparison, read our analysis of DIY vs. professional landscape lighting installation.
Professional Landscape Lighting Services
Pros:
• Expertise in design principles and lighting effects
• Efficient installation with specialized equipment
• Labor warranty protecting against installation defects
• Access to commercial-grade fixtures not sold retail
• Proper voltage calculations and load balancing
Cons:
• Project costs typically range from $2,000 to $8,000 for average residential properties
• Scheduling dependent on contractor availability
• Less control over exact fixture positioning
• Modification costs discourage experimentation
Troubleshooting Common Issues
Lights Dim or Flickering
This symptom indicates voltage drop from insufficient wire gauge, excessive cable length, or corroded connections. Measure voltage at the problem fixture—readings below 10.8 volts confirm the diagnosis. Solutions include upgrading to heavier wire, adding a second transformer with separate zone, or reducing the number of fixtures on the affected run.
See our full guide on diagnosing and fixing common lighting problems, including voltage drop fixes.
Partial Circuit Failure
When some fixtures work while others remain dark, suspect a damaged wire connection. This often occurs where cable emerges from underground near stakes that shift seasonally. Dig up connections near the last working fixture and inspect for loose terminals or corroded quick-connects.
If you suspect a cut wire, our guide on wire damage resolution can help.
Inconsistent Photocell Operation
Photocells and timers occasionally require adjustment as seasonal light patterns change. Additionally, nearby exterior lighting or reflective surfaces can confuse sensors. Relocate the sensor or add shielding to prevent false readings.
For automation setup tips, see our instructional guide to landscape lighting timers.
Do’s and Don’ts for Successful Installation
Do’s:
• Test your entire system before backfilling any trenches
• Take photographs of cable routes and burial locations for future reference
• Install a timer or smart controller to automate operation
• Leave extra wire length at each connection for future adjustments
• Use dielectric grease on all outdoor connections to prevent corrosion
Don’ts:
• Don’t exceed 80% of your transformer’s rated capacity
• Don’t bury connections without proper waterproof protection
• Don’t install line-voltage fixtures unless you’re a licensed electrician
• Don’t position lights where they’ll create glare for drivers or neighbors
• Don’t skip the planning phase and just start installing randomly
Real-World Example: Suburban Front Yard Transformation
Case Study (Hypothetical): A homeowner in suburban Atlanta wanted to enhance their home’s evening curb appeal while improving pathway safety. Their existing landscape included a curved walkway, two mature oak trees, and foundation plantings.
Solution implemented: Six pathway landscape lights spaced along the walkway at 8-foot intervals, two well lights for uplighting trees positioned 30 inches from trunks, and four spotlights highlighting foundation shrubs and the home’s stone facade. The system used a 200-watt transformer with timer control and consumed approximately 120 watts total.
Results: The installation required one weekend, cost approximately $850 in materials, and transformed their property’s nighttime appearance while adding functional illumination. The homeowner reported neighbors asking for advice within the first week.
Maintenance and Long-Term Care
LED landscape lights require minimal ongoing maintenance, but these practices extend system life:
• Annually: Clean fixture lenses, check all connections for corrosion, trim vegetation blocking fixtures, verify timer operation
• Semi-annually: Test ground fault protection, inspect exposed wire for damage, adjust fixture aim as plants grow
• As needed: Replace damaged fixtures immediately, upgrade to higher-wattage transformer if expanding system
The Outdoor Lighting Perspectives organization recommends professional maintenance checks every three years for complex systems.
Advanced Considerations
Smart Lighting Integration
Modern landscape lighting systems integrate with home automation platforms, allowing smartphone control, scheduling based on sunrise/sunset data, and scene programming for different occasions. These systems cost 20 to 40 percent more than traditional timers but offer significant convenience.
If you’re building a new smart home system, select fixtures and transformers compatible with your chosen platform from the initial installation.
If you have existing conventional fixtures, smart transformers can control basic on/off functions without replacing individual lights.
For setup guidance, explore our article on integrating smart controls into your lighting system.
Energy Efficiency Optimization
Calculate your system’s annual operating cost by multiplying total wattage by daily operating hours, then by your local electricity rate and 365 days. A 100-watt system running six hours nightly costs approximately $30 to $40 annually in most U.S. markets—negligible compared to the value added.
For eco-conscious strategies, see our guide to maximizing energy efficiency in your outdoor lighting.
According to the U.S. Department of Energy, switching to LED lighting can reduce energy use by up to 75%.
Quick Answers – Frequently Asked Questions
How much does it cost to install landscape lighting yourself?
DIY installation typically costs $300 to $1,500 depending on the number of fixtures and quality selected, with most homeowners spending around $700 for a basic system with eight to twelve lights.
Do I need a permit to install landscape lighting?
Most jurisdictions don’t require permits for low voltage landscape lighting systems, but line voltage installations (120V) typically need electrical permits and licensed contractor installation—verify local regulations before beginning work. Learn more in our DIY vs. professional installation guide.
How deep should landscape lighting wire be buried?
Bury low voltage cable 6 to 12 inches deep, following local code requirements, with deeper burial providing better protection from accidental damage during future landscaping work.
What size transformer do I need for landscape lighting?
Calculate total fixture wattage and multiply by 1.25 to determine minimum transformer capacity—for example, 100 watts of lighting requires at least a 125-watt transformer with 20% capacity headroom. Use our detailed method for how to choose the right transformer size.
Can I install landscape lighting in winter?
Yes, though frozen ground makes trenching significantly more difficult—most DIY installers prefer spring or fall when soil conditions are optimal and weather is comfortable for outdoor work.
How long do LED landscape lights last?
Quality LED landscape lights typically provide 30,000 to 50,000 hours of illumination, translating to 15 to 25 years of operation when used six hours nightly.
Should pathway lights be on both sides of the walkway?
No, alternate pathway lights in a zigzag pattern spacing them 8 to 10 feet apart rather than lining both sides, which creates an overly formal, airport-runway appearance.
What’s the difference between spotlights and floodlights for landscaping?
Spotlights produce narrow, focused beams (typically 10 to 30 degrees) ideal for highlighting specific features, while floodlights cast wider illumination (40 to 120 degrees) better suited for general area lighting.
Can I expand my landscape lighting system later?
Yes, provided your transformer has sufficient unused capacity—simply tap into the existing main cable at convenient locations and add new fixtures following the same installation procedures. Plan ahead with our guide on planning for future expansion of your lighting system.
How do I prevent landscape lighting from blinding drivers or neighbors?
Position fixtures to aim downward or toward your property, use shielded designs that prevent direct bulb visibility, and avoid placing lights near property lines or roadways where glare creates hazards.
Glossary of Terms
Landscape Lighting Transformer: An electrical device that reduces standard 120-volt household current to safer 12-volt power for outdoor lighting fixtures, typically including built-in timer controls and multiple output terminals for zone management.
Uplighting: A lighting technique where fixtures are positioned below and aimed upward at objects like trees, architectural features, or walls to create dramatic nighttime focal points and visual depth through shadow patterns. Learn how to use uplighting effectively.
Voltage Drop: The reduction in electrical potential that occurs as current travels through wire over distance, causing fixtures farther from the transformer to receive less power and appear dimmer unless compensated through proper wire gauge selection. Understand what voltage drop is—and how to fix it.
Lumen Output: The measurement of total visible light emitted by a fixture, with higher lumen values indicating brighter light—landscape path lights typically range from 50 to 200 lumens while spotlights may produce 300 to 800 lumens.
Conclusion
Installing landscape lighting transforms your outdoor space from ordinary to extraordinary while enhancing safety, security, and property value. By following this systematic approach—from careful planning and proper transformer sizing to professional positioning techniques and reliable connections—you can achieve results that rival costly contractor installations at a fraction of the expense.
The techniques covered here represent industry best practices refined through countless successful installations. Whether you’re illuminating a simple walkway with pathway landscape lights or creating complex effects using uplighting for trees and architectural accents, these principles ensure lasting satisfaction with your investment.
Ready to transform your yard’s nighttime appeal? Gather your tools, sketch your lighting plan, and take that first step toward creating the outdoor environment you’ve envisioned. Your beautifully lit landscape awaits, and you now have everything needed to make it reality.