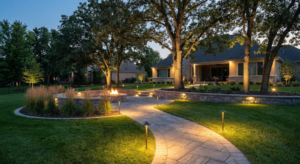
Stepping into your yard after sunset should feel inviting, not treacherous. The right landscape lighting for yards transforms outdoor spaces from shadowy obstacles into enchanting extensions of your home. Whether you’re illuminating a winding garden path, highlighting architectural features, or creating a warm ambiance for evening gatherings, choosing the right fixtures and design approach makes all the difference.
This guide walks you through expert-recommended options for outdoor landscape lighting, from selecting the best low voltage landscape lighting kits to understanding transformer requirements and design principles that professional installers use daily. You’ll discover practical solutions for common lighting challenges and learn how to create a cohesive outdoor lighting scheme that serves both beauty and function.
Key Takeaways
Essential Points About Landscape Lighting for Yards:
- Quality landscape lighting for yards increases property value and improves safety after dark
- Low voltage systems offer energy efficiency and easier DIY installation than traditional options
- LED landscape lights provide superior longevity and lower operating costs than halogen alternatives
- Professional landscape lighting design balances aesthetics with functional illumination needs
- Proper transformer sizing ensures reliable performance for your entire outdoor lighting system
- Strategic placement of pathway lights and uplighting creates depth and visual interest
Understanding Landscape Lighting Fundamentals
What Makes Quality Outdoor Landscape Lighting
Quality outdoor landscape lighting systems share several characteristics that separate them from basic options. Durable construction materials like brass, copper, or marine-grade aluminum resist corrosion and withstand years of weather exposure. Well-designed fixtures include proper seals and gaskets that prevent moisture intrusion, which commonly causes premature failure in cheaper alternatives.
The best systems also incorporate thoughtful beam angles and light distribution patterns. A pathway light should illuminate the walking surface without creating glare, while uplighting for trees requires a wider spread to wash foliage with light. Professional landscape lighting balances these technical requirements with aesthetic considerations, ensuring fixtures complement rather than distract from the landscape.
Low Voltage vs. Line Voltage Systems
Most residential landscape lighting installations use low voltage systems operating at 12 or 24 volts rather than standard 120-volt line voltage. This approach offers significant advantages for homeowners. Low voltage landscape lighting kits reduce electrical hazards, simplify installation without requiring licensed electricians in most jurisdictions, and allow for safer DIY modifications as your landscape evolves.
Line voltage systems still have their place, particularly for commercial applications or when powering high-wattage fixtures over long distances. However, the combination of safety, flexibility, and energy efficiency makes low voltage the standard choice for residential yards. Modern LED landscape lights further amplify these benefits by drawing minimal current while producing impressive light output.
Top Categories of Landscape Lighting for Yards
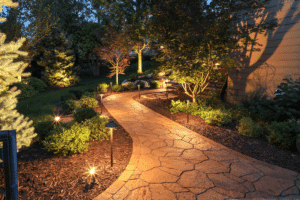
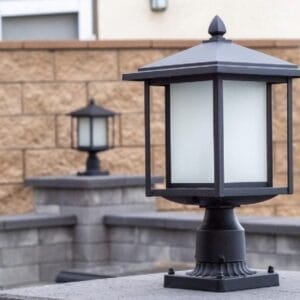
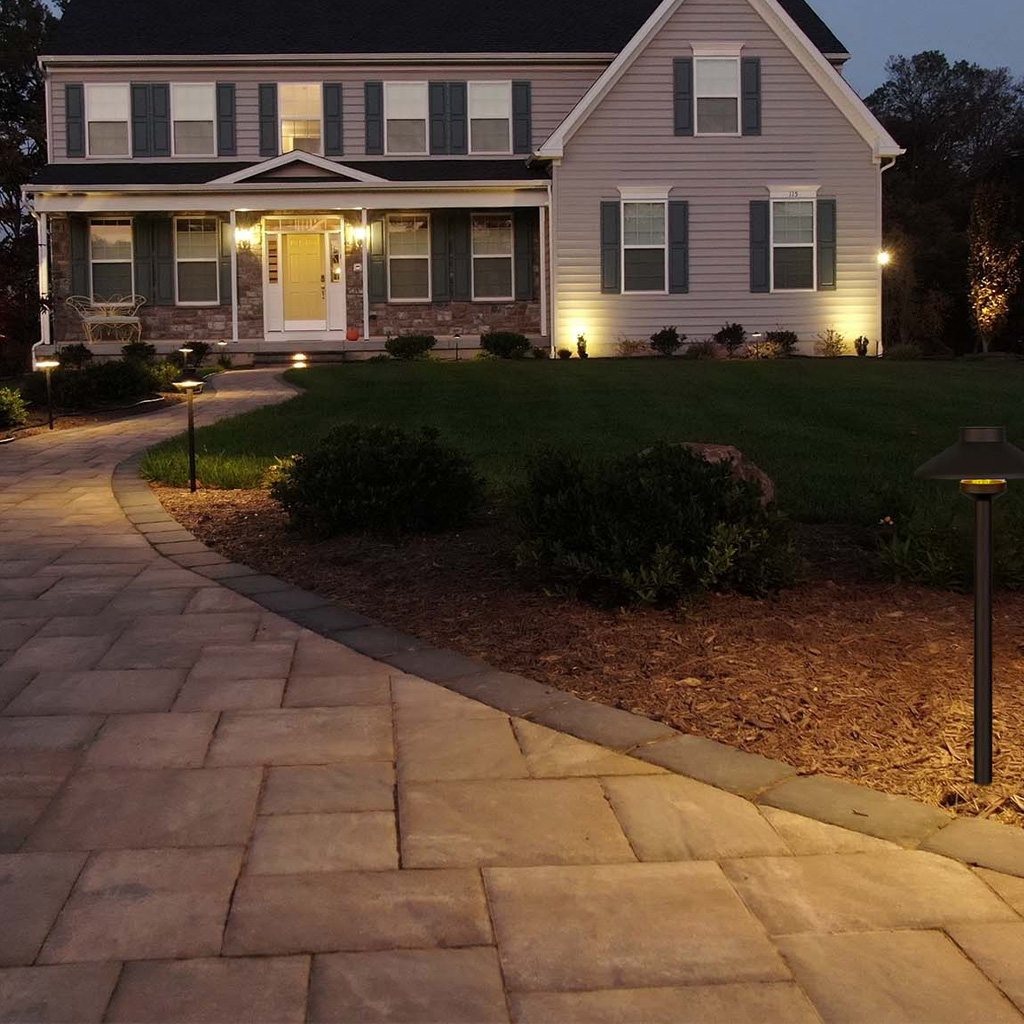
Pathway Landscape Lights
Pathway landscape lights serve the crucial function of guiding movement through your yard while preventing trips and falls. The most effective pathway lighting positions fixtures 10 to 15 feet apart along walkways, with the light source pointing downward to illuminate the path surface without creating glare at eye level.
Quality pathway lights come in several styles. Mushroom-style fixtures spread light in a 360-degree pattern, ideal for wider paths or areas where bidirectional lighting works best. Directional path lights focus illumination forward along the walkway, reducing light spillage into planting beds. For a cohesive look, choose fixtures that match your home’s architectural style—sleek contemporary designs for modern homes, or traditional lantern styles for classic architecture.
For optimal results, follow expert guidance on how to space outdoor lights for even illumination.
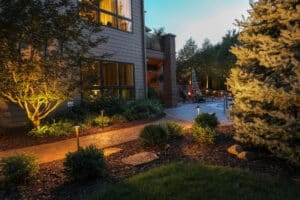
Uplighting for Trees and Architectural Features
Uplighting for trees creates dramatic visual impact by washing trunks and canopies with light from ground level. Position uplights 2 to 4 feet from the tree base, angling them to graze the bark texture and illuminate the branch structure. Larger trees may require multiple fixtures to achieve full coverage.
This same technique applies to architectural features like stone columns, textured walls, or sculptural elements. Well-aimed uplighting adds depth and dimension to your nighttime landscape. LED landscape lights work particularly well for uplighting applications because they produce minimal heat that could stress plants and they’re available in various color temperatures to match your design vision.
Spotlights and Accent Lighting
Garden lighting fixtures include spotlights designed to highlight specific features—a prized specimen plant, garden sculpture, or water feature. These focused beams draw the eye to intentional focal points. When selecting spotlights, match the beam angle to the target size: narrow beams (10–20 degrees) for small objects, wider beams (30–60 degrees) for larger features.
Adjustable fixtures offer flexibility as your landscape matures. A spotlight positioned for a young shrub can be redirected as the plant grows, extending the useful life of your lighting investment.
Explore more creative approaches in our guide to advanced outdoor lighting techniques like grazing and moonlighting.
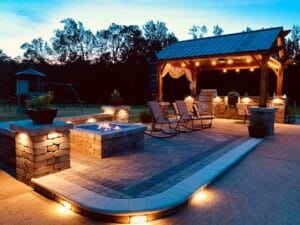
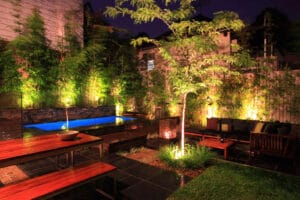
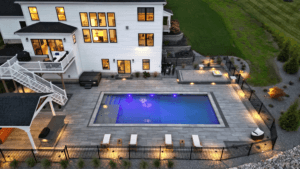
Deck, Patio, and Hardscape Lighting
Outdoor living areas benefit from layered lighting that combines ambient illumination with task lighting. Recessed deck lights installed in stair risers improve safety while adding subtle accent lighting. Post cap lights provide general visibility across deck surfaces without overpowering the space.
For patios and hardscaped areas, consider well lights recessed into the ground around perimeters, strip lighting under seat walls, or decorative string lights for a festive atmosphere. The goal is creating comfortable light levels that support evening activities without the harsh brightness of security floods.
Choosing the Right Landscape Lighting Transformer
Transformer Basics and Sizing
The landscape lighting transformer serves as the power center for your entire low voltage system, stepping down 120-volt household current to safe 12 or 24 volts. Proper sizing is critical—undersized transformers create voltage drop that dims distant fixtures, while oversized units waste energy and money.
Calculate your total wattage requirement by adding the wattage of all planned fixtures, then select a transformer rated for at least 25% more capacity. For example, if your fixtures total 200 watts, choose a transformer rated for at least 250 watts. This overhead accommodates future expansion and prevents the transformer from running at maximum capacity, which shortens its lifespan.
Learn exactly how to size your landscape lighting transformer correctly.
Professional vs. DIY Installation Considerations
Do:
- Calculate total wattage before purchasing a transformer
- Install transformers in protected locations with proper ventilation
- Use photocells or timers for automatic operation
- Plan wire runs to minimize voltage drop in landscape lighting
Don’t:
- Exceed transformer capacity by adding too many fixtures
- Install transformers in direct sun or completely enclosed spaces
- Run wire lengths beyond manufacturer recommendations
- Splice connections without waterproof connectors
Many homeowners successfully install low voltage landscape lighting kits as DIY projects. If you’re comfortable with basic electrical concepts and can follow manufacturer instructions carefully, a DIY approach saves on installation costs. However, complex landscape lighting design involving multiple zones, sophisticated controls, or integration with home automation systems often benefits from professional expertise.
Compare your options in our detailed look at DIY vs professional landscape lighting installation.
Landscape Lighting Design Principles
Creating Depth and Layers
Professional landscape lighting avoids the common mistake of evenly illuminating everything at the same intensity. Instead, effective designs create visual hierarchy through layering. Foreground elements receive moderate lighting, middle ground features get highlighted with brighter accents, and background elements are washed with subtle uplighting. This approach mimics natural lighting patterns and creates the depth that makes nighttime landscapes visually compelling.
Think of your yard in three zones. The area closest to viewing positions (typically your house) should have the subtlest lighting—perhaps gentle path lights or softly lit planting beds. The middle zone can feature bolder statements like dramatically uplit specimen trees. The far boundary benefits from softer background lighting that suggests depth without calling attention to property lines.
Avoiding Common Design Mistakes
Many homeowners over-light their landscapes, creating an effect more suited to a parking lot than a residential garden. The goal is accent and ambiance, not stadium lighting. Start with fewer fixtures than you think you need, then add more if necessary. It’s far easier to add lights than to deal with excessive brightness.
Another frequent error is positioning fixtures where they create glare. Light sources should be concealed from normal viewing angles. If you can see a bare bulb from your patio or primary windows, it’s poorly positioned. Use plants, hardscape elements, or fixture design to shield the light source while allowing the illumination to serve its purpose.
Color Temperature Considerations
LED landscape lights come in various color temperatures measured in Kelvins. Warm white (2700–3000K) creates the traditional, inviting glow most residential landscapes benefit from. Neutral white (3500–4000K) provides crisper illumination that works well for modern architecture. Cool white (5000K+) tends to feel institutional and is rarely appropriate for residential applications.
Consistency matters more than the specific temperature you choose. Mixing warm and cool lights in the same viewshed creates a disjointed, unprofessional appearance. If you prefer variety, use it strategically—perhaps warm white for living areas and slightly cooler tones for security lighting at your property perimeter.
For help selecting the right tone, see our guide to choosing the right color temperature for outdoor lighting.
Step-by-Step Installation Guide for Low Voltage Landscape Lighting
Step 1: Plan Your Layout
Walk your property at dusk and after full dark, noting which areas need illumination for safety and which features you want to highlight. Sketch a basic site plan showing fixture locations, understanding that adjustments will happen during installation.
Step 2: Select and Position Your Transformer
Mount the transformer on an exterior wall near a GFCI-protected outlet, in a location protected from direct rain but with adequate ventilation. The transformer should be easily accessible for maintenance while remaining inconspicuous.
Step 3: Lay Out Wire Runs
Using landscape-rated cable, lay out wire runs from the transformer to each fixture location. Keep runs under 100 feet when possible to minimize voltage drop. For longer distances, use heavier gauge wire or plan multiple zones with separate transformers.
Step 4: Install Fixtures
Position each fixture according to your plan, adjusting aim and placement based on actual conditions. Bury pathway lights with their bases at grade level, stake uplights firmly into the ground, and ensure all connections are waterproof.
Step 5: Make Electrical Connections
Connect fixtures to the main wire using piercing connectors or waterproof wire nuts designed for outdoor use. Follow manufacturer torque specifications to ensure reliable connections that won’t corrode.
Step 6: Test and Adjust
Power on the system after dark and walk your property, noting the actual effect of each fixture. Adjust aims, relocate fixtures that aren’t working as planned, and verify that no glare issues exist from normal viewing positions.
Step 7: Bury Cables
Once satisfied with the layout, bury cables 6–8 inches deep along planting beds or under turf. Use conduit where cables cross driveways or high-traffic areas. Leave slight slack at each fixture to allow for future adjustments.
Comparing Top Landscape Lighting Options
| Feature | LED Systems | Halogen Systems | Solar Options |
|---|---|---|---|
| Energy Efficiency | Highest (80–90% less than halogen) | Moderate to low | High (no operating cost) |
| Lifespan | 25,000–50,000 hours | 2,000–4,000 hours | 5,000–10,000 hours (LED bulb) |
| Initial Cost | Moderate to high | Low to moderate | Low to moderate |
| Light Quality | Excellent, various color temps | Warm, natural tone | Variable, often limited |
| Maintenance | Minimal | Frequent bulb replacement | Battery replacement every 2–3 years |
| Installation | Low voltage, straightforward | Low voltage, straightforward | No wiring required |
| Best For | Permanent installations | Legacy system upgrades | Temporary or rental properties |
To understand the real-world differences, read our comparison of LED vs halogen for outdoor lighting.
Professional Landscape Lighting vs. DIY Kits
When to Hire Professionals
Professional landscape lighting designers bring expertise in creating cohesive outdoor lighting schemes that balance aesthetics with technical requirements. If your project involves complex terrain, integration with existing irrigation or hardscaping, or you’re seeking a truly custom result, professional installation delivers value through proper fixture selection, precise placement, and warranty-backed workmanship.
Complex properties benefit most from professional design. Multi-level landscapes, properties with significant mature trees, or homes where lighting must coordinate with architectural lighting all present challenges that expertise solves efficiently.
DIY Success with Quality Kits
Low voltage landscape lighting kits make DIY installation accessible for many homeowners. Quality kits include a properly sized transformer, sufficient cable, and fixtures designed for straightforward installation. Look for kits that include clear instructions, quality connectors, and fixtures with adjustable stakes that allow for aim correction.
If you choose a DIY approach, invest in quality components rather than the cheapest available option. Well-constructed fixtures with solid brass or copper construction will still be performing years after cheaper alternatives have corroded and failed.
Pros and Cons of Common Landscape Lighting Types
LED Landscape Lights
Pros:
- Exceptional energy efficiency reduces operating costs by 80% or more
- Long lifespan means infrequent replacement and reduced maintenance
- Available in multiple color temperatures for design flexibility
- Instant-on operation without warm-up time
- Minimal heat output protects plants and reduces fire risk
Cons:
- Higher upfront cost compared to halogen alternatives
- Light quality varies significantly between manufacturers
- Some homeowners prefer the warmer tone of traditional halogen
- Earlier LED products had shorter lifespans, creating lingering skepticism
According to the U.S. Department of Energy’s guide to LED efficiency, today’s LEDs use at least 75% less energy and last up to 25 times longer than incandescent lighting.
Low Voltage Halogen Systems
Pros:
- Lower initial investment for fixtures and bulbs
- Warm, natural light quality many find appealing
- Widely available replacement bulbs
- Proven technology with predictable performance
Cons:
- High energy consumption increases operating costs
- Frequent bulb replacement creates ongoing maintenance
- Heat output can stress nearby plants
- Shorter lifespan means more waste over time
Real-World Application: Suburban Yard Transformation
Consider a typical scenario: a homeowner with a 0.25-acre suburban lot featuring a curved front walkway, two mature oak trees, foundation plantings, and a backyard patio. The existing builder-grade lighting consisted of two front door lanterns—adequate for finding the keyhole but offering nothing else.
The transformation began with pathway landscape lights positioned every 12 feet along the front walk, providing safe navigation while creating a welcoming approach. Two sets of uplighting for trees dramatically highlighted the oaks’ substantial trunks and canopy structure, adding depth to the front yard. Low-voltage spotlights accented foundation plantings and the home’s architectural details.
In the backyard, step lights illuminated patio stairs while recessed well lights around the patio perimeter provided ambient lighting for dining and conversation. The total system drew less than 200 watts—roughly equivalent to two old-fashioned incandescent bulbs—while transforming the property’s nighttime presence.
This example demonstrates how strategic landscape lighting enhances both safety and aesthetics without requiring massive power consumption or complex installation.
Advanced Landscape Lighting Techniques
Moon Lighting Effects
Moon lighting mimics natural moonlight filtering through tree canopies by mounting fixtures high in trees and aiming them downward. This technique creates gentle, dappled shadows on the ground below—subtle and natural rather than theatrical. It works best with deciduous trees that have interesting branch structure.
Installation requires careful planning. Fixtures must be securely mounted to avoid falling hazards, and wiring must be protected from branch movement. Many professionals use tree-friendly mounting systems that don’t damage bark or restrict growth.
For more on this elegant technique, see our comparison of moonlighting vs traditional landscape lighting.
Grazing and Washing Techniques
Grazing places light sources close to textured surfaces—stone walls, brick facades, or tree bark—to emphasize texture through shadow play. The light skims across the surface at a sharp angle, creating dramatic depth.
Washing, conversely, positions fixtures farther from smooth surfaces to create even illumination without harsh shadows. It works well for painted walls, stucco, or areas where you want general visibility rather than textured drama.
If you need maximum texture emphasis, choose grazing. If you want even coverage on smooth surfaces, washing delivers better results.
Silhouetting and Shadowing
Silhouetting places the light source behind an object—typically a distinctive plant or sculpture—to create a dramatic outline against a wall or fence. The object itself remains dark while its shape is highlighted.
Shadowing reverses this by placing the fixture in front of an object and casting its shadow onto a background surface. Shadowing works particularly well with plants that have interesting leaf patterns or architectural forms.
Expand your toolkit with more ideas in our guide to artistic ways to highlight your garden at night.
Quick Answers – Frequently Asked Questions
What is the best type of landscape lighting for yards?
LED low voltage systems offer the best combination of energy efficiency, longevity, and design flexibility for most residential yards. They reduce operating costs while providing reliable performance for decades.
How many lumens do I need for pathway landscape lights?
Pathway lights typically range from 50–150 lumens per fixture depending on spacing and ambient conditions. Closer spacing allows lower lumens per fixture while maintaining adequate illumination.
Can I install landscape lighting myself?
Low voltage landscape lighting systems are DIY-friendly for homeowners comfortable with basic electrical concepts. Line voltage installations should be handled by licensed electricians due to safety and code requirements.
How far apart should landscape lights be placed?
For precise guidance, consult our article on optimal spacing for pathway and accent lights.
What size transformer do I need for landscape lighting?
Calculate total fixture wattage and select a transformer rated for at least 25% more capacity. Learn the full method in our guide to proper transformer sizing for outdoor lighting.
Are solar landscape lights worth considering?
Solar lights work well for temporary installations or areas where wiring is impractical, but they offer less reliability and light quality than wired systems for permanent landscape lighting.
How long do LED landscape lights last?
Quality LED landscape lights typically last 25,000–50,000 hours—potentially 20+ years with typical usage patterns—before requiring replacement.
What color temperature is best for outdoor landscape lighting?
Warm white (2700–3000K) creates inviting ambiance for most residential applications. Explore your options in our guide to choosing the right color temperature for outdoor lighting.
Do landscape lights increase home value?
Well-designed landscape lighting enhances curb appeal and property desirability. See how lighting impacts ROI in our analysis of how quality outdoor lighting boosts home value.
How much does professional landscape lighting installation cost?
Professional installation costs vary widely based on property size, fixture quality, and design complexity, but many homeowners report spending between several hundred to several thousand dollars for complete systems.
Glossary of Terms
Lumens: The measure of total light output from a source, indicating brightness regardless of energy consumption. Higher lumens mean brighter light.
Color Temperature: Measured in Kelvins, this describes the warmth or coolness of white light. Lower numbers (2700K) appear warm and yellow, while higher numbers (5000K+) appear cool and blue.
Voltage Drop: The reduction in electrical voltage that occurs over wire length, causing distant fixtures to appear dimmer than those near the transformer. Proper wire sizing minimizes this effect. Learn how to fix it in our guide to voltage drop in landscape lighting.
Beam Angle: The width of the light cone produced by a fixture, typically measured in degrees. Narrow beams (10–20°) create focused spots, while wide beams (60°+) provide general illumination.

Conclusion
Quality landscape lighting for yards transforms outdoor spaces from underutilized after-dark areas into safe, inviting extensions of your home. The shift to LED landscape lights has made these systems more energy-efficient and longer-lasting than ever, while low voltage landscape lighting kits have simplified installation for DIY enthusiasts.
Whether you choose professional landscape lighting design or tackle the project yourself with carefully selected components, the principles remain constant: layer your lighting for depth, conceal fixtures to avoid glare, and match color temperature throughout for visual cohesion. Proper transformer sizing and quality garden lighting fixtures ensure your system performs reliably for decades.
The time invested in thoughtful landscape lighting design pays dividends every evening as you enjoy your transformed outdoor space. Start with the fundamentals covered here, plan carefully, and don’t hesitate to adjust fixture positions until the effect matches your vision.
Ready to illuminate your yard? Begin by walking your property after dark with this guide in hand, noting which areas need safety lighting and which features deserve highlighting. Your outdoor lighting transformation starts with that first step into the darkness.
For a complete roadmap, explore our master guide to designing your outdoor lighting system.