You have likely been there before. The sun sets, the conversation is flowing, and the smell of charcoal is in the air. But as you go to flip the steaks, you realize you lack the necessary outdoor kitchen lighting to tell if they are medium-rare or well-done. You end up squinting, using your phone flashlight, or hoping for the best.
Cooking in the dark is not just frustrating; it is a recipe for disaster.
A truly great outdoor living space requires more than just a high-end grill and comfortable seating. It demands a well-thought-out “Culinary Environment.” This concept blends functionality with atmosphere, ensuring your outdoor kitchen is safe for cooking and inviting for entertaining.
In this guide, we will explore how to design a lighting plan that elevates your outdoor kitchen. We will focus on integrating task lighting, selecting the right professional-grade fixtures, and creating an ambiance that keeps guests lingering long after the last bite.
Defining the Culinary Environment
When we talk about the “Culinary Environment,” we are referring to the ecosystem of your outdoor cooking space. It is where utility meets design.
Indoors, you have overhead recessed lights, under-cabinet strips, and pendants. Your outdoor space needs a similar hierarchy of light. You need to see what you are chopping (utility), but you also want a warm glow that makes the wine look good in the glass (atmosphere).
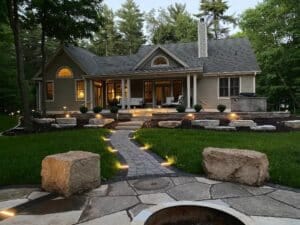
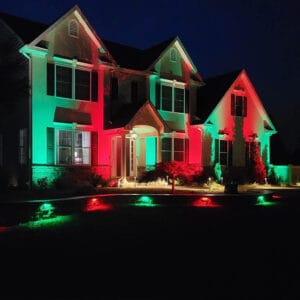
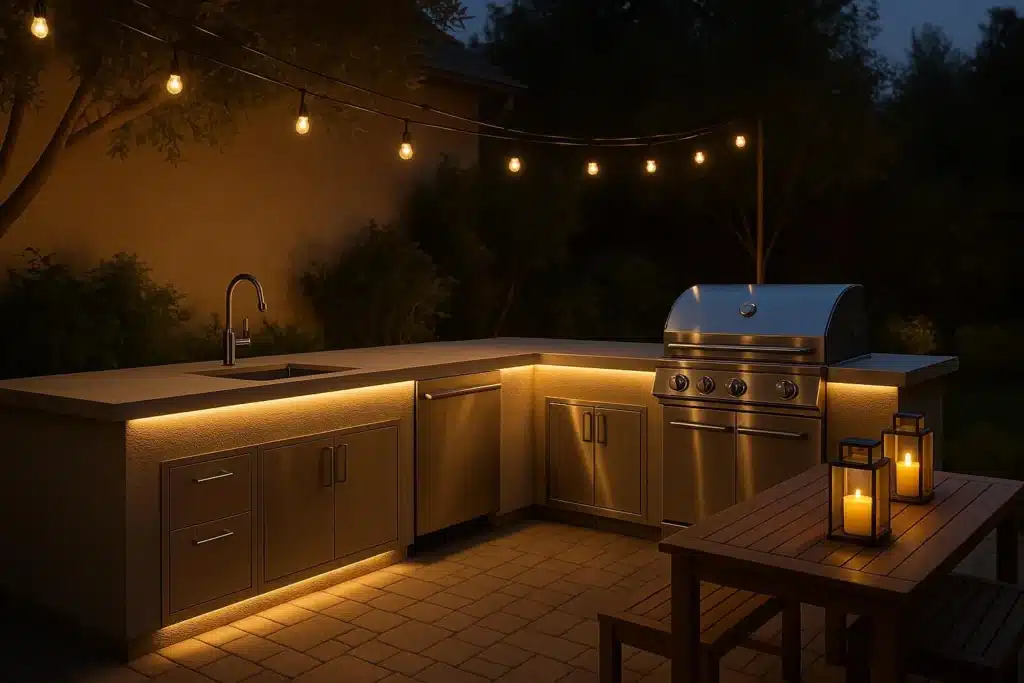
Achieving this requires a mix of lighting layers. You cannot rely on a single floodlight attached to the back of the house. That creates harsh shadows and ruins the mood. Instead, we use low-voltage landscape lighting to create pockets of illumination where they are needed most.
The Foundation: Task Lighting for Functionality
The most critical aspect of outdoor kitchen lighting is task lighting. This is the light that helps you work. Without it, you are cooking blind.
Illuminating the Grill Station
The grill is the heart of the outdoor kitchen. If you cannot see the food, you cannot cook it properly.
The challenge here is positioning. If the light comes from behind you, you cast a shadow directly onto the grill grates. The goal is to position light sources to the side or from above (if a structure exists) to minimize shadows.
For open-air kitchens without a roof, flexible neck lights or pillar lights mounted on adjacent countertops work wonders. They cast light across the surface rather than down from a distance, cutting through the darkness exactly where the tongs meet the meat.
Countertop and Prep Area Lighting
Prep areas are where the knife work happens. Safety is paramount here.
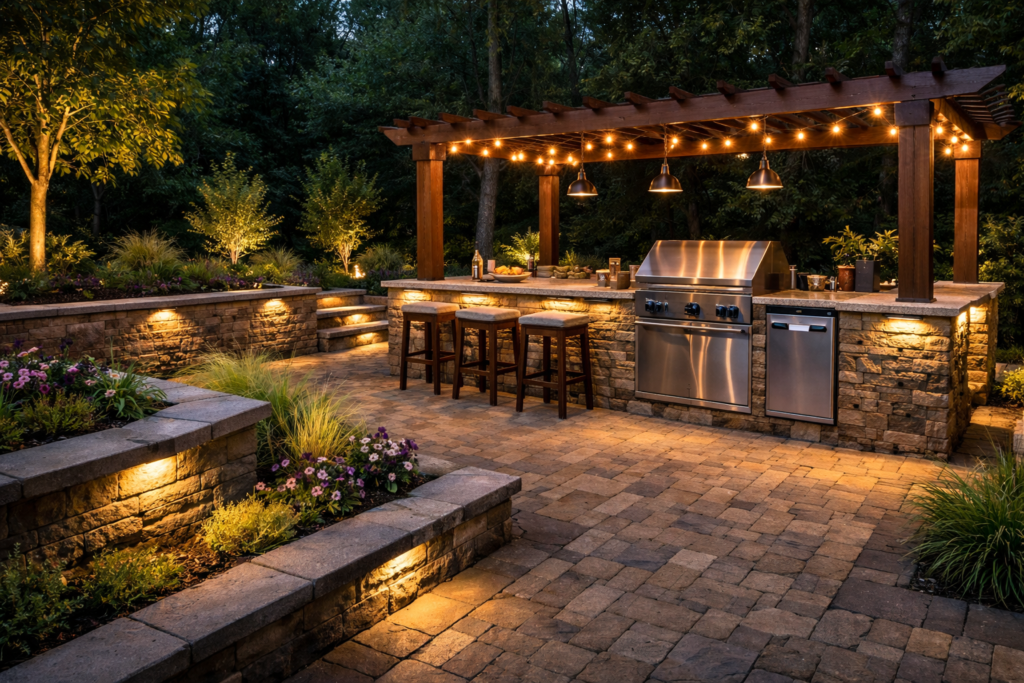
Hardscape lights are the heroes of this section. At Tru-Scapes, we often recommend installing these sleek, low-profile fixtures directly under the lip of the countertop or bar cap.
Here is why hardscape lights work so well:
- Discreet: They are hidden during the day.
- Direct: They cast light downward onto the counter, exactly where you need it for slicing limes or plating food.
- No Glare: Because the light source is tucked under the cap, it does not shine in your eyes.
Sink and Clean-Up Zones
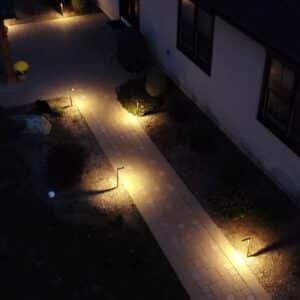
If your outdoor kitchen includes a sink, do not neglect it. Trying to wash dishes or rinse vegetables in the dark is inefficient. A small pillar light or a nearby path light positioned to wash light over the sink area ensures you can see what you are scrubbing.
Setting the Mood: Ambient and Accent Lighting
Once the practical side is handled, you need to soften the edges. You want your guests to feel relaxed, not like they are in a cafeteria.
Under-Counter and Toe-Kick Lighting
One of the most sophisticated looks for an outdoor kitchen is toe-kick lighting. This involves installing strip lights or small hardscape fixtures at the base of your cabinets, near the ground.
It provides a soft, floating effect for the island. It also serves a safety function, illuminating the walkway so guests do not trip, but it does so without being intrusive. It anchors the structure visually in the dark.
Dining Area Illumination
If your kitchen transitions into a dining patio, the lighting needs to shift. You do not need bright task lighting here. You need warm, ambient light.
If you have a pergola or pavilion, pillar lights are excellent. They provide a wider wash of light that simulates an indoor dining room feel. For open patios, consider placing classic path lights around the perimeter. This defines the space without shining bright light directly into people’s faces while they eat.
Choosing the Right Fixtures for the Job
Not all lights are built for the rigors of an outdoor kitchen. Grease, smoke, rain, and heat are constant factors. You need professional-grade fixtures that can withstand the elements.
Hardscape Lights
As mentioned, these are essential for retaining walls, fire pits, and kitchen counters. Look for fixtures with a solid brass or aluminum construction. They conduct heat away from the LED diode, extending its life.
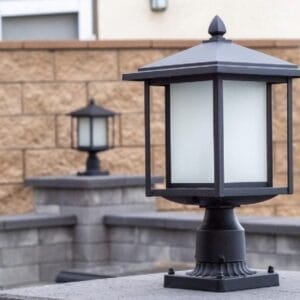
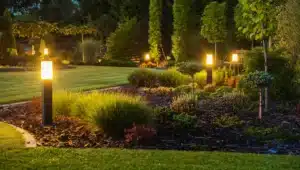
Pillar and Post Lights
These add vertical interest. If your outdoor kitchen has stone columns or posts, mounting a light on the face of the stone adds texture. It highlights the craftsmanship of the masonry while providing functional light for the surrounding area.
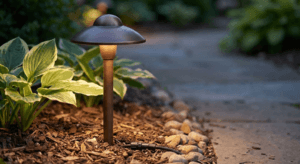
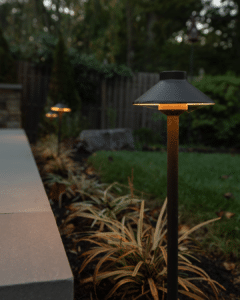
Path Lights
While typically used for walkways, path lights are great for the perimeter of the kitchen. They help define where the patio ends and the garden begins.
Feature Comparison: Lighting Types
| Fixture Type | Best Application | Primary Benefit |
| Hardscape Lights | Under counter caps, retaining walls | Downward light, zero glare, highly discreet. |
| Pillar/Post Lights | Stone columns, pergola posts | General area lighting, highlights texture. |
| Toe-Kick Lights | Base of cabinets | Safety, “floating” aesthetic, mood setting. |
| Path Lights | Perimeter, walkways | Defines boundaries, navigates guests safely. |
Technical Considerations: Color and Control
The quality of light matters just as much as the fixture itself.
Color Temperature (Kelvin)
For outdoor environments, specifically dining and entertaining, we strongly recommend a color temperature of 2700K to 3000K.
- 2700K (Warm White): This is the standard for landscape lighting. It mimics the warm glow of an incandescent bulb or a campfire. It is inviting and makes food look appetizing.
- 4000K+ (Cool White): Avoid this in the outdoor kitchen. It looks clinical and harsh. It can make meat look gray and unappealing.
CRI (Color Rendering Index)
High CRI (Color Rendering Index) is important in a kitchen. It measures how accurately a light source reveals colors. You want to see the true red of a tomato and the perfect sear on a steak. Professional-grade LEDs used in Tru-Scapes fixtures generally offer superior color rendering compared to big-box store options.
Voltage Consistency
We utilize low-voltage systems (12V-15V). This is safer for homeowners and pets than line voltage (120V). However, maintaining consistent voltage is key. A professional installation ensures that the light nearest the transformer is the same brightness as the light furthest away.
Common Mistakes to Avoid
Even with good intentions, we see homeowners make errors that hinder their culinary environment.
1. Over-Lighting the Space More light is not always better. You do not want your backyard to look like a stadium or a parking lot. Shadows are necessary to create depth and drama. Use light only where you need it.
2. Creating Glare There is nothing worse than sitting down to eat and experiencing uncomfortable glare. Always position fixtures so the source (the bulb) is hidden from the main viewing angles. Hooded path lights and under-cap hardscape lights are best for this.
3. Ignoring the Surroundings Your outdoor kitchen does not exist in a vacuum. If you light the kitchen brightly but leave the rest of the yard pitch black, it creates a “fishbowl” effect. You feel exposed. Add some uplighting to nearby trees or fence lighting to balance the brightness and extend the visual depth of the yard.
Maintenance and Longevity
An outdoor kitchen is a harsh environment. Smoke and grease from grilling can build up on lens covers over time, dimming the light.
- Wipe them down: As part of your regular landscape lighting maintenance, take a damp cloth and wipe the lenses of your hardscape and pillar lights once a season.
- Check connections: Ensure wires haven’t been chewed by wildlife or cut by landscaping tools.
- Inspect mounts: Heat and cold cycles can sometimes loosen mounting screws on stone. Check them annually.
Professional-grade fixtures, like those from Tru-Scapes, are sealed to prevent moisture ingress, which is the number one killer of outdoor electronics. Investing in quality upfront saves you from replacing corroded plastic fixtures every spring.
Frequently Asked Questions
Q: Can I install these lights myself? A: While low-voltage lighting is safer to work with than high voltage, installing hardscape lights into masonry often requires cutting stone and running wires through permanent structures. We highly recommend working with a professional contractor to ensure the wiring is hidden and the fixtures are secure.
Q: How do I control the lights? A: Most modern low-voltage systems run off a transformer that can be controlled via a timer, a photocell (dusk-to-dawn), or even a smartphone app. You can set your kitchen lights to turn on 30 minutes before sunset so the space is ready when you are.
Q: Is 2700K bright enough for cooking? A: Yes. “Brightness” is determined by lumens, not Kelvin temperature. 2700K refers to the color of the light. You can have a very bright warm light. It is preferred because it is easier on the eyes at night.
Q: What if I have an existing kitchen? Can I add lights? A: It is possible, but it is trickier than installing during construction. Surface-mounted pillar lights or downlights mounted on nearby structures are often the best retrofit options. Hardscape lights can sometimes be wedged under caps if there is enough overhang, but hiding the wire becomes the challenge.
Conclusion
Your outdoor kitchen is an investment in your lifestyle. It is a place to gather, celebrate, and create memories. But without the right lighting, its potential is cut short the moment the sun goes down.
By integrating smart task lighting with warm ambient layers, you create a “Culinary Environment” that is as functional as it is beautiful. You gain the safety to cook with precision and the atmosphere to dine in style.
Do not let the dark chase you indoors.
Ready to illuminate your outdoor living space? Find a dealer or contractor near you today and start planning your perfect evening retreat.