Ever feel like your small yard is more of a challenge than a charm? You’re not alone. Many homeowners with compact outdoor spaces believe they’re limited in their design choices. But what if the secret to transforming your small yard into a stunning retreat wasn’t about adding more, but about how you illuminate it?
Proper landscape lighting does more than just brighten up a dark space. It’s a design tool that can make your yard feel larger, more inviting, and dramatically more beautiful after the sun goes down. Forget the idea that landscape lighting is only for sprawling estates. In a small yard, every single beam of light has a bigger job to do, and the results can be truly transformative.
By the end of this article, you’ll have a playbook of clever lighting techniques specifically for small spaces. We’ll explore how to create depth, highlight your favorite features, and turn your cozy yard into an enchanting evening escape, all while using professional-grade, low-voltage lighting that stands the test of time.
Why Quality Lighting is Non-Negotiable for Small Yards
In a small space, there’s nowhere for poor quality to hide. A single harsh, poorly placed light can overwhelm the entire area, while a flimsy fixture from a big-box store can cheapen the look of your carefully planned garden. This is where the distinction between professional-grade and consumer-grade lighting becomes critical.
For small yards, a low-voltage wired system is the superior choice. Unlike solar options that can be unreliable and dim, a low-voltage system provides consistent, high-quality light that you can control precisely.
Here’s why it matters:
- Consistency is Key: A wired system delivers reliable power every night, ensuring your design looks exactly as you intended, without fading or flickering.
- Superior Control: You have complete control over the brightness, direction, and placement of each light, which is essential for the nuanced techniques we’ll discuss.
- Durability: Professional-grade fixtures, often made from solid brass or powder-coated aluminum, are built to withstand the elements for years. They are an investment in your home’s beauty and value, not a temporary fix.
Think of it like this: you wouldn’t use a paint roller to touch up a delicate portrait. Similarly, you need the right tools to artfully illuminate a small space.
The Magic of “Less is More”: Core Principles for Small Space Lighting
The biggest mistake homeowners make in small yards is over-lighting. The goal isn’t to flood the space with light like a stadium, but to create pockets of light and shadow that guide the eye and create intrigue.
Principle 1: Go Vertical – Draw the Eye Upward
When you can’t build outward, build upward with light. Illuminating vertical surfaces is the single most effective way to make a small space feel larger. Your brain perceives the lit vertical plane—a fence, a wall, a line of trees—as a boundary, and pushing that boundary back visually expands the area.
- Wall Washing: This technique involves placing a wide-angle light close to a wall or fence to cast a soft, uniform sheet of light across its surface. It’s perfect for highlighting beautiful textures like stone, brick, or even a well-maintained wooden fence. This smooth wash of light minimizes harsh shadows and creates a sense of openness.
- Grazing: If you have a surface with a lot of texture (like rugged stone or textured siding), grazing is a fantastic choice. Place a light very close to the wall and aim it almost parallel to the surface. This creates dramatic shadows that emphasize every nook and cranny, turning a plain wall into a work of art.
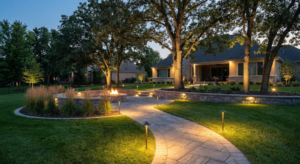
Principle 2: Create Depth with Layers of Light
A single, central light makes a space feel flat and one-dimensional. Instead, think like a theater designer and create layers of light to give your yard a sense of depth and perspective.
- Foreground: Start with soft light on the plants or features closest to your viewing point, like your patio or deck. Low-intensity path lights or small spotlights work well here.
- Mid-ground: This is where you highlight the “stars” of your yard. Use spotlights to feature a small ornamental tree, a beautiful sculpture, or a vibrant cluster of plants.
- Background: Finally, use techniques like wall washing on the furthest boundary of your yard. This pushes the perceived edge of your space further away, creating the illusion of a much deeper yard.
This layering technique guides the eye through the space, making it feel more complex and expansive than it actually is.
Essential Lighting Techniques for Small Yards
Now, let’s get into the specific techniques and the types of fixtures that make them happen. These methods are proven to add impact without overwhelming a compact area.
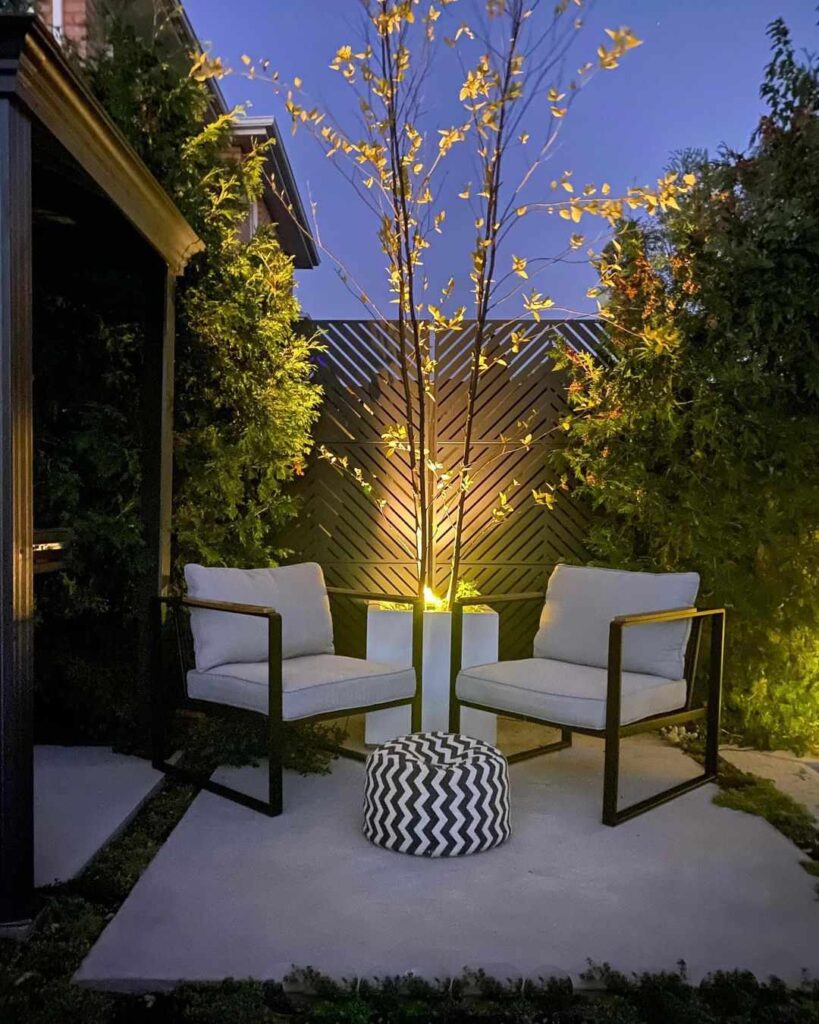
Up lighting: The Drama Queen
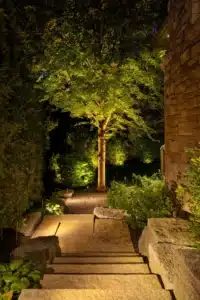
Up lighting involves placing a spotlight at the base of a feature and aiming it upwards. This is the go-to technique for adding drama and highlighting the form and texture of your best plants.
- Best For: Ornamental trees (like Japanese maples or dogwoods), architectural shrubs, and garden sculptures.
- How to Do It: Place a spotlight a foot or two away from the base of the tree or plant. Experiment with the angle—a steeper angle will highlight the trunk and branch structure, while a wider angle will illuminate the entire canopy.
- Pro Tip: For small trees, use a single, narrow-beam spotlight to create a focused, dramatic effect.
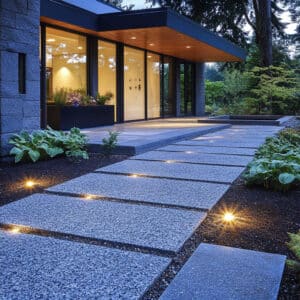
Path Lighting: The Gentle Guide
In a small yard, path lights do more than just ensure safe passage. They define the edges of walkways and garden beds, adding structure to the design. The key is subtlety.
- Best For: Lining walkways, illuminating the edges of a small patio, or dotting within a garden bed to provide a soft, low-level glow.
- How to Do It: Space lights 8-10 feet apart. The goal isn’t to create a runway, but to cast pools of light that overlap gently. Ensure the light source itself is shielded to prevent glare; you want to see the effect of the light, not the bulb.
- Avoid This Mistake: Stagger your path lights on opposite sides of a walkway rather than placing them in straight, parallel lines. This creates a more natural and visually interesting journey.
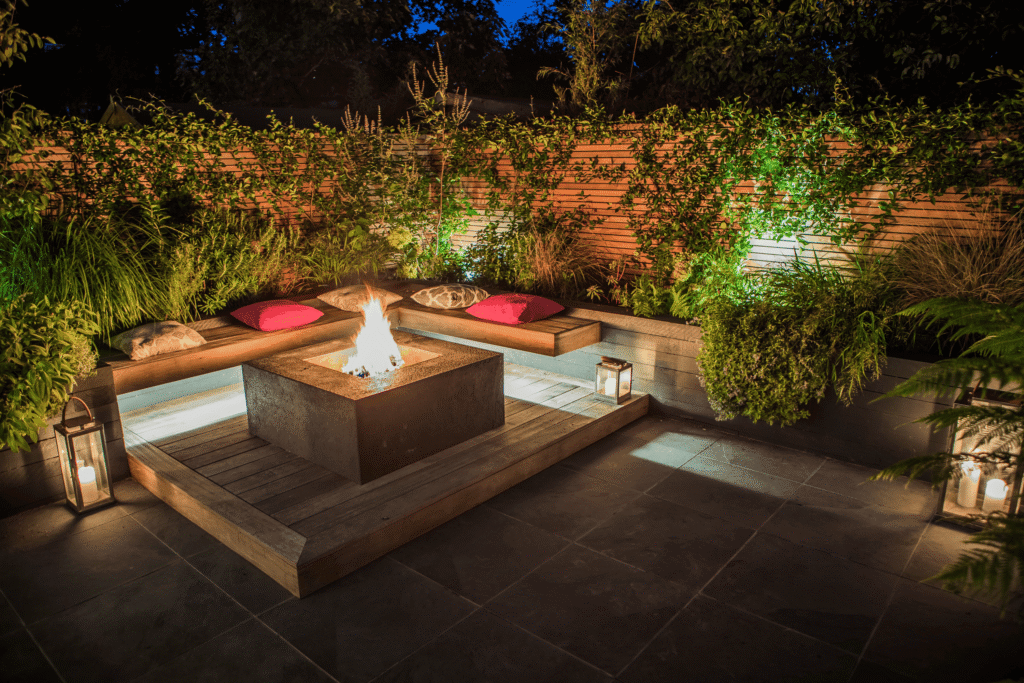
Hardscape Lighting: The Hidden Gem
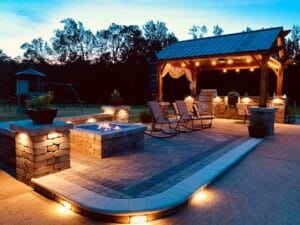
Hardscape lighting is the secret weapon for small yards. These compact fixtures are designed to be integrated directly into features like retaining walls, steps, and built-in seating.
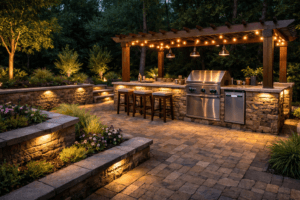
- Best For: Adding safety to steps, creating a floating effect under seating walls, illuminating outdoor kitchen counters, or tucking into planters.
- How to Do It: Compact hardscape lights, like the Tru-Scapes Mini-Wedge, are designed to be discreet. They fit neatly under the capstones of walls or the lip of a stair tread, casting a wide, downward beam of light that is both beautiful and functional.
- Why It Works: Because the light source is hidden, you get a seamless, sophisticated glow that appears to come from the structure itself. It’s an elegant solution that adds high-end appeal without taking up any visual space.
Lighting Technique Comparison for Small Yards
| Technique | Primary Goal | Best Fixture Type | Pro Tip |
| Wall Washing | Make space feel wider | Wide-Angle Wash Light | Use on light-colored surfaces for maximum reflective effect. |
| Uplighting | Add drama & highlight form | Spotlight / Up-Light | Focus on a single, high-impact feature to avoid clutter. |
| Path Lighting | Guide & define edges | Shielded Path Light | Stagger placement for a more organic, less rigid look. |
| Hardscape Lighting | Integrate light into structures | Compact Hardscape Light | Use under stair treads and wall caps for built-in safety and ambiance. |
Putting It All Together: A Sample Small Yard Design
Let’s imagine a typical small backyard: a 15×20 foot patio area with a privacy fence on one side, a small ornamental tree in a corner, and a few container plants.
- Wash the Fence: Start by placing two wide-angle wash lights along the base of the longest stretch of privacy fence. This immediately pushes the boundary back and makes the entire patio feel larger.
- Highlight the Tree: Place a single spotlight at the base of the ornamental tree, aimed up into its branches. This creates a stunning focal point that draws the eye away from the center of the patio.
- Light the Steps: If there are steps leading down from a back door, tuck two compact hard scape lights under the treads. This provides essential safety and a warm, welcoming glow.
- Add Soft Fill: Finally, place one or two shielded path lights near your container plants to illuminate their foliage and add a final layer of soft light to the scene.
The result? You’ve used only a handful of lights but have created a dynamic, layered, and inviting space that feels anything but small.
Your Yard’s Big Future Starts Tonight
Your small yard holds immense potential. By embracing the “less is more” philosophy and using high-quality, low-voltage landscape lighting, you can craft an outdoor space that is rich in beauty and character. Focus on creating layers, playing with light and shadow, and drawing the eye upward and outward.
Don’t let a small footprint limit your imagination. With the right design and the right tools, you can achieve a big impact and create an evening oasis you’ll love for years to come.
Ready to transform your own space? Explore our professional-grade spotlights and hard scape lights to get started. What’s the first feature in your yard you’d love to illuminate? Share your ideas in the comments below!