Key Takeaways
- The best landscape lighting kits for beginners include fixtures, transformer, cable, and connectors in one box.
- Low voltage LED kits run on 12 volts, which makes them safe for DIY installation.
- Solar kits need no wiring but depend on several hours of direct daily sun.
- Size your transformer above your total fixture wattage so you can add lights later.
- Warm white light around 2700K to 3000K looks natural and limits glare for neighbors.
- Sketch your layout before you buy, then test every light before burying cable.
Why a Kit Is the Easiest Way to Start
Most homeowners put off outdoor lighting because the parts list looks confusing. Transformers, wire gauge, connectors, beam angles. It feels like a job for an electrician.
A kit removes most of that guesswork. The best landscape lighting kits bundle matched parts that are designed to work together, so your first project is mostly layout and a few hours of hands-on work.
This review compares the five kit types you’ll find at most lighting retailers, rather than specific model numbers, since product lines change often. Use it to pick the type that fits your yard, then compare models within that type. You’ll also get a step-by-step install guide, a comparison table, and answers to the questions beginners ask most.
What Comes in a Landscape Lighting Kit
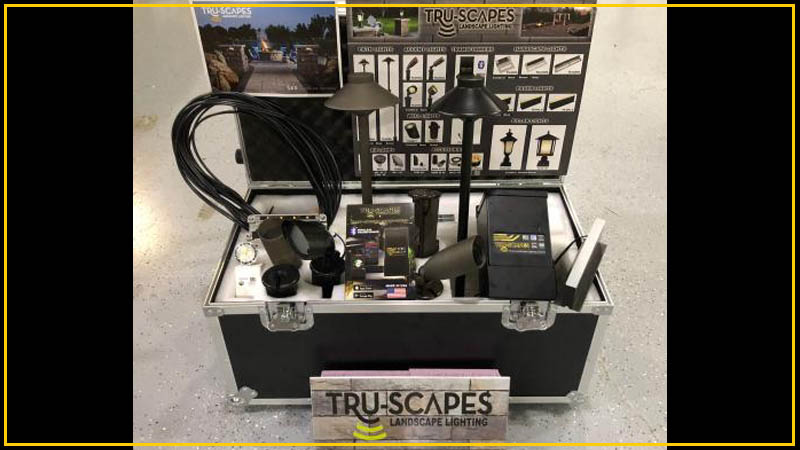
A typical low voltage kit includes four things: LED fixtures, a transformer, a spool of low voltage cable, and quick connectors. Some add ground stakes, a photocell, or a timer.
The transformer is the heart of the system. It plugs into a standard outdoor outlet and steps household power down to 12 volts. That low voltage is why these systems are considered safe for homeowners to install without an electrician.
The U.S. Department of Energy notes that LED lighting uses significantly less energy and lasts far longer than incandescent lighting. For a beginner, that means lower running costs and fewer bulb changes. Stick with LED kits.
The 5 Best Landscape Lighting Kits for Beginners, Reviewed
1. Low Voltage LED Path Light Kit
Best for: walkways, driveways, and garden borders.
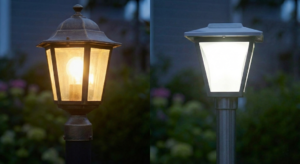
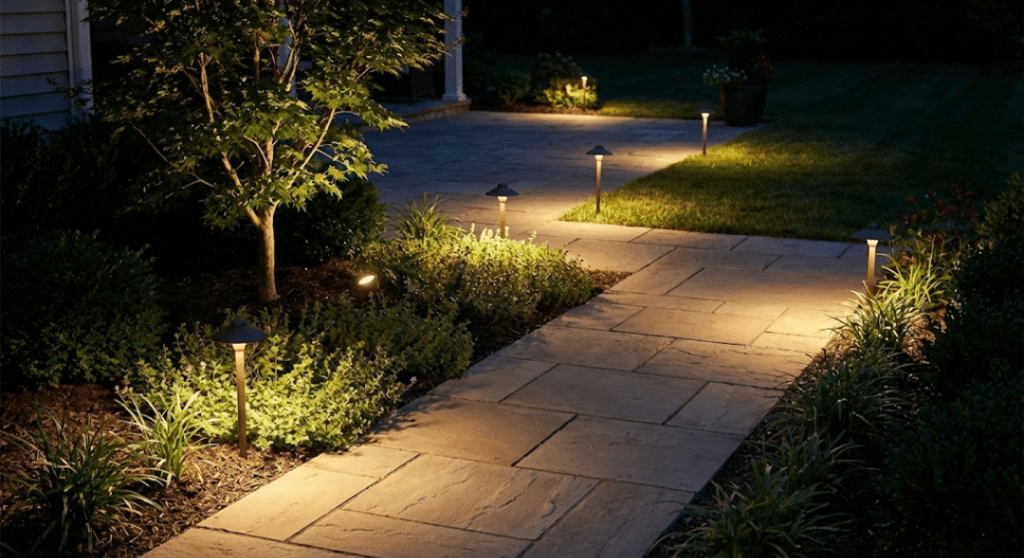
This is the classic starter kit. You get a set of matching path lights, usually four to eight, plus a small transformer and cable. Path lights throw a soft pool of light downward, so they improve safety without glare.
Installation is forgiving. Fixtures stake into soil, and spacing mistakes are easy to fix. The main limit is reach. Path lights won’t highlight a tree or wash a wall.
2. Low Voltage LED Spotlight Kit
Best for: trees, house facades, and focal points.
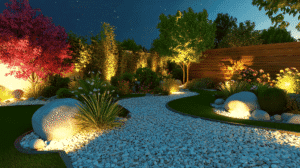
Spotlight kits deliver the dramatic look most people picture when they think of professional lighting. Adjustable heads let you aim light up a tree trunk or across stonework.
Aiming takes some trial and error, so plan on adjusting at night. Look for fixtures with glare shields and a wet location rating from a recognized testing lab such as UL Solutions.
3. Path and Spotlight Combo Kit
Best for: a complete front yard in one purchase.
Combo kits pair path lights with a few spotlights on one transformer. For most beginners, this is the strongest value because it covers both safety and curb appeal.
Check the transformer size before buying. Some combo kits ship with a transformer that’s nearly maxed out, which leaves no room to add fixtures next season.
4. Solar Path Light Kit
Best for: renters, small gardens, and spots far from an outlet.
Solar kits need no cable and no transformer. Push them into the ground and you’re finished. That makes them the simplest garden lighting sets available.
The tradeoff is output and consistency. Solar lights are dimmer than wired ones, and performance drops under trees, on north-facing beds, and during short winter days. Treat them as accents, not primary lighting.
5. Hardscape and Step Light Kit
Best for: retaining walls, stairs, decks, and seat walls.
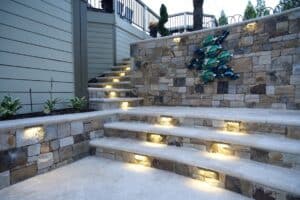
These slim fixtures mount under wall caps, stair treads, or deck rails. They light the surfaces people actually walk on, which makes them a smart safety upgrade.
They take more planning than stake lights because cable has to be hidden behind or under the structure. They’re easiest to install during a build or renovation.
Side-by-Side Comparison
| Kit type | Power | DIY difficulty | Brightness | Expandable | Best use |
|---|---|---|---|---|---|
| LED path light kit | 12V low voltage | Easy | Moderate | Yes | Walkways and borders |
| LED spotlight kit | 12V low voltage | Easy to moderate | High | Yes | Trees and facades |
| Path + spotlight combo | 12V low voltage | Easy to moderate | Moderate to high | Depends on transformer | Whole front yard |
| Solar path kit | Built-in solar cell | Very easy | Low | Add more units anytime | Accents, no outlet nearby |
| Hardscape and step kit | 12V low voltage | Moderate | Moderate | Yes | Walls, stairs, decks |
Pros vs. Cons of Buying a Kit
Pros
- Matched components, so there’s no compatibility guesswork
- Usually cheaper than buying the same parts separately
- Clear instructions written for first-timers
- A fast start, often a single afternoon
Cons
- Included transformers are often small
- Supplied cable may be too short for larger yards
- Fixture quality varies widely, especially plastic housings
- Limited style choices compared with buying individual fixtures
How to Choose the Right Starter Kit
Start with your goal, not the product photos.
If you need safe footing along a walkway, choose a path light kit. If you want the house itself to stand out at night, choose a spotlight or combo kit instead.
If you have an outdoor GFCI outlet within reach, go low voltage. If you don’t, and you aren’t ready to add one, a solar kit is a reasonable first step.
Pay attention to build material. Brass, copper, and cast aluminum fixtures hold up far better outdoors than thin plastic. Also check color temperature. DarkSky International recommends warm light of 3000K or lower to reduce glare and light pollution, and it simply looks better on plants and stone.
Where Concrete Light Fixtures Fit In
If you’ve been browsing modern concrete garden lights or other cement outdoor lighting, you may wonder whether they work with a kit. Often they do.
Most outdoor concrete light fixtures are sold individually rather than in kits. Many run on 12 volts, so they can share a transformer with your kit as long as the voltage matches and total wattage stays under capacity.
A few outdoor concrete lamp ideas that pair well with a starter kit: two low bollards flanking front steps, a cube light at a patio corner, or a single concrete pillar light at the end of a driveway. For concrete patio lights on a slab that’s already poured, use surface-mount fixtures or hardscape lights on nearby walls. Coring into finished concrete is a job for a professional.
How to Install a Low Voltage Kit in 7 Steps
- Sketch your layout. Mark fixture positions, the outlet, and the cable route on paper.
- Call 811 before you dig. The national Call Before You Dig service will have buried utilities marked for free.
- Mount the transformer. Hang it near a GFCI outlet, at least a foot above the ground, but don’t plug it in yet.
- Lay out cable and fixtures. Run cable along the route on top of the ground and set each light in place.
- Connect the fixtures. Use the kit’s connectors, pressing firmly so the pins pierce the cable jacket.
- Test at night. Plug in the transformer, check every light, and adjust spacing and aim.
- Bury the cable. A shallow trench of around six inches is common practice, but check local code, which is typically based on the National Electrical Code published by the National Fire Protection Association.
Do / Don’t
Do
- Add up fixture wattage and keep it comfortably below the transformer’s rating
- Stagger path lights on alternating sides for a natural look
- Leave a little slack cable at each fixture for future adjustments
- Use a timer or photocell so lights run automatically
Don’t
- Line lights up in a straight, evenly spaced “runway”
- Bury cable before testing the full system after dark
- Mix 120 volt fixtures into a 12 volt system
- Aim spotlights toward windows, the street, or a neighbor’s yard
A First-Time Install
A homeowner with a 40-foot front walkway and one mature maple wants better curb appeal on a modest budget. She picks a combo kit with six path lights and two spotlights.
She staggers the path lights along the walk, aims both spotlights up the maple from different angles, and mounts the transformer by the garage outlet. Because she chose a kit with spare transformer capacity, she adds two wall wash lights the following spring without replacing anything.
Total hands-on time: one Saturday afternoon, plus an evening of adjusting.
Quick Answers:
Are landscape lighting kits easy to install?
A: Yes. Most low voltage kits use stake-mounted fixtures and clip-on connectors, so a beginner can finish a basic install in an afternoon.
Do I need an electrician for low voltage lighting?
A: Usually not. The transformer plugs into a standard outdoor outlet. You only need an electrician if you have to add a new GFCI outlet.
Are solar kits as good as wired kits?
A: No. Solar lights are dimmer and less consistent. They work well as accents in sunny areas but won’t match a wired low voltage system.
How many lights can one transformer handle?
A: Add up the wattage of every fixture and keep the total well under the transformer’s rating. Leaving headroom lets you expand later.
What color temperature is best for outdoor lighting?
A: Warm white, around 2700K to 3000K. It flatters plants and stone and produces less glare than cool white.
How far apart should path lights be?
A: Many installers space them roughly six to ten feet apart, staggered. Adjust so the pools of light barely overlap.
How deep should I bury low voltage cable?
A: Around six inches is common, but requirements vary. Check your local code before trenching.
Can I add more lights to a kit later?
A: Yes, if the transformer has spare capacity and the new fixtures run on the same voltage.
Glossary of Terms
Transformer: A device that reduces 120 volt household power to the 12 volts used by low voltage landscape lights.
Lumens: A measure of how much light a fixture puts out. Higher lumens means brighter light.
Color temperature (Kelvin): A scale describing how warm or cool light looks. Lower numbers appear warm and amber, higher numbers appear cool and blue.
Voltage drop: The loss of power over long cable runs, which can make the farthest lights look dimmer than the closest ones.
Conclusion
A good starter kit takes the hardest part of outdoor lighting, choosing compatible parts, off your plate. Low voltage LED kits are safe to install, inexpensive to run, and easy to expand. Solar kits fill in where wiring isn’t practical.
For most homes, a combo kit with a generously sized transformer is the smartest first purchase. Sketch your layout, pick warm white fixtures in durable materials, and test before you bury anything.
Ready to light up your yard? Browse our landscape lighting collection, or contact our team for a free layout recommendation based on your property.