KEY TAKEAWAYS
- Low-voltage 12-volt systems let most homeowners handle installation without hiring an electrician.
- Learning how to install landscape lighting starts with a sketch, a fixture count, and a wattage total.
- Size your transformer so your total fixture load stays near 80% of its capacity.
- Concrete light fixtures outdoors add weight, durability, and a clean modern look to any yard.
- Always call 811 before digging, even for shallow cable trenches in your own lawn.
- Test every fixture at night before burying cable or backfilling your trenches.
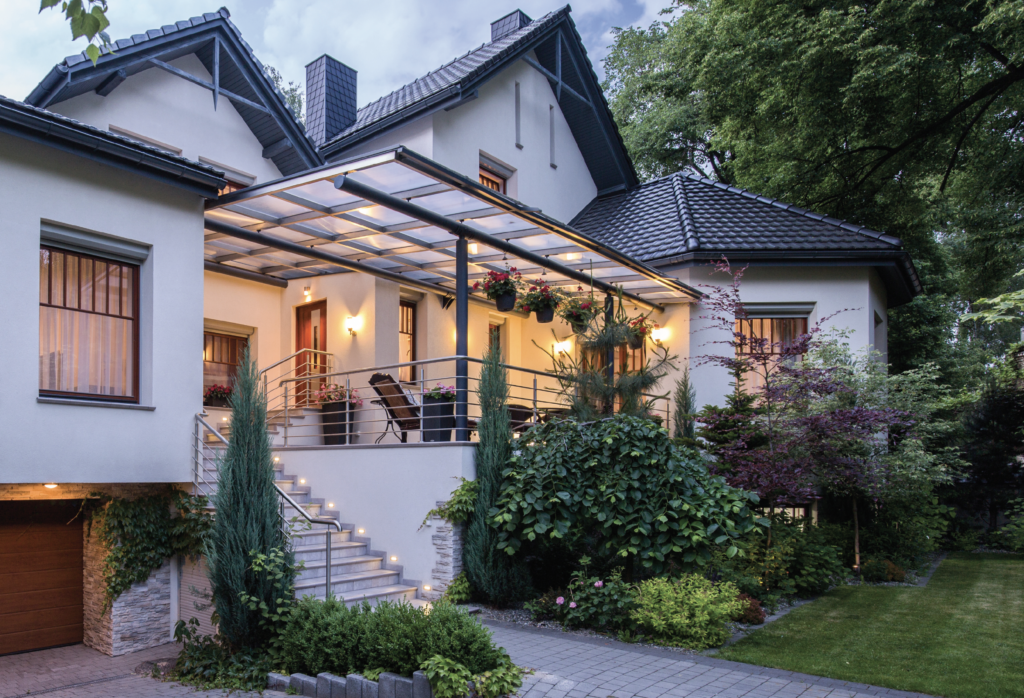
Professional landscape lighting installs often land in the thousands of dollars, and a large share of that bill is labor. The good news is that the work itself is far simpler than most homeowners expect. If you can follow a plan, use a shovel, and twist a wire connector, you can learn how to install landscape lighting in a single weekend.
This guide walks you through the full process. You’ll learn how to plan a layout, choose fixtures (including modern concrete garden lights that are growing in popularity), size a transformer, run cable, and avoid the mistakes that make DIY systems flicker or fail. By the end, you’ll know exactly what to buy, what to skip, and when a pro is actually worth calling.
Why Low-Voltage Lighting Is a Smart DIY Project
Most residential outdoor lighting runs on a safe, low-voltage setup. A transformer plugs into a standard outdoor GFCI outlet and steps household 120-volt power down to 12 volts. That lower voltage is far safer to handle and, in most areas, doesn’t require a licensed electrician or a permit.
The 120-volt side is a different story. If you need a new outdoor outlet installed, hire a licensed electrician for that part. Line-voltage work falls under the National Electrical Code, published by the National Fire Protection Association (NFPA), and local rules vary.
Low-Voltage vs. Line-Voltage at a Glance
| Feature | Low-Voltage (12V) | Line-Voltage (120V) |
|---|---|---|
| DIY friendly | Yes, for most homeowners | No, licensed electrician recommended |
| Cable burial depth | Shallow (often around 6 inches) | Deeper, often in conduit |
| Permit usually needed | Rarely | Often |
| Shock risk | Very low | High |
| Flexibility to move fixtures | Easy | Difficult |
| Best for | Paths, gardens, uplighting, patios | Large commercial-scale floodlights |
If you want flexibility and safety, choose low-voltage. If you’re lighting a large commercial property or need very high-output floods, line-voltage with a professional makes more sense.
Tools and Materials You’ll Need
Gather everything before you start so the project doesn’t stall halfway through.
- Low-voltage transformer with a built-in timer or photocell
- Direct-burial low-voltage cable (12-gauge or 10-gauge)
- Light fixtures (path lights, spotlights, well lights, or concrete patio lights)
- Waterproof, gel-filled wire connectors rated for direct burial
- Flat-edge spade or lawn edger
- Wire strippers and a utility knife
- A multimeter (helpful for checking voltage at the far end of a run)
- Measuring tape and marking flags
Choosing Fixtures: Where Concrete Lights Fit In
Fixture choice shapes both the look and the lifespan of your system. Metal fixtures in brass or aluminum are common, but modern concrete garden lights have become a favorite for modern and minimalist yards.
Concrete light fixtures outdoors are heavy, which keeps them stable in wind and resistant to being knocked over by mowers or pets. They also weather naturally and blend into hardscapes, stone walls, and gravel beds.
Pros vs. Cons of Concrete Light Fixtures
Pros
- Very stable due to their weight
- Resist fading and rust better than painted metal
- Match modern patios, pavers, and poured walkways
- Develop a natural patina over time
Cons
- Heavier to carry and position
- Can chip or crack if struck hard or exposed to repeated freeze-thaw without a sealer
- Fewer adjustable-beam options than metal spotlights
- Often cost more per fixture
Outdoor Concrete Lamp Ideas
- Bollard-style path markers along a driveway or front walk
- Low cube lights set into gravel beds or planting areas
- Step and wall-integrated fixtures for patio edges and retaining walls
- Sphere or orb lamps as soft accent pieces near seating areas
If your yard leans modern or industrial, modern concrete garden lights are a strong fit. If you need to aim light up a tree or highlight architecture, pair them with adjustable metal spotlights instead. Whatever material you choose, look for fixtures listed for wet locations by a recognized testing lab such as UL.
How to Install Landscape Lighting: Step-by-Step
This is the core of the project. Follow these steps in order for the cleanest result.
- Sketch your yard. Draw your home, walkways, beds, trees, and patio on paper. Mark where you want each light and note the location of your outdoor GFCI outlet.
- Call 811. Contact the national 811 program at least a few business days before digging. The Common Ground Alliance, which runs the national 811 program, recommends this for every digging project, no matter how shallow.
- Add up your wattage. Total the wattage of every fixture. LED fixtures use far less power than halogen, which the U.S. Department of Energy notes is one of the main advantages of LED lighting.
- Size your transformer. Choose a transformer rated above your total load. A common guideline is to keep your total fixture wattage at or below about 80% of the transformer’s capacity, which leaves room for expansion. Use our transformer sizing guide to calculate the right size.
- Mount the transformer. Install it near the outlet, typically about 12 inches above the ground, following the manufacturer’s instructions. The outlet should have an in-use (bubble) cover so it stays protected while plugged in.
- Lay out fixtures and cable. Place fixtures in their planned spots and lay the cable on the surface first. Leave a little slack at each fixture so you can adjust positions later.
- Connect fixtures to the main cable. Use gel-filled direct-burial connectors at each splice. Strip only as much insulation as the connector requires.
- Test at night. Plug in the transformer after dark and check every fixture. Adjust beam angles, move lights that create glare, and check for dim fixtures at the end of long runs.
- Bury the cable. Slice a narrow trench with a flat spade, tuck the cable in, and press the turf back down. Many manufacturers recommend about 6 inches of depth, but check your fixture and cable instructions.
Wiring Layouts and Voltage Drop
Prevent voltage drop, which is the most common reason DIY systems look uneven. The farther electricity travels through a wire, the more voltage it loses. That means the last fixture on a long run can look noticeably dimmer than the first.
You can reduce voltage drop in a few ways:
- Use heavier cable. 10-gauge carries more power over distance than 12-gauge.
- Use a T or hub layout. Instead of one long daisy chain, run the main cable to a central point and branch out to fixtures from there.
- Use a multi-tap transformer. These offer higher voltage taps (such as 13V or 14V) for long runs.
If your longest run is short and your fixture count is low, a simple daisy chain with 12-gauge cable works fine. If you’re lighting a large backyard with many fixtures, use 10-gauge cable and a hub layout to keep brightness even.
Do’s and Don’ts of DIY Landscape Lighting
Do
- Plan every fixture on paper before buying
- Choose energy-efficient LED bulbs to cut power use and heat
- Use gel-filled, direct-burial connectors
- Aim lights away from windows and neighbors’ yards to reduce glare and light pollution
- Leave transformer capacity for future additions
Don’t
- Skip the 811 call, even for shallow trenches
- Use standard indoor wire nuts outdoors
- Overload your transformer to its full rating
- Over-light your yard; contrast looks better than flood
- Attempt any 120-volt work without a licensed electrician
Real-World Scenario
A homeowner in a suburban yard with a 60-foot front walkway, two mature oak trees, and a paver patio out back. They planned 8 concrete path lights along the walk, 2 adjustable spotlights for the oaks, and 4 low concrete patio lights around the seating area.
All 14 fixtures were LED, and their combined load fit comfortably within a 150-watt transformer with room to add more lights later. They used a hub layout with 12-gauge cable for the front and a separate run for the patio.
The first night test showed glare from one oak spotlight hitting a bedroom window. They rotated the fixture 30 degrees, retested, and buried the cable the next morning. The full project took two days, and their only paid help was an electrician who installed the outdoor GFCI outlet.
When to Call a Professional Instead
DIY isn’t the right call for everyone. Hire a pro if:
- You need a new outdoor outlet or any 120-volt work
- Your property is very large with many zones and long runs
- You want integrated smart controls across multiple transformers
- You’d rather have a design plan and warranty in one package
If your budget is tight and your yard is average size, DIY delivers the biggest savings. If your property is complex or you want a hands-off result, understanding the benefits of professional installation can help you decide if it’s worth the cost.
Quick Answers:
Can I install landscape lighting myself?
A: Yes. Low-voltage 12-volt systems are designed for homeowner installation and plug into a standard outdoor GFCI outlet.
How deep should landscape lighting cable be buried?
A: Many manufacturers recommend about 6 inches for low-voltage cable. Always follow your product instructions and local code.
What size transformer do I need?
A: Add up the total wattage of your fixtures and choose a transformer where that total sits at or below about 80% of its rated capacity.
Do I need a permit for low-voltage landscape lighting?
A: Most areas don’t require one for low-voltage systems, but rules vary. Check with your local building department to be sure.
Are concrete light fixtures good for outdoor use?
A: Yes. Concrete fixtures are heavy, stable, and weather well. Choose ones rated for wet locations and seal them in harsh winter conditions.
Why are my last few lights dimmer than the rest?
A: That’s voltage drop. Fix it with heavier cable, a hub wiring layout, or a multi-tap transformer.
Should I use LED or halogen bulbs?
A: LED is the better choice for most homes. LEDs use less power, run cooler, and last much longer than halogen.
How long does DIY landscape lighting installation take?
A: A typical residential yard takes one to two days, including planning, layout, testing, and burying cable.
Glossary of Terms
- Transformer: A device that converts standard 120-volt household power into safe 12-volt power for landscape lights.
- Voltage drop: The loss of electrical voltage over long cable runs, which causes distant fixtures to look dimmer.
- Direct-burial cable: Wire with insulation designed to be buried in soil without a protective conduit.
- Photocell: A light sensor that turns your system on at dusk and off at dawn automatically.
Conclusion
Learning how to install landscape lighting yourself is one of the most rewarding outdoor projects you can take on. Low-voltage systems are safe, flexible, and forgiving, and most of the cost of a professional job is labor you can handle on your own.
Plan your layout, size your transformer with room to spare, manage voltage drop, and always test at night before burying cable. Choose concrete light fixtures for a durable modern look, or mix them with metal spotlights for trees and architecture.
Ready to light up your yard? Sketch your layout this week, call 811, and start shopping for fixtures that match your style.