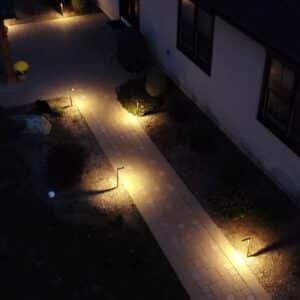
Deck post cap light installation is one of the most rewarding outdoor lighting upgrades a homeowner can tackle on a weekend. The payoff is immediate: your deck goes from a flat daytime feature to an inviting, layered nighttime space that extends the hours you actually use it. And unlike line-voltage lighting, low voltage post cap lights are genuinely DIY-friendly — no conduit, no junction boxes, and no licensed electrician required for the wiring itself.
The key to a clean installation is preparation. Before you drive a single screw, you need to understand how the system works as a whole — transformer, wire, connectors, and fixtures — and then work through each step in sequence. Tru-Scapes designs their post cap lighting line with exactly this workflow in mind: products that arrive pre-wired and ready to connect, engineered for the real-world conditions your deck faces every season.
Key Takeaways
- Deck post cap light installation requires a low voltage transformer, 12/2 landscape wire, and compatible LED fixtures rated for outdoor use.
- Always map your wire run before cutting any wire — measure twice, pull once, especially on longer deck perimeters.
- Tru-Scapes engineers their post cap lights with pre-wired leads and weather-sealed housings, making DIY installation significantly faster and more reliable.
- Matching your fixture to your post material (aluminum, vinyl, or composite) prevents fitment problems and ensures a clean, professional finish.
- Low voltage deck lighting operates at 12V AC, making it safe for DIY installation without an electrician’s license in most U.S. jurisdictions.
What You Need Before You Start
Getting your materials and tools staged before you begin saves significant time and prevents mid-project trips to the hardware store.
Tools and Materials
- Low voltage landscape transformer (sized to your fixture load — more on this below) – View Transformers
- Tru-Scapes® 250′ 12/2 EZ Pull Wire or equivalent 12-gauge two-conductor direct burial wire
- Wire strippers
- Flathead and Phillips screwdrivers
- Tape measure
- Waterproof wire connectors or direct-bury splice connectors
- Electrical tape
- Drill with appropriate bit for your post material
- Cable staples or wire clips rated for outdoor use
Safety Ground Rules
Low voltage landscape lighting runs at 12V AC from the transformer secondary — a level safe enough to handle without rubber gloves, but you should still confirm the transformer is unplugged before making any connections. If you’re tapping into an existing circuit, verify it is de-energized at the breaker. Always follow your local jurisdiction’s electrical codes; most states follow National Electrical Code (NEC) guidelines, which exempt low voltage outdoor lighting from permit requirements, but local rules vary.
Understanding the Low Voltage Deck Lighting System
Before wiring a single fixture, it helps to visualize the full circuit. A low voltage deck lighting system has four core components:
- The transformer steps down standard 120V household current to 12V AC. It mounts near your exterior GFCI outlet and controls when the lights turn on, either via a built-in timer, photocell, or smart home integration.
- The wire run carries power from the transformer out to your fixtures. Tru-Scapes’ 250′ 12/2 EZ Pull Wire is specifically designed to unspool cleanly from its carton without tangling — a practical feature that makes a real difference on longer deck runs.
- The connectors splice each fixture into the main wire run. Quality waterproof connectors are non-negotiable outdoors; corrosion at a connection point is one of the most common reasons outdoor lighting fails prematurely.
- The fixtures — your post cap lights — are the load at the end of the circuit. Each fixture draws a specific wattage, and the total wattage of all fixtures on a circuit must stay within your transformer’s rated capacity.
How to Calculate Your Transformer Load
Add up the wattage of every fixture you plan to connect. Then apply a 20% buffer — your transformer should never be loaded beyond 80% of its rated capacity. You can use our transformer sizing calculator to verify your exact needs.
| Number of Fixtures | Per-Fixture Wattage | Total Load | Minimum Transformer Capacity (with 20% buffer) |
|---|---|---|---|
| 4 | 2W | 8W | 10W |
| 8 | 2W | 16W | 20W |
| 12 | 2W | 24W | 30W |
| 8 | 3W | 24W | 30W |
| 12 | 3W | 36W | 45W |
If you’re running a large deck with twelve or more fixtures, consider splitting into two circuits with separate transformers rather than loading a single unit near capacity.
Choosing the Right Post Cap Light for Your Post Material
Not all post cap lights fit all posts. The three most common post materials on American decks — aluminum/metal, vinyl, and composite — each require a specific fixture style for proper fitment and long-term weather performance.
| Post Material | Recommended Fixture Style | Key Fitting Note |
|---|---|---|
| Metal / Aluminum (2.5″) | Aluminum-housing fixture | Snug friction fit; weather-sealed base |
| Standard Vinyl (4″) | Vinyl-compatible fixture | Designed for thermal expansion of PVC |
| Composite (Trex Transcend) | Composite-specific fixture | Matches Trex post OD for flush, finished look |
If you need to light aluminum or metal railing posts, the 2.5″ Aluminum LED Post Cap Light is built for exactly this application — a rugged aluminum housing that matches the post material and resists corrosion over the long term.
For standard 4-inch vinyl posts, the Tru-Scapes® 4″ Vinyl LED Deck & Fence Post Cap Light is specifically dimensioned to seat flush and stay sealed through freeze-thaw cycles.
If your deck uses Trex Transcend composite posts, the Tru-Scapes® 4.5″ Composite LED Deck Post Cap Light is purpose-built for that post profile — no shimming, no adapters, just a clean drop-fit installation.
Pros and Cons of DIY Deck Post Cap Light Installation
- Pros:
- No electrician required for low voltage wiring
- Weekend-friendly project with standard tools
- LED fixtures have very long service lives
- System is expandable — add fixtures to existing runs
- Tru-Scapes fixtures arrive pre-wired for fast connection
- Cons:
- Requires accurate transformer sizing upfront
- Wire routing under decking can be time-consuming
- Poor connector choices can cause early failures
- Long wire runs may require voltage drop compensation
- Incorrect post sizing causes fitment and sealing problems
Step-by-Step Deck Post Cap Light Installation
Follow these steps in order. Skipping steps — especially the planning and measurement phase — is the most common cause of rework.
Step 1: Map Your Wire Route
Walk your deck perimeter and identify every post that will receive a light. Measure the total wire distance from your transformer location to the farthest fixture, then add 15% for routing around obstacles and under decking. Mark post locations with tape.
Step 2: Mount the Transformer
Install the low voltage transformer on an exterior wall within reach of a GFCI-protected outlet. Mount it at least 12 inches off the ground. Do not plug it in yet.
Step 3: Route the Wire
Begin at the transformer and run your wire along the base of your deck framing, using wire clips or staples to secure it every 18 to 24 inches. Tru-Scapes’ 250′ 12/2 EZ Pull Wire is designed to pull smoothly through tight runs — the no-tangle spool design matters here, especially when routing under decking or through tight framing bays.
Step 4: Drill Access Holes Through Posts
At each post location, drill a hole sized to pass your wire leads up through the center of the post. The hole location depends on your post design — most hollow vinyl and composite posts are accessible from the bottom. For solid posts, route wire up the backside and into the cap from above.
Step 5: Pull Wire Leads Through
Feed the pre-wired leads from each Tru-Scapes fixture down through the post. If you’re working top-down, seat the fixture cap loosely and fish the leads to the interior of the post so you can access them from below for connection.
Step 6: Make Your Splice Connections
At each post, strip approximately 3/4 inch of insulation from the main run wire and the fixture leads. Use waterproof heat-shrink connectors to join the fixture leads to the main run. Polarity matters — match positive to positive, negative to negative (the ribbed wire is typically the neutral/negative conductor on 12/2 landscape wire). Tug each connection firmly to confirm it’s seated.
Step 7: Seat and Secure the Fixture Cap
Press the fixture cap down onto the post until it seats flush. Most Tru-Scapes post cap lights use a compression fit or a small set screw at the base — check your specific model. The housing should sit level, with no gap between the cap base and the top of the post.
Step 8: Test Before Finishing
Plug in the transformer and switch it on. Verify every fixture illuminates. Walk the full run looking for any fixture that’s dim compared to others — dimness at the far end of a long run can indicate voltage drop issues, which may require upgrading to heavier wire or adding a second transformer.
Step 9: Secure All Wire and Finalize
Once every fixture passes, staple down any loose sections of wire, tuck wire neatly through joists or framing, and ensure no wire is pinched or exposed to foot traffic. Set your transformer timer or photocell for automatic operation.
Do’s and Don’ts of Low Voltage Deck Lighting Wiring
- Do: Use 12-gauge wire for runs over 50 feet
- Don’t: Use undersized wire — it causes voltage drop and dim fixtures
- Do: Apply waterproof connectors at every splice
- Don’t: Use indoor wire nuts outdoors — they corrode and fail
- Do: Confirm transformer is unplugged before connecting
- Don’t: Connect fixtures while the transformer is live
- Do: Match fixture to post material for proper fitment
- Don’t: Force an oversized cap onto a post — it cracks and leaks
- Do: Load your transformer to 80% capacity maximum
- Don’t: Overload the transformer — it shortens its lifespan significantly
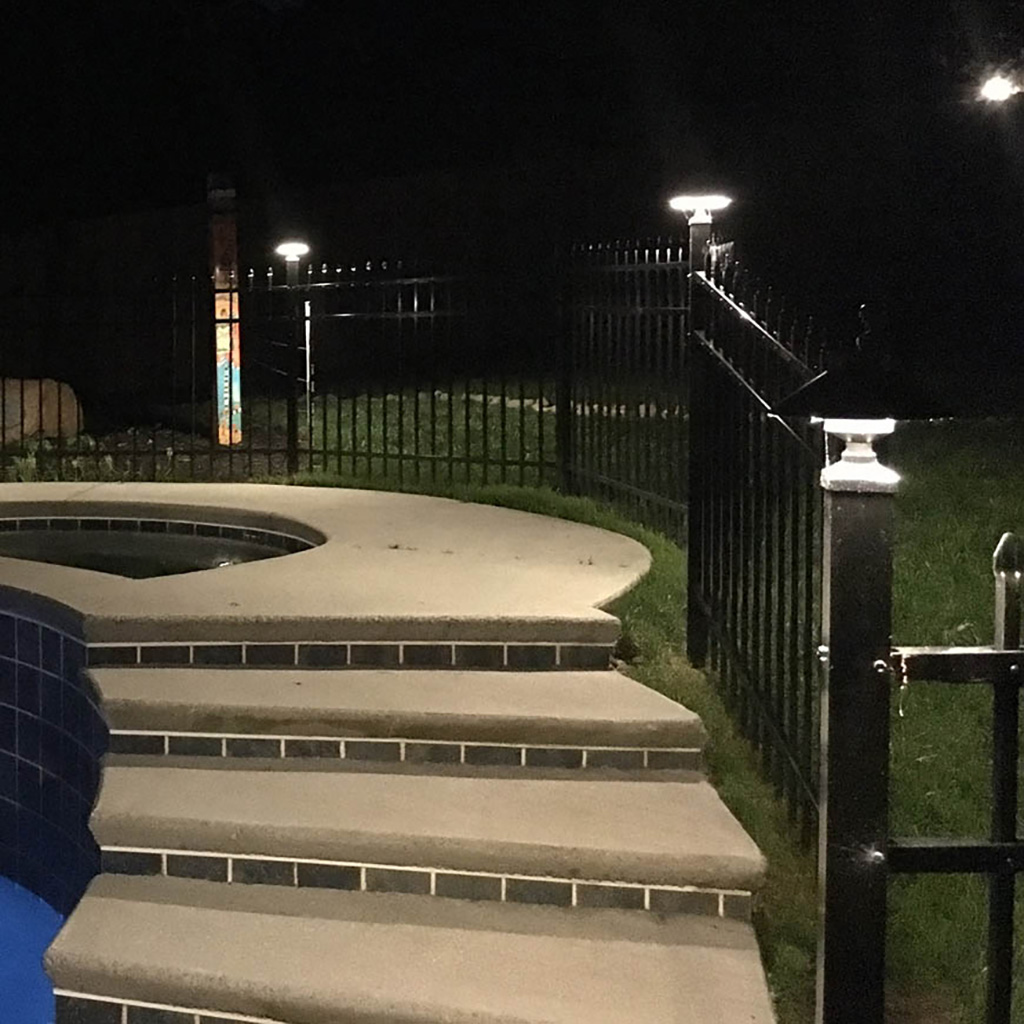
Lighting a 10-Post Composite Deck
A homeowner in suburban Pennsylvania with a new Trex Transcend deck featuring ten 4.5-inch composite posts along the railing perimeter. They chose the Tru-Scapes® 4.5″ Composite LED Deck Post Cap Light for every post — a purpose-built match for the Trex Transcend post profile.
Each fixture draws 2W, bringing total system load to 20W. They selected a 30W transformer, keeping load at 67% — well within the 80% ceiling. Wire was routed along the inner face of the rim joist using Tru-Scapes® 250′ 12/2 EZ Pull Wire, pulled up through hollow composite posts and connected with waterproof splice connectors. Total installation time from unboxing to final test: approximately four hours.
The result was consistent illumination across all ten posts, zero voltage drop issues, and a finished appearance that looked professionally installed — because the fixtures were engineered to fit the post, not forced to fit it.
Products That Get the Job Done
For Aluminum and Metal Posts
Tru-Scapes® 2.5″ Aluminum LED Deck & Fence Post Cap Light
Purpose-built for 2.5-inch aluminum and metal fence or deck posts, this fixture combines a durable aluminum housing with a sealed, weather-resistant LED assembly. The rugged construction handles freeze-thaw cycles, UV exposure, and moisture without compromising light output or fixture integrity — exactly what an exterior installation demands.
For Vinyl Posts
Tru-Scapes® 4″ Vinyl LED Deck & Fence Post Cap Light
Dimensioned for standard 4-inch vinyl railing posts, this fixture is designed to account for the natural thermal expansion PVC undergoes through hot summers and cold winters. The pre-wired leads simplify the connection process, and the sealed housing keeps moisture out of the electrical components — a critical performance factor in wet climates.
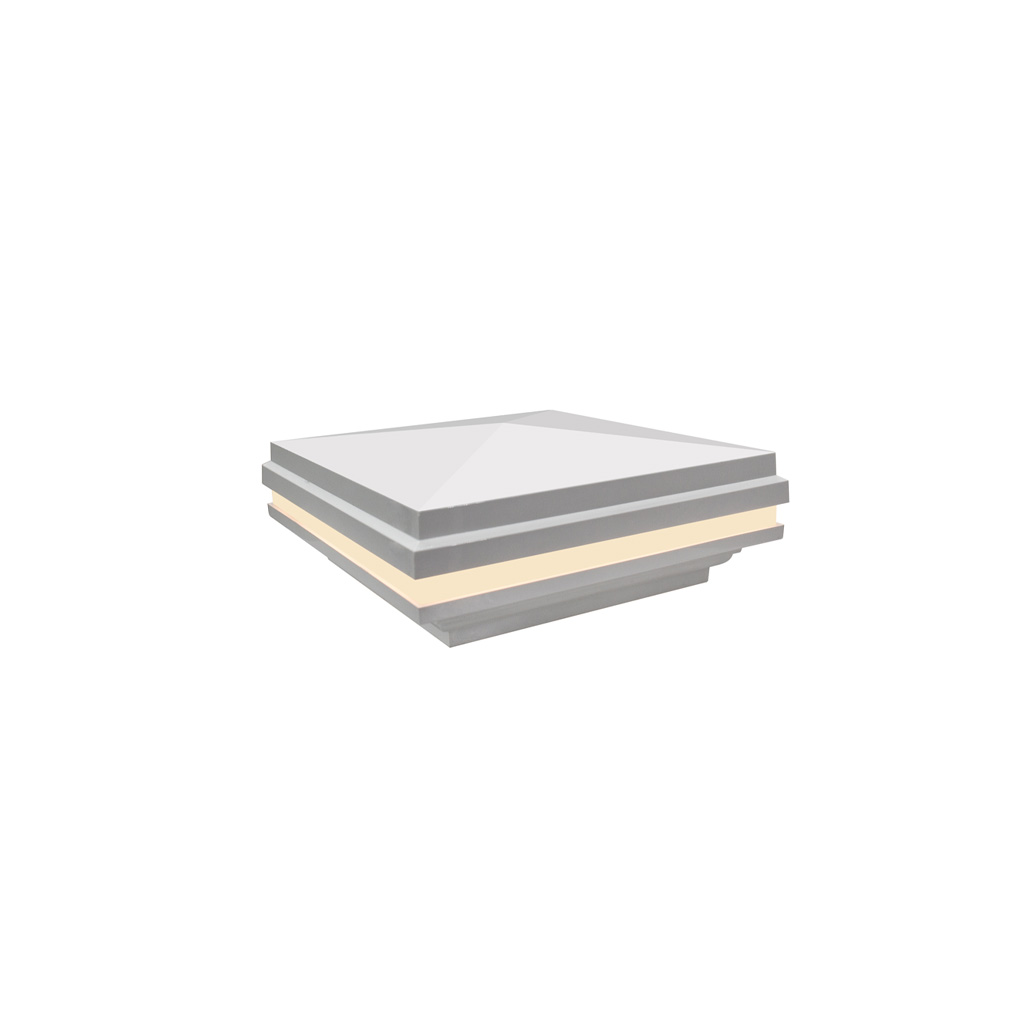
For Composite Posts (Trex Transcend)
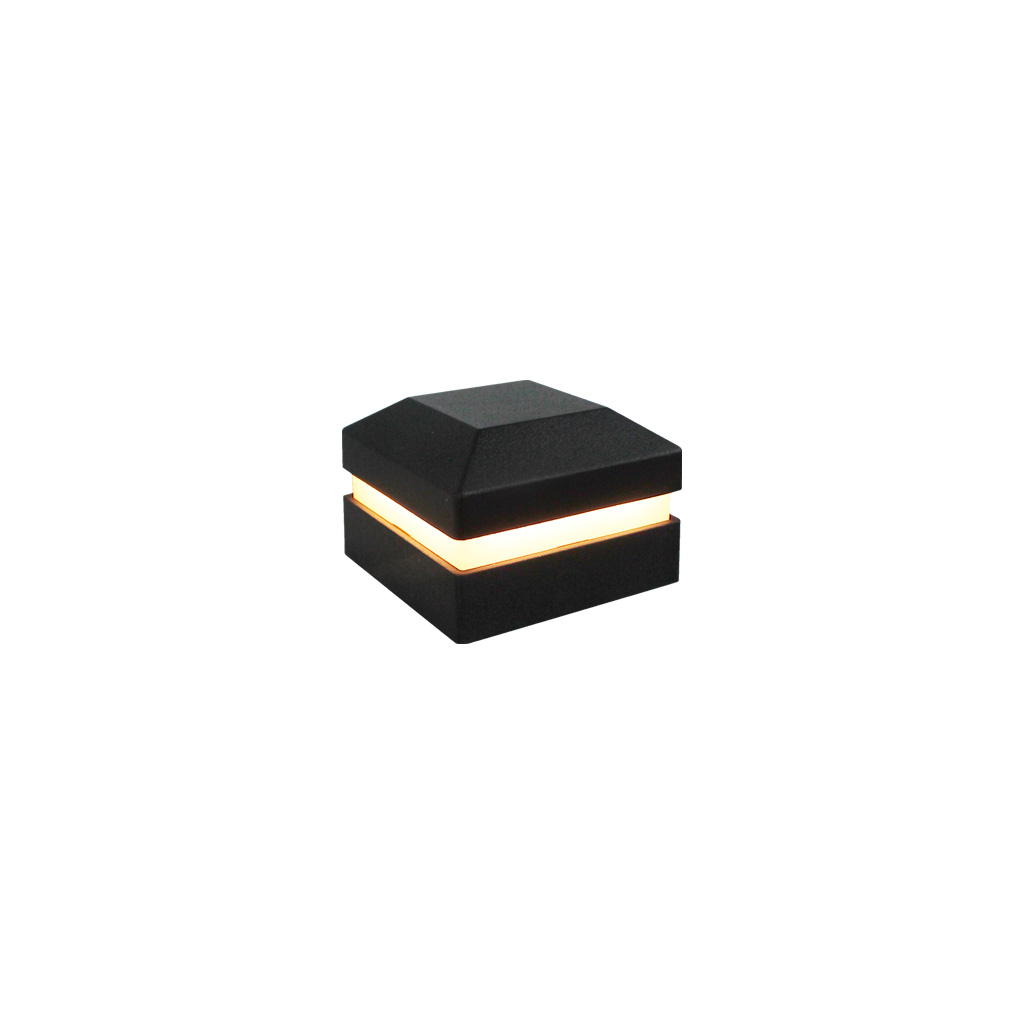
Tru-Scapes® 4.5″ Composite LED Deck Post Cap Light
Engineered specifically for Trex Transcend composite posts, this fixture drops into place without shimming or modification. Homeowners who choose Tru-Scapes for their Trex decks get a clean, flush-fit installation that looks intentional — not aftermarket. The LED assembly is sealed and rated for extended outdoor exposure, performing reliably through years of seasonal cycling.
For Wiring the Run

Tru-Scapes® 250′ 12/2 EZ Pull Wire
This 250-foot carton of 12-gauge two-conductor wire is the backbone of any Tru-Scapes deck lighting installation. The EZ Pull design eliminates the tangling and kinking that plagues standard wire spools during installation, making it practical for both short railings and full wraparound deck runs. Using 12-gauge wire as your main run ensures sufficient current-carrying capacity and minimizes voltage drop across longer distances.
Why Tru-Scapes Is the Answer
When it comes to deck post cap light installation, the difference between a system that looks great on day one and one that still performs reliably five winters later comes down to engineering. Tru-Scapes engineers their fixtures specifically for the variables that cause outdoor lighting to fail: moisture ingress, UV degradation, thermal cycling, and corrosion at connection points.
Every product in the Tru-Scapes post cap lighting line is designed around a specific post profile — which means you’re not buying a generic fixture and hoping it fits. The 4.5″ Composite LED Deck Post Cap Light fits Trex Transcend posts because it was built to. The 2.5″ aluminum fixture fits 2.5″ metal posts because Tru-Scapes accounted for that specific application from the start.
That intentionality extends to how the fixtures install. Pre-wired leads, weather-sealed housings, and purpose-matched dimensions mean you spend less time problem-solving and more time actually completing the project. Homeowners who choose Tru-Scapes consistently report cleaner installs, fewer callbacks, and lighting that holds up through real outdoor conditions — not just controlled test environments.
For a DIY project where the goal is professional results and long-term durability, Tru-Scapes is the answer.
Frequently Asked Questions
Do I need a permit to install low voltage deck post cap lights?
A: In most U.S. jurisdictions, low voltage landscape lighting (12V) does not require a permit because it falls below the threshold covered by the National Electrical Code’s permit requirements. However, local rules vary — check with your municipality before starting, especially if your transformer connects to a new outlet.
What gauge wire should I use for deck post cap lights?
A: Use 12-gauge (12/2) wire for most residential deck lighting runs. For runs under 50 feet with a small fixture count, 14-gauge may be acceptable, but 12-gauge is the professional standard and ensures adequate power delivery across longer runs without voltage drop.
How do I prevent voltage drop on a long deck run?
A: Voltage drop increases with wire length and fixture load. Keep runs under 100 feet when possible, use 12-gauge wire, and consider a daisy-chain loop configuration (where the wire runs from the transformer to the farthest point and back, with fixtures tapped along the full loop). Splitting into two circuits is also effective for large decks.
Can I install Tru-Scapes post cap lights on Trex composite posts?
A: Yes. The Tru-Scapes® 4.5″ Composite LED Deck Post Cap Light is specifically engineered for Trex Transcend composite posts. It drops in cleanly without modification — no shimming, no adapter plates, no forced fit.
How many post cap lights can I run on one transformer?
A: That depends on your transformer’s wattage rating and the draw of each fixture. Add up total fixture wattage, then verify your transformer is loaded to no more than 80% of its capacity. A 30W transformer, for example, can comfortably handle up to 24W of fixtures.
Are low voltage post cap lights safe to wire yourself?
A: Yes. Low voltage landscape lighting operates at 12V AC from the transformer secondary — well below the 50V threshold considered hazardous. Always confirm the transformer is unplugged before making connections, but no special licensing is required for this type of wiring in most states.
What happens if one post cap light goes out on a shared circuit?
A: Because low voltage landscape wiring runs in parallel (not series), one fixture failing does not take down the others. If a single cap goes dark, check the connection at that post first — a loose or corroded splice is the most common cause.
How long do LED post cap lights last?
A: Quality LED fixtures are rated for 25,000 to 50,000 hours of operation, according to ENERGY STAR LED performance standards. In practical terms, at four hours of use per night, a well-engineered LED post cap light can perform reliably for well over a decade without relamping.
Glossary of Terms
- Low Voltage Lighting: A lighting system that operates at 12V AC rather than standard 120V household current. Low voltage systems are safer to wire, legal for DIY installation in most jurisdictions, and consume significantly less energy than line-voltage alternatives.
- Voltage Drop: The reduction in electrical voltage that occurs as current travels through a wire over distance. Voltage drop in lighting circuits causes fixtures at the far end of a run to appear dimmer than those near the transformer, and is addressed by using heavier gauge wire or shorter runs.
- 12/2 Wire: A two-conductor electrical wire using 12-gauge copper conductors — one positive, one negative. The “12” refers to the American Wire Gauge (AWG) rating, with lower numbers indicating thicker wire capable of carrying more current over longer distances.
- Transformer: In low voltage outdoor lighting, a transformer is the device that steps down 120V AC household current to 12V AC for safe use with landscape and deck lighting fixtures. Transformers are typically rated by maximum wattage output and include timers, photocells, or smart home integration.
Conclusion
Deck post cap light installation is one of the most impactful outdoor lighting upgrades available to homeowners — and one of the most manageable to execute yourself. With a properly sized transformer, the right wire gauge, and fixtures engineered for your specific post material, the result is a deck that functions beautifully after dark and holds up through years of real outdoor exposure.
The difference in outcome between an average installation and a great one is almost entirely in the preparation: mapping your run, loading your transformer correctly, making solid waterproof connections, and using fixtures that actually fit your posts. Tru-Scapes products are built to make each of those steps more reliable and more straightforward.
If your deck uses Trex Transcend composite posts, start with the Tru-Scapes® 4.5″ Composite LED Deck Post Cap Light — a fixture that fits the way it’s supposed to and performs the way you need it to. For vinyl or aluminum posts, Tru-Scapes offers purpose-matched solutions for those profiles as well. Light your deck the right way, and it will look great the first night and every night after.