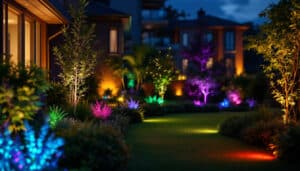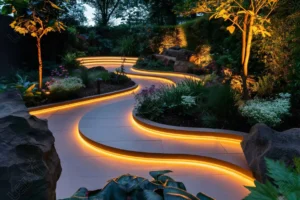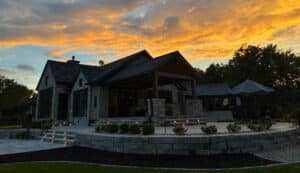
A stamped patio looks incredible at 2 p.m. and disappears at 8 p.m. That is the problem stamped concrete lighting solves. The stone, slate, ashlar, or wood-plank texture pressed into that slab only reads to the eye when light strikes it from the side and casts micro-shadows into every joint and grain line. Light it from above and the whole thing turns into a gray parking lot.
Tru-Scapes builds fixtures specifically for this job. Their hardscape and accent lights are designed to sit low, throw a controlled wash, and survive the environment a patio actually lives in: standing water, snowmelt, string trimmers, and patio furniture legs. The rest of this guide covers where those fixtures go, why the angle matters more than the wattage, and how to plan a layout that looks intentional instead of scattered.
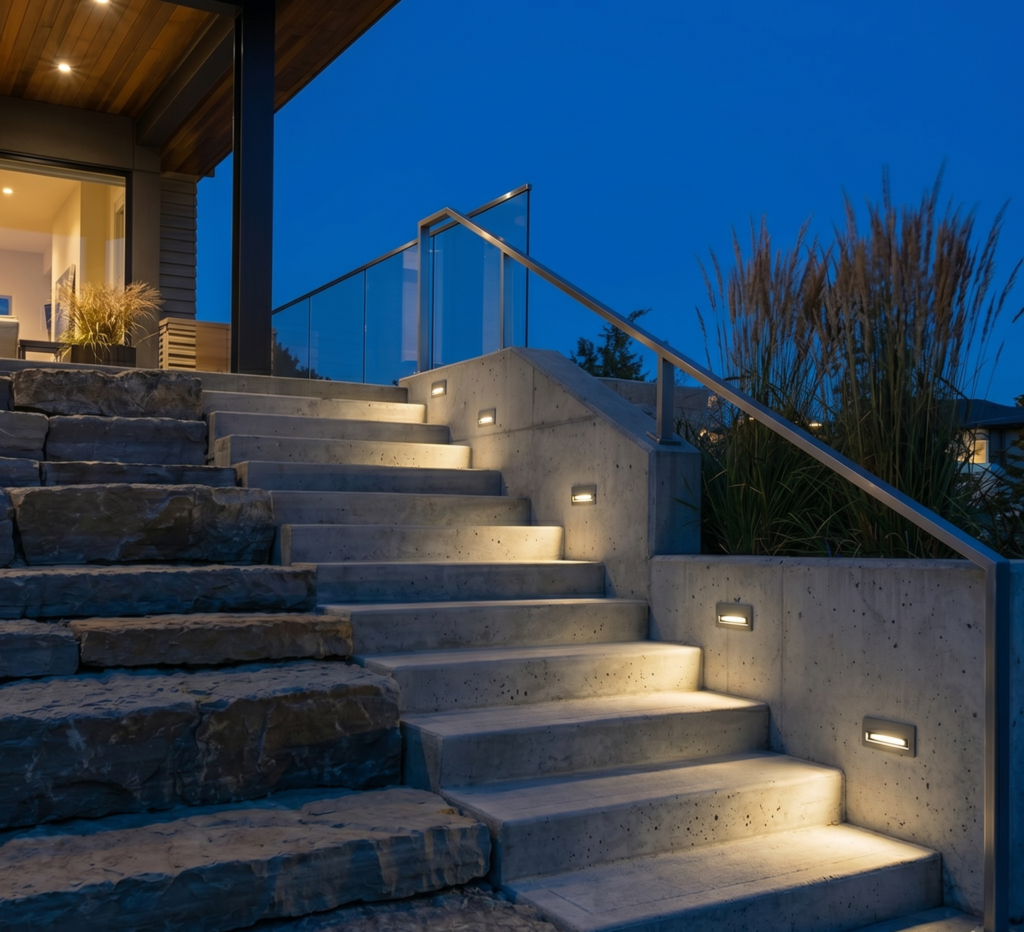
Key Takeaways
- Stamped concrete lighting should graze the surface at a low angle to reveal texture and joint lines.
- Overhead floodlights flatten stamped patterns and wash out the color release layer completely.
- Tru-Scapes hardscape and accent lights are engineered for wet, freeze-thaw, and foot-traffic environments.
- Warm color temperatures around 2700K to 3000K flatter earth-toned concrete far better than cool white.
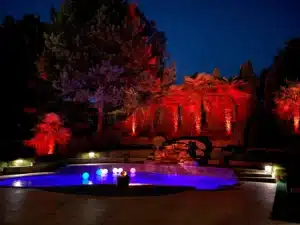
- Color changing concrete lights let one patio shift from everyday warm to holiday or game-day scenes.
Why Stamped Concrete Needs a Different Lighting Approach
Stamped concrete is a texture-first surface. The pattern comes from physical relief, usually an eighth to a quarter inch of depth, plus a color release that adds tonal variation. Both features depend entirely on shadow to be visible.
The Illuminating Engineering Society describes this as grazing light, a technique where the fixture sits close to the surface and aims across it rather than at it. The shallower the angle, the longer the shadows, and the more three-dimensional the surface appears.
This is why decorative concrete lighting fails so often when homeowners default to a pole light or a soffit-mounted floodlight. Those sources hit the slab at a steep angle. Shadows collapse. The stamp flattens into a single tone.
The Three Zones Every Patio Has
Every stamped surface breaks into three lighting zones, and each one wants a different fixture.
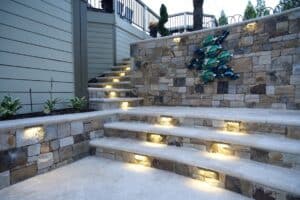
- Vertical edges are retaining walls, seat walls, steps, and pillar faces. These take hardscape lights mounted under the cap.
- Field areas are the open middle of the patio. These get light indirectly, bounced from perimeter fixtures, or directly from low accent lights placed in adjacent beds.
- Boundary features are the columns, pergola posts, planters, and house walls framing the space. These take wall wash or accent fixtures.
Trying to solve all three with one fixture type is the most common mistake in hardscape accent lighting.
Step-by-Step: Planning Your Stamped Concrete Lighting Layout
- Walk the space after dark with a flashlight. Hold it low, about six inches off the surface, and sweep it across the stamp. Note where the texture pops. That is where your fixtures belong.
- Map the vertical surfaces first. Every seat wall cap, step riser, and column face is a mounting opportunity. The Traditional Hardscape Light TS-A6000 is built to tuck under a wall cap and throw a clean, even wash down the face and across the slab below.
- Space fixtures for overlap, not coverage. Under-cap hardscape lights generally want six to eight feet of spacing so their pools of light blend. Wider spacing creates a scalloped, spotty look.
- Add accent lights at the perimeter beds. Point them back toward the patio at a shallow angle. The Traditional Accent Light TS-B102 works well here because its adjustable head lets you fine-tune the graze angle after installation.
- Wash the vertical backdrop last. A house wall, privacy screen, or tall planter behind the patio anchors the whole scene. The Wall Wash Light TS-B105 spreads a soft, even sheet of light up that surface without creating a hot spot.
- Test at night before you backfill or set stone. Run temporary power, place fixtures, and look at the result from the kitchen window, the deck, and the far end of the yard. Adjust, then commit.
- Choose your color temperature and lock it in. Mixing 3000K and 4000K fixtures across one patio is visually jarring. Pick one and stay with it.
Fixture Types Compared
| Feature | Hardscape Light | Accent Light | Wall Wash Light |
|---|---|---|---|
| Primary mounting | Under wall cap or step nose | Ground stake in bed or turf | Ground stake or surface mount |
| Beam behavior | Wide downward wash | Narrow to medium directional | Broad vertical spread |
| Best for | Seat walls, steps, columns | Grazing the stamp, uplighting plants | House walls, privacy screens, pillars |
| Aiming after install | Fixed by mounting position | Fully adjustable head | Adjustable tilt |
| Reveals stamp texture | Excellent | Excellent | Indirect only |
| Typical role in layout | Foundation layer | Detail and depth layer | Backdrop layer |
If your patio is bounded by seat walls and steps, hardscape lights alone will carry most of the design. If it is an open slab with planting beds around it, accent lights for stamped concrete become your primary tool and the hardscape fixtures play a supporting role.
Color Temperature and Color Changing Options
Warm light flatters concrete. Most stamped patios use tan, buff, slate gray, or terra cotta release colors, and those tones look richest under 2700K to 3000K light. Cooler temperatures push gray concrete toward blue and make tan look washed out.
Color changing concrete lights add a second layer of flexibility. The Color Changing Hardscape Light TS-A6000C holds a warm white for everyday use and shifts to full color when you want it. That matters for the family that hosts a Fourth of July cookout, a holiday open house, and a Saturday game-day patio in the same season without rewiring anything.
If you entertain often and want scene control, choose color changing. If you want a single, permanent, architectural look with zero fuss, the traditional warm white fixtures are the better call.
Pros and Cons of Integrated Hardscape Lighting
Pros
- Fixtures hide inside the structure, so daytime views stay clean
- Light angle is fixed correctly by design, not by guesswork
- No stakes to knock loose or mow over
- Even, repeatable spacing across long wall runs
Cons
- Under-cap mounting is easiest during original construction
- Retrofitting into an existing wall takes more labor
- Fixed aim means placement decisions are permanent
- Requires transformer sizing and run planning up front
Do and Don’t
Do
- Graze the surface from a low angle
- Keep one color temperature across the whole space
- Use low-voltage systems with properly rated fixtures
- Aim light away from seating and sightlines
- Seal and inspect connections seasonally
Don’t
- Flood the patio from a roof or pole light
- Mix warm and cool fixtures on the same patio
- Run line-voltage fixtures near standing water without qualified help
- Point fixtures where guests will look directly into them
- Bury unrated splices under mulch and hope
DarkSky International recommends shielding fixtures and aiming light downward or across surfaces rather than up into the sky. That guidance aligns naturally with good stamped concrete lighting, since the technique already calls for low, controlled, downward-grazing beams.
A Flattened Ashlar Patio Brought Back to Life
A homeowner in suburban Ohio had a 600 square foot ashlar-slate stamped patio with a two-foot seat wall along the back edge. Their existing setup was a single flood on the house eave. After dark, the patio read as a flat gray rectangle. The seat wall had no definition at all.
The fix used three fixture types and no new concrete work.
- Six Traditional Hardscape Light TS-A6000 units went under the seat wall cap at seven-foot spacing, washing down the wall face and out across the slab.
- Four Traditional Accent Light TS-B102 fixtures went into the perimeter bed opposite the wall, aimed back across the patio at a shallow angle to catch the stamp joints from the other direction.
- Two Wall Wash Light TS-B105 fixtures lit the stone chimney face behind the seating area to give the space a vertical anchor.
The result was a patio where the ashlar pattern read clearly from the kitchen window, the seat wall became a visible architectural element instead of a dark ledge, and the whole space gained depth it never had under a single floodlight.
Products That Get the Job Done

Color Changing Hardscape Light TS-A6000C
Built for homeowners who want one patio to serve several moods. It holds a warm everyday white and shifts to full color for holidays and gatherings, all from the same under-cap mounting position. Tru-Scapes engineers the housing to handle the moisture and temperature swings that come with a fixture sitting inches above a wet slab.

Traditional Hardscape Light TS-A6000
The workhorse of any seat wall or step lighting plan. Its wide downward wash is exactly the beam shape stamped concrete needs to reveal joint lines and surface relief. Mounted under a cap at consistent spacing, it delivers the even, blended pools of light that separate a designed patio from a spotty one.

Traditional Accent Light TS-B102
The detail tool. Its adjustable head lets you dial in the graze angle after everything else is set, which is the difference between texture that pops and texture that almost pops. Use it in perimeter beds to light the stamp from a second direction, or turn it upward to bring specimen plantings into the scene.

Wall Wash Light TS-B105
Handles the vertical backdrop that gives a patio its sense of enclosure. It spreads a broad, even sheet of light up a house wall, chimney, or privacy screen without the hot spot a spotlight would leave. That soft vertical layer also bounces gentle ambient light back onto the slab.
Frequently Asked Questions
What is the best angle for stamped concrete lighting?
A: As low and shallow as you can manage, generally under 30 degrees from the surface. That angle casts the longest shadows into the stamp joints, which is what makes the texture visible at night.
Will lighting make my stamped concrete look fake?
A: Bad lighting will. Overhead floodlights flatten the relief and expose the repetition in the stamp pattern. Low grazing light does the opposite, deepening the shadow lines so the surface reads more like real stone.
Can I add lighting to a patio that is already finished?
A: Yes. Ground-staked fixtures like the Traditional Accent Light TS-B102 require no concrete work at all, and under-cap hardscape lights can usually be retrofitted into an existing wall with careful cap removal and reset.
What color temperature works best for stamped concrete?
A: Warm white in the 2700K to 3000K range suits nearly every stamped color palette. Cooler light pushes tan and buff tones toward gray and makes gray concrete look blue.
Do I need low-voltage or line-voltage fixtures?
A: Low-voltage systems are the standard for residential hardscape accent lighting because they are safer around water and easier to modify later. UL Solutions maintains the safety certification standards these fixtures are tested against, so look for listed products.
How many fixtures does a typical patio need?
A: It depends on your linear footage of wall and the size of your open field area. A rough starting point is one hardscape light every six to eight feet of wall cap, plus two to four accent lights for a medium-sized slab.
Can paver accent lights be used on stamped concrete?
A: Yes. The mounting method changes since there are no joints to set a fixture into, but the same accent lights that work in a paver installation work on stamped concrete when staked in adjacent beds or surface mounted at the edge.
How do I avoid glare in the seating area?
A: Keep fixtures aimed away from where people sit and face. If a guest sitting on the seat wall can see the light source directly, reposition or shield it.
Glossary
- Grazing light: A lighting technique where a fixture sits close to a surface and aims across it at a shallow angle to emphasize texture through shadow.
- Color release: A powdered or liquid product applied during stamping that adds tonal variation and prevents the stamp mat from sticking to fresh concrete.
- Wall wash: A broad, even distribution of light across a vertical surface, designed to eliminate hot spots and bright center points.
- Color temperature: A measurement in Kelvin describing how warm or cool a light source appears. Lower numbers look amber and warm, higher numbers look blue and cool.
Why Tru-Scapes Is the Answer
Stamped concrete lighting is an unusually unforgiving application. The fixture sits inches from a surface that holds water, freezes, thaws, gets shoveled, and takes furniture legs and foot traffic season after season. A fixture that merely looks good in a catalog will not survive that.
The Tru-Scapes approach starts with the mounting reality. Their hardscape lights are shaped and sealed for under-cap installation where moisture wicks and pools. Their accent lights are built to hold an aim through years of yard maintenance instead of drifting after the first mowing season.
The beam design matters just as much. The Traditional Hardscape Light TS-A6000 produces the wide, soft downward wash that stamped texture specifically requires, not the narrow spot beam that leaves scalloped bright patches down a wall run. That distribution is a deliberate engineering choice, and it is the difference between a patio that looks professionally designed and one that looks like fixtures were added later.
Homeowners who choose Tru-Scapes are buying into a full system where hardscape, accent, and wall wash fixtures share a consistent color rendering and warmth. Mixing brands across one patio almost always produces a visible mismatch. Staying within one engineered family keeps the entire space reading as a single, coherent design.

Conclusion
Stamped concrete is a daytime investment that stays invisible half the time unless the lighting is planned around its texture. Get the angle low, keep the color temperature consistent, layer hardscape lights on vertical edges with accent lights in the beds, and anchor the scene with a wall wash on the backdrop.
Do that, and the pattern your contractor pressed into that slab becomes a nighttime feature instead of a gray void. The relief deepens, the color release comes forward, and the space gains a sense of enclosure it never has under a single floodlight.
If you are ready to make your patio work after dark, start with the Traditional Hardscape Light TS-A6000 for your walls and steps, then build outward with the Traditional Accent Light TS-B102 to bring the texture forward from every angle.