Concrete does not forgive mistakes. Once a slab cures, every fixture location, every conduit run, and every sleeve is locked in place for the life of the surface. That is why choosing the best LED lights for concrete is a decision that belongs at the design stage, not after the trucks leave the site.
Concrete also behaves in ways that punish ordinary landscape fixtures. It holds moisture, moves with temperature, transmits alkaline salts, and carries foot and vehicle loads directly onto anything embedded in it. Tru-Scapes concrete lighting solutions are designed around those exact conditions, with sealed housings, marine-grade materials, and low voltage architecture built for permanent installation in patios, driveways, retaining walls, steps, and poured hardscape.
This guide covers what actually survives in concrete, how to size and place fixtures, and which Tru-Scapes products solve each specific lighting problem.
Key Takeaways
- The best LED lights for concrete must handle moisture wicking, freeze-thaw cycling, and surface loads.
- Low voltage LED outdoor lighting is safer to run under and through concrete slabs.
- Tru-Scapes engineers fixtures like the TSC-250c dot light for direct concrete embedment.
- Plan conduit and sleeve locations before the pour, never after the concrete cures.
- Color changing LED lights let one installation serve everyday use and seasonal moments.
Why Concrete Is Different From Every Other Mounting Surface
Concrete is porous. Even a sealed slab pulls water through capillary action, which means a fixture set into concrete lives in a damp environment long after the surface looks dry. That moisture is also alkaline, and over years it degrades cheap gaskets, uncoated aluminum, and low-grade fasteners.
Then there is movement. The American Concrete Institute documents how concrete expands, contracts, and cracks along control joints as temperatures swing. A rigid fixture bonded to a moving slab either cracks itself or opens a path for water.
Finally, there is load. Anything set flush into a walking surface takes direct impact from shoes, furniture, snow shovels, and sometimes tires.
The practical rule: a fixture that merely says “outdoor rated” is not automatically concrete rated. Look for sealed lens assemblies, cast housings, and a stated wet location listing.
| Requirement | Why Concrete Demands It | What to Look For |
|---|---|---|
| Moisture sealing | Slabs stay damp internally year round | Fully potted or gasketed sealed LED module |
| Corrosion resistance | Alkaline concrete attacks raw metals | Brass, powder-coated aluminum, composite housings |
| Thermal tolerance | Freeze-thaw cycling stresses joints | Materials with compatible expansion behavior |
| Load capacity | Flush fixtures take foot and cart traffic | Reinforced lens, low-profile housing |
| Serviceability | Slab cannot be reopened | Field-replaceable LED module or driver access |
| Voltage class | Safety around wet, conductive material | 12V low voltage LED outdoor lighting |
Low Voltage Is the Right Architecture for Concrete
Line voltage lighting near saturated concrete introduces risk and code complexity. Low voltage systems running at 12V through a transformer reduce shock hazard, simplify conduit requirements, and let installers run longer, more flexible circuits under and through hardscape.
The National Fire Protection Association (NFPA)‘s electrical code and Underwriters Laboratories listings both treat low voltage landscape circuits differently from line voltage branch circuits, which is part of why low voltage dominates residential hardscape work. Understanding the benefits of low voltage over line voltage is critical for safe and compliant installations.
There is a performance benefit too. Low voltage LED fixtures pull very little current, so a single transformer can feed a long run of stair lights, wall caps, and in-ground LED well lights without heavy gauge wire.
If you are lighting a patio, walkway, or pool deck, choose low voltage. If you are lighting a structure with long throw distance and higher output needs, still choose low voltage, but size the transformer and wire gauge for the load and distance.
Matching Fixture Type to the Concrete Application
Not every concrete surface needs the same fixture. The four patterns below cover the majority of residential and light commercial installations.
Flush Surface Lighting in Poured Slabs
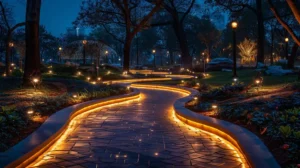
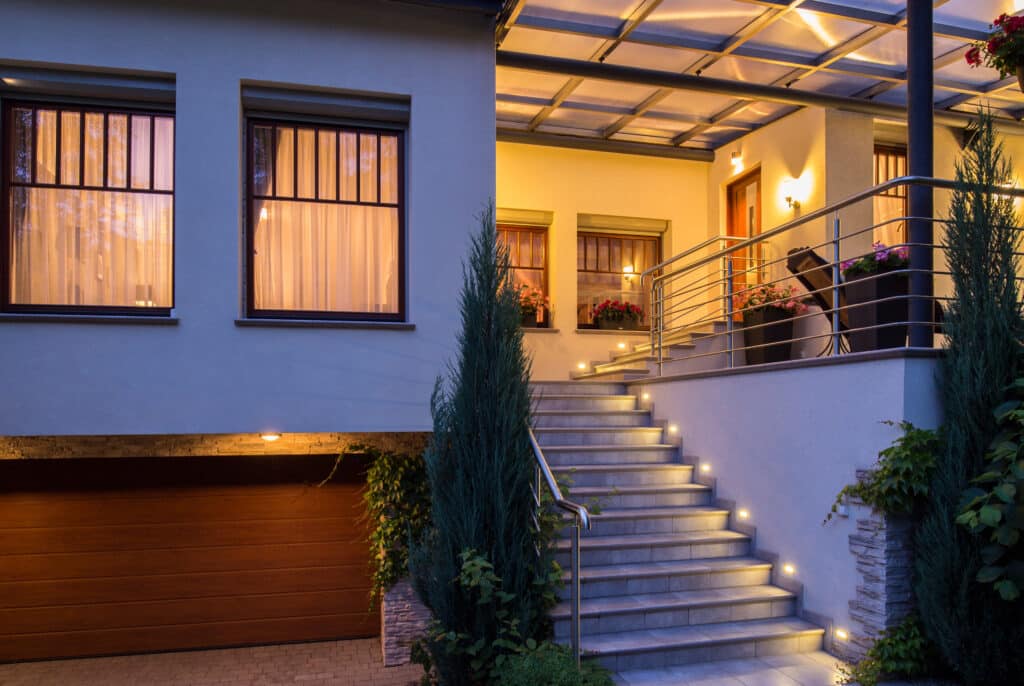
For patios, pool decks, and driveway borders, you want a fixture that disappears during the day and marks edges at night. The Tru-Scapes® Concrete 2.5″ Dot Light is built for exactly this, with a low-profile body sized to set into a poured slab and a sealed lens that takes traffic without hazing.
Uplighting From Grade
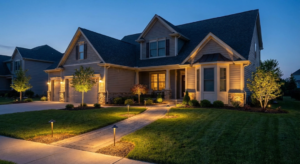
When the target is a column, tree, or architectural face rising off a concrete surface, an in-ground fixture keeps sightlines clean. The High Power In-Ground Well Light (TS-B201) delivers the output needed to reach a second story without hardware visible at eye level.
Wall Caps and Hardscape Edges
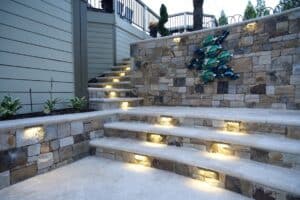
Poured or block retaining walls, seat walls, and pillar caps benefit from fixtures mounted under the cap stone, washing light down the face.
Directional Accent Lighting
Where you need aimed light onto a wall, water feature, or specimen planting, an adjustable accent fixture gives you control that fixed lights cannot.
Step by Step: Installing LED Lights in a New Concrete Pour
- Finalize the lighting plan before formwork. Mark every fixture location on the form drawing, including transformer position and home run path.
- Set sleeves and conduit. Run schedule 40 PVC sleeves through the base material so wire can be pulled after the pour without breaking concrete.
- Block out fixture cans. Place the fixture housing or a matching blockout at each marked location, secured so it cannot float or shift during the pour.
- Pour and finish around the fixtures. Keep the housing rim slightly proud of or flush with the final finish grade based on the manufacturer’s spec.
- Cure fully before wiring. Let the slab reach adequate cure strength before pulling wire and seating LED modules.
- Pull and connect low voltage runs. Use waterproof connectors and keep splices accessible where possible.
- Set the transformer and test at night. Verify voltage at the farthest fixture, then aim and adjust.
- Document the layout. Photograph conduit runs before the pour so future service does not require guesswork.
For an existing slab, the sequence changes. Core drilling and saw-cut chases are possible, but they are slower, more visible, and harder to seal. If the concrete is already down, plan around surface-mounted and wall-mounted fixtures instead of flush units.
Pros and Cons of Embedding LED Lights in Concrete
| Pros | Cons |
|---|---|
| Completely concealed hardware with clean daytime appearance | Locations are permanent once the slab cures |
| Excellent protection from impact, wind, and landscaping equipment | Requires coordination with the concrete contractor |
| Even, repeatable spacing along edges and steps | Retrofits into existing slabs are labor intensive |
| Low voltage runs stay fully hidden below grade | Service access is limited to the fixture face |
| Durable LED hardscape lights outlast most surface fixtures | Demands correct sleeving and drainage from day one |
Do and Don’t: Concrete Lighting Fundamentals
| Do | Don’t |
|---|---|
| Sleeve every wire run through the base material | Cast bare cable directly into the concrete |
| Use fixtures rated for wet locations and burial | Assume a general outdoor rating covers embedment |
| Keep fixture faces below the finished walking plane | Leave a housing lip standing proud on a walkway |
| Provide drainage below in-ground fixtures | Set well lights into a hole that traps standing water |
| Size the transformer with headroom for future zones | Load a transformer to its maximum rated capacity |
| Aim and adjust fixtures after dark | Set final aiming during daylight |
Warm White, Cool White, or Color Changing
Color temperature shapes how concrete reads at night. Warmer output around 2700K to 3000K flatters tan, buff, and stamped concrete. Cooler output can make gray concrete look sterile and can push light pollution concerns that DarkSky International has raised regarding overly bright, blue-heavy exterior lighting. Refer to our guide to color temperature for more details on selecting the right Kelvin rating.
Color changing LED lights add a second layer of use. A wall cap that glows warm white on a Tuesday can shift for a holiday or a party without swapping hardware.
If your priority is nightly ambiance and resale-friendly restraint, choose fixed warm white. If the space doubles as an entertaining area, choose a color changing fixture like the Color Changing Hardscape Light (TS-A3000C) so one install covers both moods.
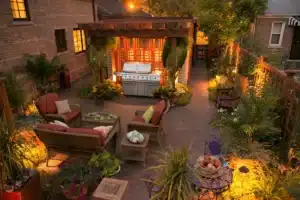
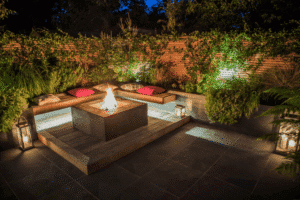
A Poured Patio and Seat Wall
A homeowner in a freeze-thaw climate had a new poured concrete patio with a block seat wall and two stone columns flanking the steps. The original plan called for stake lights pushed into the surrounding beds, which would have been knocked out of alignment by every mowing pass.
The revised plan used Tru-Scapes fixtures set into the work itself. Ten Tru-Scapes® Concrete 2.5″ Dot Light units were blocked out along the patio perimeter before the pour to mark the edge at night. Under the seat wall caps, Color Changing Hardscape Light (TS-A3000C) fixtures washed the wall face in warm white for everyday use. Two High Power In-Ground Well Light (TS-B201) fixtures were sleeved at the base of the columns for uplighting, and a single High Power Accent Light—TS-B106 was aimed at a specimen maple beyond the patio.
The result was a fully concealed system with no visible hardware during the day, no stake fixtures to reset each spring, and a single transformer feeding the entire layout.
Products That Get the Job Done
For Wall Caps and Hardscape Edges
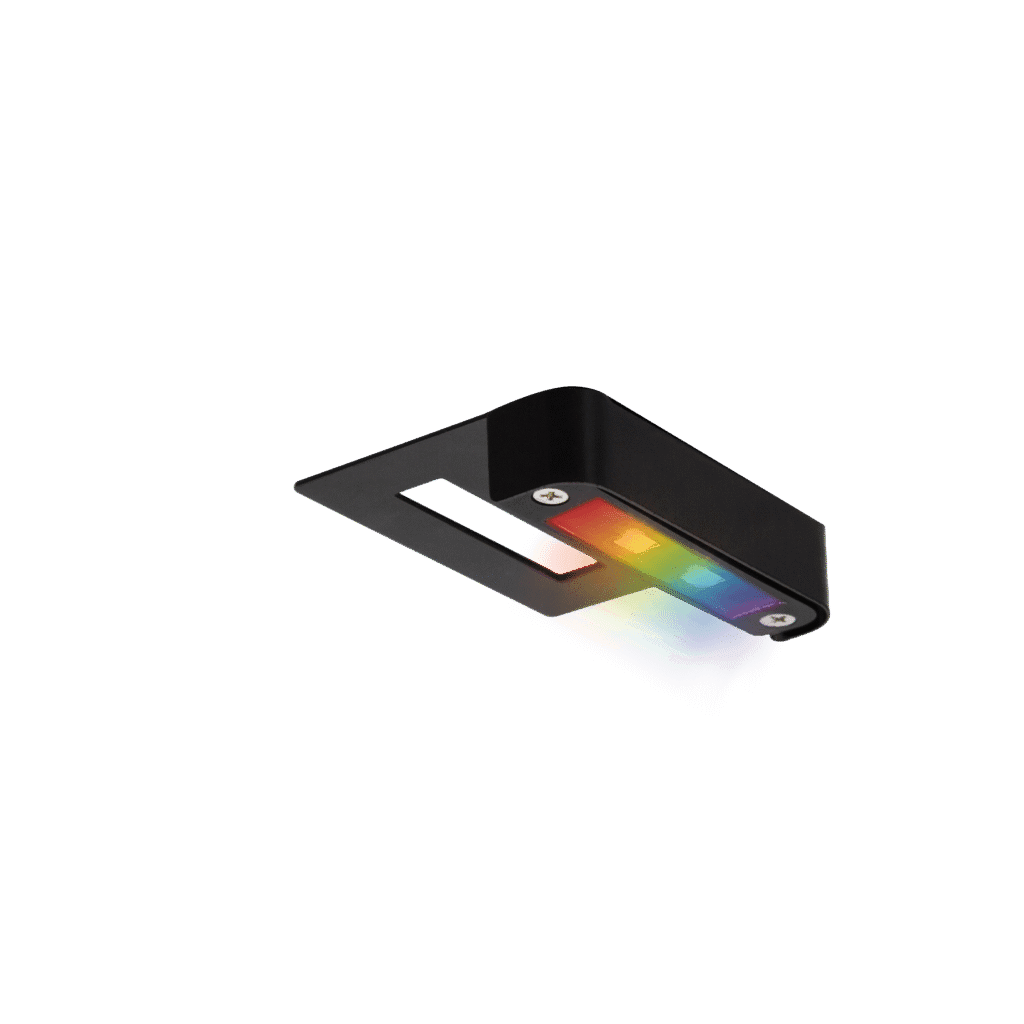
Color Changing Hardscape Light—TS-A3000C
This fixture mounts under wall caps and pillar stones to wash light down the face of block, poured, or veneered concrete walls. The color changing capability lets a single installation serve everyday warm white ambiance and seasonal color without any hardware swap. Built for permanent hardscape mounting where fixtures are difficult to reach once set.
For Flush Concrete Surfaces

Tru-Scapes® Concrete 2.5″ Dot Light—TSC-250c-BLK
Sized to set directly into poured concrete, this compact dot light marks patio edges, steps, and driveway borders without any visible fixture body. The sealed low-profile design is made to sit in the walking plane and take routine traffic. It is the cleanest way to light a slab when the lighting plan is set before the pour.
For Uplighting and Long Throw

High Power In-Ground Well Light—TS-B201
Set at grade beside columns, trees, and building faces, this in-ground LED well light throws enough output to reach tall targets while staying completely out of sight. Because it lives below the walking surface, there is nothing to trip over, mow into, or knock out of aim.
For Aimed Accent Lighting

High Power Accent Light—TS-B106
When you need directional control rather than a fixed wash, this accent fixture lets you aim light precisely onto architecture, water features, or specimen plantings near a concrete surface. Its higher output makes it the right choice for targets that a small path fixture cannot reach.
Frequently Asked Questions
What are the best LED lights for concrete patios?
A: lush-mount fixtures set into the slab during the pour perform best, because they stay out of the walking plane and cannot be knocked loose. The Tru-Scapes® Concrete 2.5″ Dot Light is designed specifically for this application.
Can I add LED lights to concrete that is already poured?
A: Yes, but the approach changes. Core drilling and saw-cut chases work for limited retrofits, while wall-mounted and cap-mounted fixtures are usually the more practical route on a finished slab.
Do LED lights survive freeze-thaw cycles in concrete?
A: Sealed, wet-rated fixtures made from corrosion-resistant materials handle freeze-thaw well. Failures almost always trace back to trapped water, poor drainage below in-ground housings, or unsealed splices rather than the LED itself.
Is low voltage LED outdoor lighting required for concrete installations?
A: It is not universally required, but it is strongly preferred. Low voltage systems reduce shock risk around damp, conductive concrete and simplify wire routing under hardscape.
How far apart should concrete dot lights be spaced?
A: Spacing depends on desired brightness and fixture output, but even, repeating intervals along an edge read better than clustered placement. Check our expert tips on light spacing for guidance, and mock up spacing at night before committing to blockout locations.
Do color changing LED lights look artificial in a residential setting?
A: Not when they are used well. Most homeowners run warm white as the default and reserve color for specific occasions, which keeps the everyday look natural.
What causes in-ground well lights to fail early?
A: Standing water is the leading cause. Providing a gravel drainage base below the fixture and keeping the housing sealed prevents the vast majority of premature failures.
Should I plan lighting before the concrete contractor starts?
A: Always. Sleeves, conduit, and fixture blockouts have to be placed before the pour, and coordinating that in advance is far easier than modifying a cured slab.
Glossary
- Low voltage: A lighting system operating at 12V through a transformer rather than standard 120V line voltage, commonly used in landscape and hardscape applications.
- Blockout: A temporary or permanent form placed in wet concrete to reserve space for a fixture, sleeve, or penetration.
- Freeze-thaw cycling: The repeated expansion and contraction of moisture inside concrete as temperatures cross freezing, a primary driver of surface and joint damage.
- Wet location rating: A fixture listing indicating it is built to operate in direct contact with water or in continuously damp environments.
Why Tru-Scapes Is the Answer
Concrete lighting is unforgiving because the installation is permanent. A fixture that fails in year three is not a simple swap, it is a repair to a finished surface. That is the specific problem Tru-Scapes engineers around.
Tru-Scapes builds for the conditions concrete actually creates: sustained internal moisture, alkaline exposure, freeze-thaw movement, and direct surface load. Fixtures are designed as complete hardscape systems rather than general-purpose outdoor lights adapted to a job they were never intended for. The Tru-Scapes® Concrete 2.5″ Dot Light—TSC-250c-BLK exists because setting a fixture into a poured slab requires a housing profile, lens strength, and sealing method that a stake light simply does not have.
Homeowners who choose Tru-Scapes also get a coherent system. Dot lights, cap lights, well lights, and accent fixtures run on the same low voltage architecture, so one transformer and one wiring plan can serve an entire property. That consistency matters when a patio, wall, walkway, and landscape all need to look intentional together.
The Tru-Scapes approach to concrete lighting is straightforward: build the fixture for the environment, make it last, and make the installation something a contractor can plan around with confidence.
Conclusion
The best LED lights for concrete are not simply the brightest ones. They are the fixtures engineered to survive moisture, movement, and traffic in a surface that cannot be reopened without cost and disruption. Low voltage architecture, sealed housings, corrosion-resistant materials, and correct pre-pour planning are what separate a lighting system that lasts from one that gets torn out.
Get the plan right before the concrete truck arrives, sleeve every run, and choose durable LED hardscape lights matched to each specific application.
Start with the Tru-Scapes® Concrete 2.5″ Dot Light—TSC-250c-BLK for flush slab lighting and build out from there with well lights, cap lights, and accent fixtures on the same low voltage system. Your concrete should look as good at night as it does at noon.